
Вытяжки Fulgor Milano FBHD 900 PT X - инструкция пользователя по применению, эксплуатации и установке на русском языке. Мы надеемся, она поможет вам решить возникшие у вас вопросы при эксплуатации техники.
Если остались вопросы, задайте их в комментариях после инструкции.
"Загружаем инструкцию", означает, что нужно подождать пока файл загрузится и можно будет его читать онлайн. Некоторые инструкции очень большие и время их появления зависит от вашей скорости интернета.


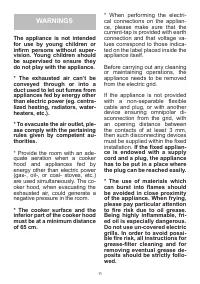


USES
The appliance is already arranged both for filte-
ring and for suction performances.
* In its filtering version the air and fumes conve-
yed by the appliance are depured both by a grea-
se filter and by an active coal filter.
In its exhausting version fumes are directly con-
veyed outside, through an evacuation duct con-
nected with the superior part of the wall or the
ceiling.
In this case, it is not necessary to use a charcoal
filter.
Before installing the appliance,
make sure that none of the parts
is damaged in any way. In case
of damaged parts, contact your
retailer and do not proceed with
installation.
Read all of the following instruc-
tions with care before installing
the appliance.
- Use an air outlet pipe of the
shortest possible length.
- Limit the number of pipe bends.
- Use a material approved by
standards and regulations.
- Avoid any sudden changes in
pipe section (recommended con-
stant diameter: 150 mm or equal
surface area).
For failure to comply with the
above-mentioned instructions,
the supplier will disclaim any
liability for problems concerning
flow rate or noise and will not
grant any warranty.
12
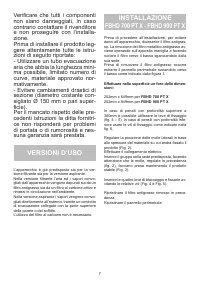
INSTALLATION
FBHD 700 PT X - FBHD 900 PT X
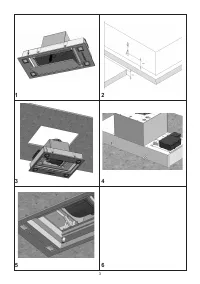
Before the installation, in order to avoid any da-
mage, remove the grease filter with the proper
handle, rotating the filter downwards and remo-
ving it.
Before removing the grease filter, remove the peri-
metrical panel turning it downwards as per Fig. 1.
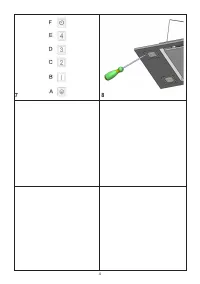
Make a hole taking care of the following di-
mensions:
252mm x 649mm for
FBHD 700 PT X
252mm x 849mm for
FBHD 900 PT X
Should the depth of the cabinet be more than
380mm, fixing levers (fig. 4-5) can be used.
In case of cabinets with lower depth, use the fi-
xing screws as shown in fig. 6.
Adjust the position of the lateral springs conside-
ring the thickness of the material you are fixing
the unit on (Fig.2).
Connect the appliance with the electric mains.
Insert the unit from below, making sure that the
springs, previously adjusted(Fig. 2), are strong
enough to keep the product fixed (fig. 3).
Insert the four blocking levers and fix them using
the screws, as showed in fig. 4 and fig. 5.
Mount the grease filter previously removed.
Reinstall the perimetral panel.
Характеристики

Остались вопросы?Не нашли свой ответ в руководстве или возникли другие проблемы? Задайте свой вопрос в форме ниже с подробным описанием вашей ситуации, чтобы другие люди и специалисты смогли дать на него ответ. Если вы знаете как решить проблему другого человека, пожалуйста, подскажите ему :)


