
Вытяжки Bertazzoni K100 HER CR A - инструкция пользователя по применению, эксплуатации и установке на русском языке. Мы надеемся, она поможет вам решить возникшие у вас вопросы при эксплуатации техники.
Если остались вопросы, задайте их в комментариях после инструкции.
"Загружаем инструкцию", означает, что нужно подождать пока файл загрузится и можно будет его читать онлайн. Некоторые инструкции очень большие и время их появления зависит от вашей скорости интернета.


4
3LIOC8LB
1. GENERAL
Carefully read the following important information
regarding installation safety and maintenance.
Keep this information booklet accessible for further
consultations.
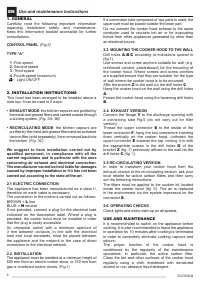
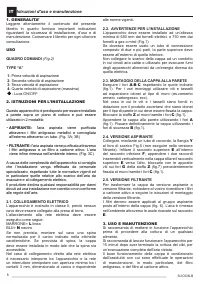
CONTROL PANEL
(Fig.2)
TYPE “A”
1
-First speed
2
-Second speed
3
-Third speed
4
-Fourth speed (maximum)
- Light ON/OFF
2. INSTALLATION INSTRUCTIONS
This hood has been arranged to be installed above a
cook top. It can be used in 2 ways:
•
EXHAUST MODE
: the kitchen vapours are purified by
the metal anti-grease filters and carried outside through
a ducting system.
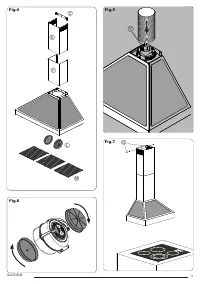
(Fig. 3A; 3B)
•
RECIRCULATING MODE
: the kitchen vapours are
purified by the metal anti-grease filters and an activated
carbon filter (sold separately), then conveyed back into
the kitchen.
(Fig. 3C)
We suggest to have installation carried out by
qualified personnel, in compliance with all the
current regulations and in particular with the ones
concerning air exhaust and electrical connection.
The manufacturer cannot be held liable for damages
caused by improper installation or if it has not been
carried out according to the state-of-the-art.
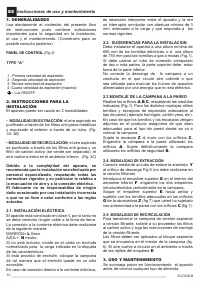
2.1 ELECTRIC CONNECTION
The appliance has been manufactured as a class II,
therefore no earth cable is necessary.
The connection to the mains is carried out as follows:
BROWN =
L
line
BLUE =
N
neutral
If not provided, connect a plug for the electrical load
indicated on the description label. Where a plug is
provided, the cooker hood must be installed in order
that the plug is easily accessible.
An omnipolar switch with a minimum aperture of
3 mm between contacts, in line with the electrical
load and local standards, must be placed between
the appliance and the network in the case of direct
connection to the electrical network.
2.2. INSTALLATION
The appliance must be installed at a minimum height of
650 mm from an electric cooker stove, or 750 mm from
gas or combined cooker stoves. (Fig.1)
If a connection tube composed of two parts is used, the
upper part must be placed outside the lower part.
Do not connect the cooker hood exhaust to the same
conductor used to circulate hot air or for evacuating
fumes from other appliances generated by other than
an electrical source.
2.3. MOUNTING THE COOKER HOOD TO THE WALL
Drill holes
A
-
B
-
C
according to indications quoted in
(fig.1).
Use screws and screw anchors suitable for wall (e.g.
reinforced cement, plasterboard) for the mounting of
the cooker hood. Where screws and screw anchors
are supplied ensure that they are suitable for the type
of wall where the cooker hood is to be mounted.
Affix the bracket
Z
to the wall via the drill holes
C
Hang the cooker hood on the wall using the drill holes
A
.
Fasten the cooker hood using the fastening drill holes
B
.
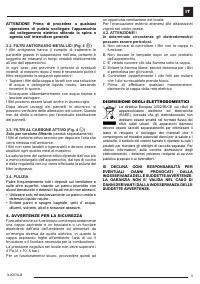
2.4. EXHAUST VERSION
Connect the flange
Y
to the discharge opening with
a connecting tube Fig.5 (do not carry out for filter
version) .
Thread the upper connector
E
to the inside of the
lower connector
F
; hang the two connectors inserting
them vertically on the cooker hood, unthread the
upper connector
E
towards the top, locking it in with
the appropriate screws in the drill holes
G
of the
bracket
Z
(fig. 7) previously affixed to the wall via the
drill holes
C
(fig. 1).
2.5 RE-CIRCULATING VERSION
In order to transform your cooker hood from the
exhaust version to the re-circulating version, ask your
local retailer for active carbon filters and then carry
out the following instructions.
The filters must be applied to the suction kit located
inside the cooker hood (fig. 6). The air is replaced
in the environment via the eyelets impressed on the
connector
E
.
2.6. OPERATING CHECKS
Check lights and motor start-up on all speeds.
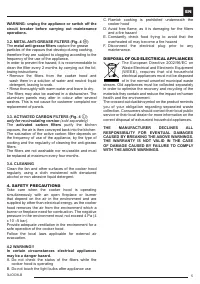
USE AND MAINTENANCE
It is recommended to switch on the appliance before
cooking. It is also recommended to leave the appliance
in operation for 10 minutes after cooking is terminated
in order to completely eliminate cooking vapours and
odours.
The proper function of the cooker hood is
conditioned by the regularity of the maintenance
operations, in particular, the active carbon filter.
Clean the fan and other surfaces of the cooker hood
regularly using a cloth moistened with denatured
alcohol or non abrasive liquid detergent.
EN
Use and maintenance instructions
Характеристики

Остались вопросы?Не нашли свой ответ в руководстве или возникли другие проблемы? Задайте свой вопрос в форме ниже с подробным описанием вашей ситуации, чтобы другие люди и специалисты смогли дать на него ответ. Если вы знаете как решить проблему другого человека, пожалуйста, подскажите ему :)


