
Водонагреватели Timberk SWH FSM3 80 V - инструкция пользователя по применению, эксплуатации и установке на русском языке. Мы надеемся, она поможет вам решить возникшие у вас вопросы при эксплуатации техники.
Если остались вопросы, задайте их в комментариях после инструкции.
"Загружаем инструкцию", означает, что нужно подождать пока файл загрузится и можно будет его читать онлайн. Некоторые инструкции очень большие и время их появления зависит от вашей скорости интернета.
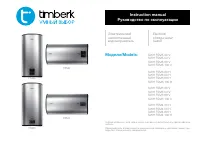


www.timberk.com • electrical storage water heater
www.timberk.com • electrical storage water heater
13
12
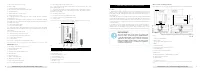
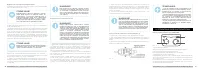
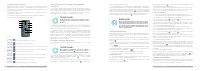
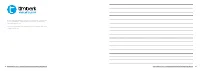
Control panel (for FSM5/FSM6 series)
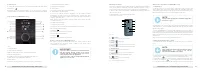
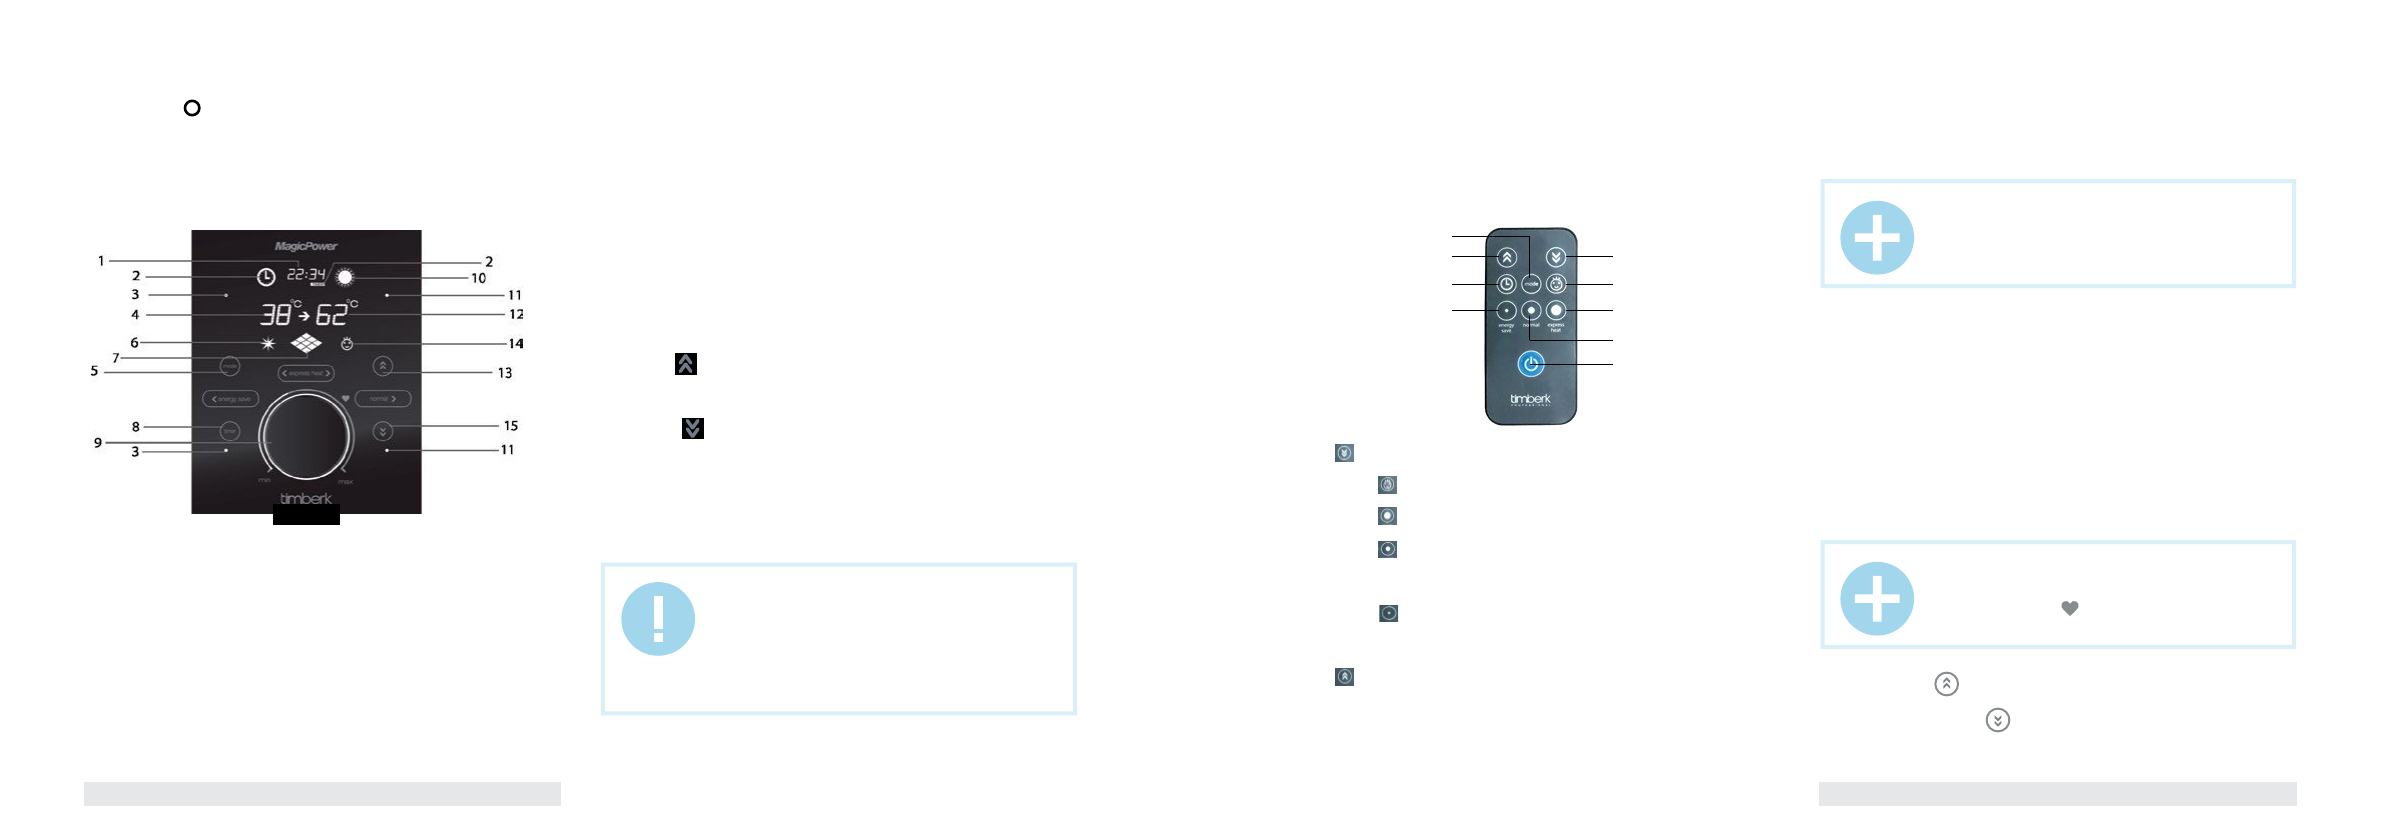
Remote controller (for FSM5/FSM6 series)
The remote controller should be directed to the signal receiver, located
on the water heater. The water heater confirms receipt of the control
command by a sound signal.
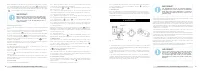
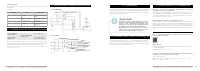
Mounting of batteries
The remote controller is power supplied from two AA batteries (not included
in the set of delivery), installed in a special compartment whose cover is
located on the back panel of the remote controller. To mount batteries:
1. Remove the cover of the battery compartment by sliding it along the
direction of the arrow.
2. Mount batteries, observing specified polarity.
3. Place the cover back.
Water heater operation (for FSM5/FSM6 series)
1. Switching on
1.1 At first, open one of the hot water outlet valves, then open the cold
water supply valve. The electric water heater will start filling with water.
When water flows from the hot tap freely, it means the water heater is fully
filled with water and you can close the hot water outlet valve.
1.2 Plug the power cord into the outlet, at that an indicator light on GFCI
and temperature controller handle lighting will light up and time will be
shown on the display.
1.3 Press the temperature controller handle and hold it for a few seconds, or
press “ON/OFF” button on the remote controller, at that water temperature
in the water heater and set water temperature will be shown on the display.
When ON/OFF button is pressed for the first time, the heating element is
switched on.
The system is set for 70°C and 2 kW heating power.
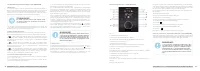
2. Water heating temperature setting
2.1. Temperature can be set within the range 35°С-75°С, in increments
of 1°С.
1. « » button
It is used to decrease the selected value.
2. Button « »
It is used to lock control panel.
3. Button « »
It is used to choose «express heat» (2000 W) function.
4. Button « »
It is used to choose «normal heat» (1200 W) function.
5. ON/OFF button
It is used to switch on/off the appliance.
6. Button « »
It is used to choose «energy save» (800 W) function.
7. TIMER button
It is used to activate timer and night heating.
8. « » button
It is used to increase the selected value.
9. MODE button
It is used to set time and timer.
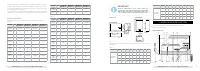
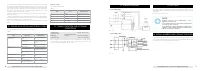
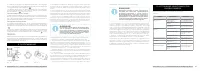
1. Time indication
2. Timer activation indicator
It lights up when water heater on/off timer is activated.
3. Energy save indicators
They light up when selecting low heating power (800 W).
4. Water heater water temperature indicator
5. Mode button
It is used to set time and timer, as well as lock the control panel.
IMPORTANT!
1. Prevent contact of the remote controller with water
and other liquids. Prevent contact of the remote
controller with direct sunlight and do not leave it
nearby heaters and electric appliances.
2. Prevent contact of direct sunlight with the infrared
signal receiver on the unit
Fig. 11
Fig. 12
6. Night heating activation indicator
7. Heating power indicator
8. Timer button
It is used to activate timer and night heating.
9. Temperature controller handle
It is used to switch on/off the appliance, set the desired heating
temperature, as well as select low heating power “energy save” (800
W), medium heating power “normal heat” (1200 W), high heating power
“express heat” (2000 W).
When pressed, the temperature controller handle also performs the ON/
OFF button function.
10. Water heating indicator
11. Normal heat indicators
They light up when selecting medium heating power (1200 W).
12. Set temperature indicator
13. button
It is used to increase the selected value.
14. Control panel lock indicator
15. Button
It is used to decrease the selected value.
NOTE:
During normal operation the cold water supply valve
must be set “open”.
NOTE:
When setting temperature, having reached the optimal
heating position “
” (+58°С (+/- 2°С), you will
hear a sound signal (for some models).
2.2. Turn the temperature controller handle clockwise (from “min” to “max”)
or press button “ ” to increase the water heating temperature.
2.3. Turn the temperature controller handle counterclockwise (from “max”
to “min”) or press button “ ” to decrease the water heating temperature.
2.4. The water heater automatically maintains water temperature. When
1
2
3
4
5
6
7
8
9
4. Switching off
To switch off water heater please set thermostat handle and temperature
setting knob « ».
At this time only control panel blue light is on. In case you are not going to
use water heater for long period – please disconnect it from power supply.
Содержание
- 2 бора без специального уведомления.
- 11 Уважаемый покупатель!; СОДЕРЖАНИЕ
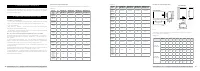
- 12 РАБОЧИЕ ХАРАКТЕРИСТИКИ; Основные особенности; НАЗНАЧЕНИЕ ПРИБОРА; Технические характеристики; Таблица 1; Таблица 2; Размерные характеристики; Таблица 3
- 13 ОПИСАНИЕ ВОДОНАГРЕВАТЕЛЯ; Местоположение
- 14 Монтаж водонагревателя
- 15 УПРАВЛЕНИЕ ВОДОНАГРЕВАТЕЛЕМ; Панель управления для серии FSM3/FSM4
- 16 Выбор режима мощности; Во время нагревания может начать капать вода из; Эксплуатация водонагревателя для серии FSM3/FSM4
- 17 Установка элементов питания; Используется для уменьшения выбранного значения.; Функция ночного нагрева
- 18 Блокировка панели управления; Ес; выключатель остынет до и исходной температуры.; УСТРАНЕНИЕ НЕИСПРАВНОСТЕЙ
- 19 ЭЛЕКТРИЧЕСКАЯ ПРИНЦИПИАЛЬНАЯ С; КОДЫ ОШИБОК; СЕРИЙНЫЙ НОМЕР И ДАТА ПРОИЗВОДСТВА; Гарантийный талон вложен в упаковку изделия; ООО «Авангард Холго»; ИНФОРМАЦИЯ О СЕРТИФИКАЦИИ


