
Водонагреватели Ariston PRO1 R 80 V 1,5K PL - инструкция пользователя по применению, эксплуатации и установке на русском языке. Мы надеемся, она поможет вам решить возникшие у вас вопросы при эксплуатации техники.
Если остались вопросы, задайте их в комментариях после инструкции.
"Загружаем инструкцию", означает, что нужно подождать пока файл загрузится и можно будет его читать онлайн. Некоторые инструкции очень большие и время их появления зависит от вашей скорости интернета.
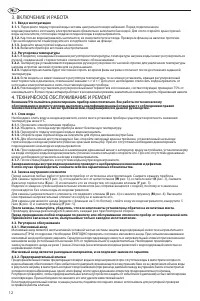


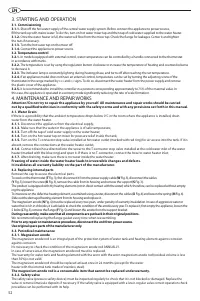


3. STARTING AND OPERATION
3.1. Commissioning
3.1.1.
Shut off the hot water supply of the central water supply system. Before connect the appliance to power source,
fill the tank up with mains water. To do this, turn on hot water mixer tap
and then tap of cold water supplied to the water heater.
3.1.2.
Once the water heater is full, the water will flow from the mixer tap. Check the flange for leakages. Center it and tighten
the nuts if necessary.
3.1.3.
Turn the hot water tap on the mixer off.
3.1.4.
Connect the appliance to power source.
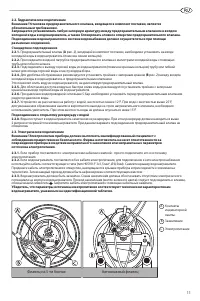
3.2. Temperature control
3.2.1.
In models equipped with external control, water temperature can be controlled by a handle connected to the thermostat
in accordance with marks.
3.2.2.
The temperature is set by using the regulation button clockwise to increase the temperature of heating and counterclockwise
to decrease it.
3.2.3.
The indicator lamp is constantly lighting during heating phase, and turns off after reaching the set temperature.
3.2.4.
If an appliance model does not have an external control, temperature can be set by turning the adjusting screw of the
thermostat in the range marked by «+» and «-» signs. To do so, disconnect the water heater from the power supply and remove
the plastic cover of the appliance.
3.2.5.
It is recommended to install the controller in a position corresponding approximately to 75% of the maximal value. In
this case, the appliance is operated in economy mode significantly reducing the rate of scale formation.
4. MAINTENANCE AND REPAIR WORKS
Attention! Do not try to repair the appliance by yourself. All maintenance and repair works should be carried
out by a qualified technician in conformity with the safety norms and with any provisions set forth in this manual.
4.1. Water Drain
If there is a possibility that the ambient temperature drops below 0°C in the room where the appliance is installed, drain
water from the water heater.
4.1.1.
Disconnect the appliance from the electrical supply;
4.1.2.
Make sure that the water in the appliance is of safe temperature;
4.1.3.
Turn off the tap of cold water supply to the water heater;
4.1.4.
Turn on the hot water tap on mixer for pressure relief inside the tank;
4.1.5.
Turn on the T-connector stop valve installed at hot water outlet (marked with red ring) for air access into the tank. If it is
absent, remove the connections at the water heater outlet;
4.1.6.
Connect drain hose directed into the sewer to the T-connector stop valve installed at the cold water inlet of the water
heater (marked with the blue ring) and open it. If there is no T-connector, connect the hose to water heater inlet;
4.1.7.
After draining, make sure there is no water inside the water heater.
Freezing of water inside the water heater leads to irreversible changes and defects.
It invalidates all warranty liability on the part of the manufacturer.
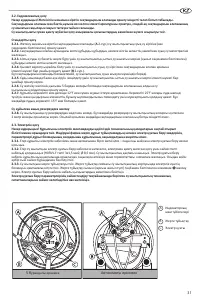
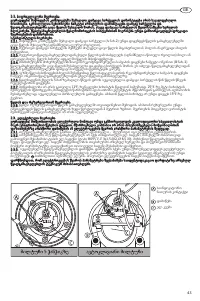
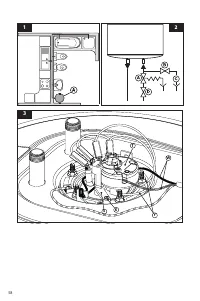
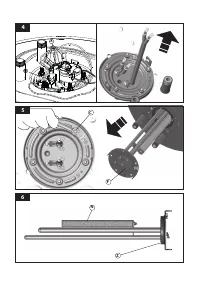
4.2. Replacing internal parts
Remove the cap to access the electrical parts.
To work on the thermostat (
T
Fig. 3), first disconnect it from the power supply cable (
W
Fig. 3), disconnect the cables
(
Y
Fig. 3), loosen the screw (
K
Fig. 3), remove the cable from its housing and remove the support (
S
Fig. 3).
The product is equipped with dry heating elements (not in direct contact with the water) which, therefore, can be replaced without empty-
ing the appliance.
To intervene on the defective heating element, ascertained using a tester, disconnect the cables (
X
Fig. 4) and loosen the spring (
M
Fig. 4).
Slide out the damaged heating element from its housing and replace it.
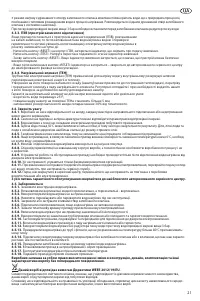
The magnesium anode (
N
Fig. 6) must be replaced every two years, under penalty of warranty invalidation. In case of aggressive water or
water that is rich in chlorides, it is advisable to check the condition of the anode every year. To replace it, first empty the appliance, loosen the
5 bolts (
C
Fig. 5), remove the flange (
F
Fig. 5) and loosen the anode from the support bracket.
During reassembly, make sure that all components are put back in their original positions.
We recommend replacing the flange gasket every time when reassembling.
Prior to any repair or maintenance procedure, disconnect the unit from power source.
Use original spare parts of the manufacturer only.
4.3. Periodical maintenance
4.3.1. Magnesium anode
The magnesium anode rod is an integral part of the protection system of water tank and heating element against corrosion
against corrosion.
It’s necessary to check the condition of the magnesium anode rod ANNUALLY.
In case of severe wear, the magnesium anode rod must be replaced.
The warranty for water tank and heating element with the worn with the worn magnesium anode rod (residual volume is less
than 30%) is not valid.
The magnesium anode rod should be replaced at least once in 24 months (except for the water
heater with the internal tank made of stainless steel).
The magnesium anode rod is a consumable item that cannot be replaced underwarranty.
4.3.2. Safety valve
The safety valve (pressure safety device) must be inspected regularly to check that it is not blocked or damaged. Replace the
valve or remove limescale deposits if necessary. If the safety valve is equipped with a lever, regular valve correct operation check
procedure can be performed with its help.
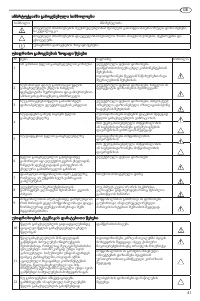
Before cleaning, isolate the appliance from the mains by
unplugging it or turning the switch off
10
11
12
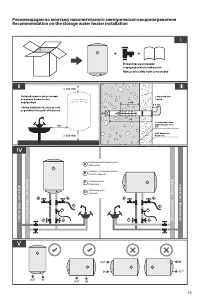
Install the appliance on a solid wall that is not subjected to
any vibrations
Make electrical connections using cables with conductors
of suitable section
Make sure all control and protection functions operate correctly
before start the appliance
Electric shock
Excessive noise
Incorrect conductor section results in cables overheating.
It may cause fire.
Shutdown or damage of the appliance due to out-of-service
or unregulated control system operation
Before water heater handling, drain hot water
Descale the components in accordance with the instructions
provided in the applicable document. Air the room.
Work is performed in protective clothing, avoiding mixing
different products. The water heater and surrounding
objects shall be protected against ingress of cleansers
Do not use any insecticides, solvents or aggressive detergents
to clean the appliance
Burns
Injury due to contact of the skin or eyes with acidic substances,
inhalation or swallowing of harmful chemical agents.
Damage to the appliance or surrounding objects due to corrosion
caused by acidic substances
Damage to the plastic and painted parts
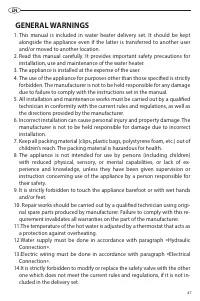
GENERAL SAFETY NORMS
Damage to the appliance or any objects underneath it due to the
object falling off following vibrations
Injury from an object falling off the appliance due to its vibrations
Electric shock in case of cable, plug, or socket damage
Electric shock. Burns due to the contact with overheated
components. Injuries due to the contact with sharp edges or
protrusions
Injury from the falling appliance
Damage to the appliance or any objects underneath it due to the
appliance falling off from its place of installation
Do not climb onto the appliance
Do not leave anything on top of the appliance
Do not use the water heater with a damaged power supply cable
Do not start or stop the water heater by plugging it into or out of
the wall outlet. Use the power switch for this purpose
Do not open the water heater body
Electric shock from live unsheathed wires under voltage
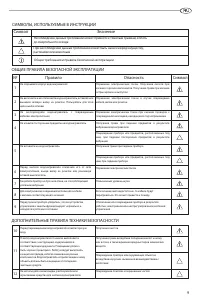
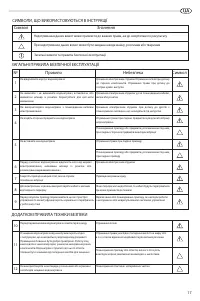
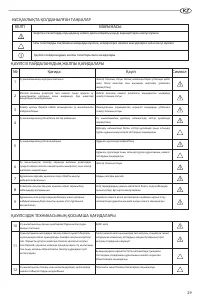
Ref. Warning Risk Symbol
1
2
3
4
5
6
7
8
9
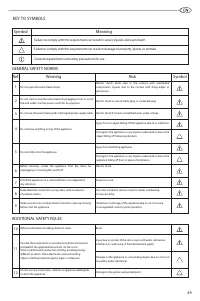
Failure to comply with this requirement can result in severe injuries and even death
Failure to comply with this requirement can result in damage to property, plants, or animals
General requirements and safety precautions for use
Symbol Meaning
KEY TO SYMBOLS
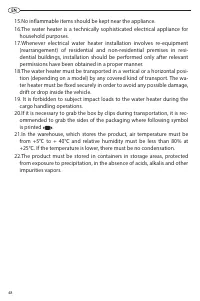
ADDITIONAL SAFETY RULES
52
Содержание
- 2 Орнату, пайдалану және қызмет көрсету жөніндегі нұсқаулық бет; დამონტაჟების, ექსპლუატაციისა და მომსახურების ინსტრუქცია გვ
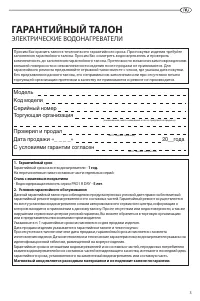
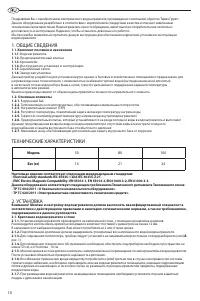
- 3 ЭЛЕКТРИЧЕСКИЕ ВОДОНАГРЕВАТЕЛИ; Сталь с эмалевым покрытием; - Водосодержащая емкость серии PRO1 R DRY -; или в представительство компании-производителя.; ЭЛЕКТРИЧЕСКИЕ ВОДОНАГРЕВАТЕЛИ; Модель; Сталь с эмалевым покрытием; ГАРАНТИЙНЫЙ ТАЛОН
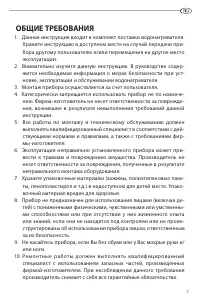
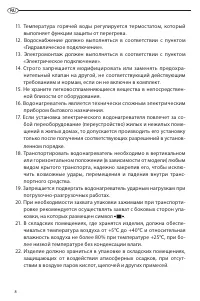
- 7 ОБЩИЕ ТРЕБОВАНИЯ
- 9 Символ Значение
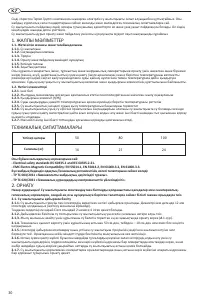
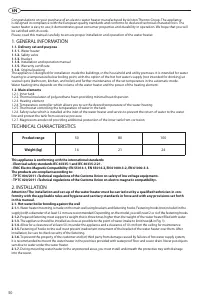
- 10 ТЕХНИЧЕСКИЕ ХАРАКТЕРИСТИКИ
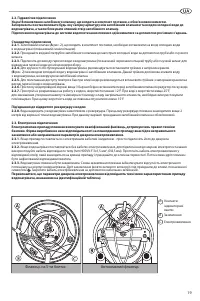
- 11 Фланец на 5-ти болтах
- 39 საერთო მოთხოვნები
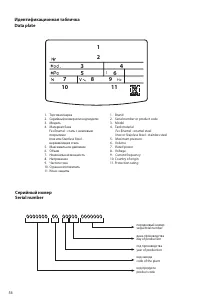
- 54 Идентификационная табличка
- 55 Recommendation on the storage water heater installation
- 56 Устройство водонагревателя
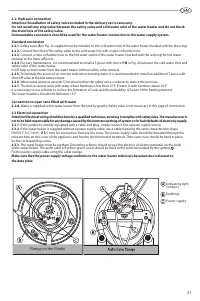
- 57 Схема установки
Характеристики

Остались вопросы?Не нашли свой ответ в руководстве или возникли другие проблемы? Задайте свой вопрос в форме ниже с подробным описанием вашей ситуации, чтобы другие люди и специалисты смогли дать на него ответ. Если вы знаете как решить проблему другого человека, пожалуйста, подскажите ему :)


