
Водонагреватели Ariston Primo 50 h - инструкция пользователя по применению, эксплуатации и установке на русском языке. Мы надеемся, она поможет вам решить возникшие у вас вопросы при эксплуатации техники.
Если остались вопросы, задайте их в комментариях после инструкции.
"Загружаем инструкцию", означает, что нужно подождать пока файл загрузится и можно будет его читать онлайн. Некоторые инструкции очень большие и время их появления зависит от вашей скорости интернета.
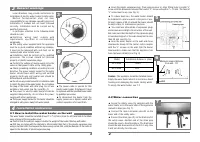
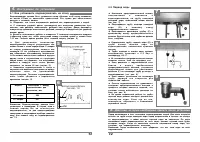
4.2 Water connection
=
Screw the safety valve (A) supplied with the
water heater on to the water inlet of the appliance
marked in blue (see Fig. 7).
=
Connect the main cold water pipe (B) on the
lower end of the safety valve.
=
Connect the drain pipe (C) on the drain end of
the safety valve. Another end of the drain pipe
should be open to the atmosphere. The drain pipe
should be kept downwards on the tilt, in any case
it will not directly face the user.
3
General warnings
Local directives may provide restrictions for
installation of electric water heater in bathrooms.
M e r l o n i Te r m o S a n i t a r i s h a l l n o t b e a r
responsibility for any damage caused by incor rect
i n s t a l l a t i o n i f m a n u a l h a s n o t b e e n f o l l o w e d
c o r r e c t l y. I n s t a l l a t i o n m u s t b e c a r r i e d o u t b y
qualified personnel.
In par ticular, attention to the following items
should be paid :
=
E l e c t r i c a l w i r i n g m u s t c o m p l y w i t h
r e q u i r e m e n t s s p e c i f i e d i n c o r r e s p o n d i n g
paragraphs.
=
The safety valve supplied with the appliance
must be in good condition without any damage,
it must not be tampered with and must not be
replaced with other similar ones.
=
Installation must be car ried out by qualified
p e r s o n n e l . T h e s c r e w s s h o u l d b e f a s t e n e d
properly in plastic expansive plugs.
=
Confir m the voltage of mains supply to be the
same as that given in data on the rating plate.
=
Check grounding condition according to local
directive. The power supply socket for the water
h e a t e r s h o u l d h a v e e a r t h w i r i n g a n d e a r t h e d
properly. Ear th wire and neutral wire should be
differentiated and identifiable.
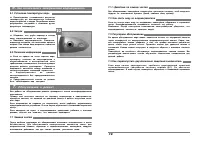
=
Do not use any socket conver ter or extension cable
to match the plug of the water heater. Do not replace
the plug of the heater with other plug. Do not use
por table or reel socket (see Fig. 3 and Fig. 4)
=
The power for electric water heater should be
supplied independently, do not share the power
supply with other appliances.
=
The power supply socket for the heater should be
arranged in a dry place, away from water splash.
=
The power cable is special for this
electric water heater. If damaged, it must
be replaced with the specified power cable
by qualified personnel.
=
To disconnect the heater from the
supply, please use a bipolar switch with
contact separation of at least 3mm.
3
4
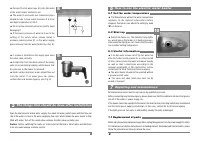
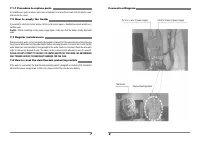
4.1 How to install the water heater on the wall
The water heater should be installed at least 1½ f" (475mm) from the left hand side to facilitate
easy removal of the inspection cover.
=
Confirm that the wall can suppor t double the weight of the heater filled up with water.
=
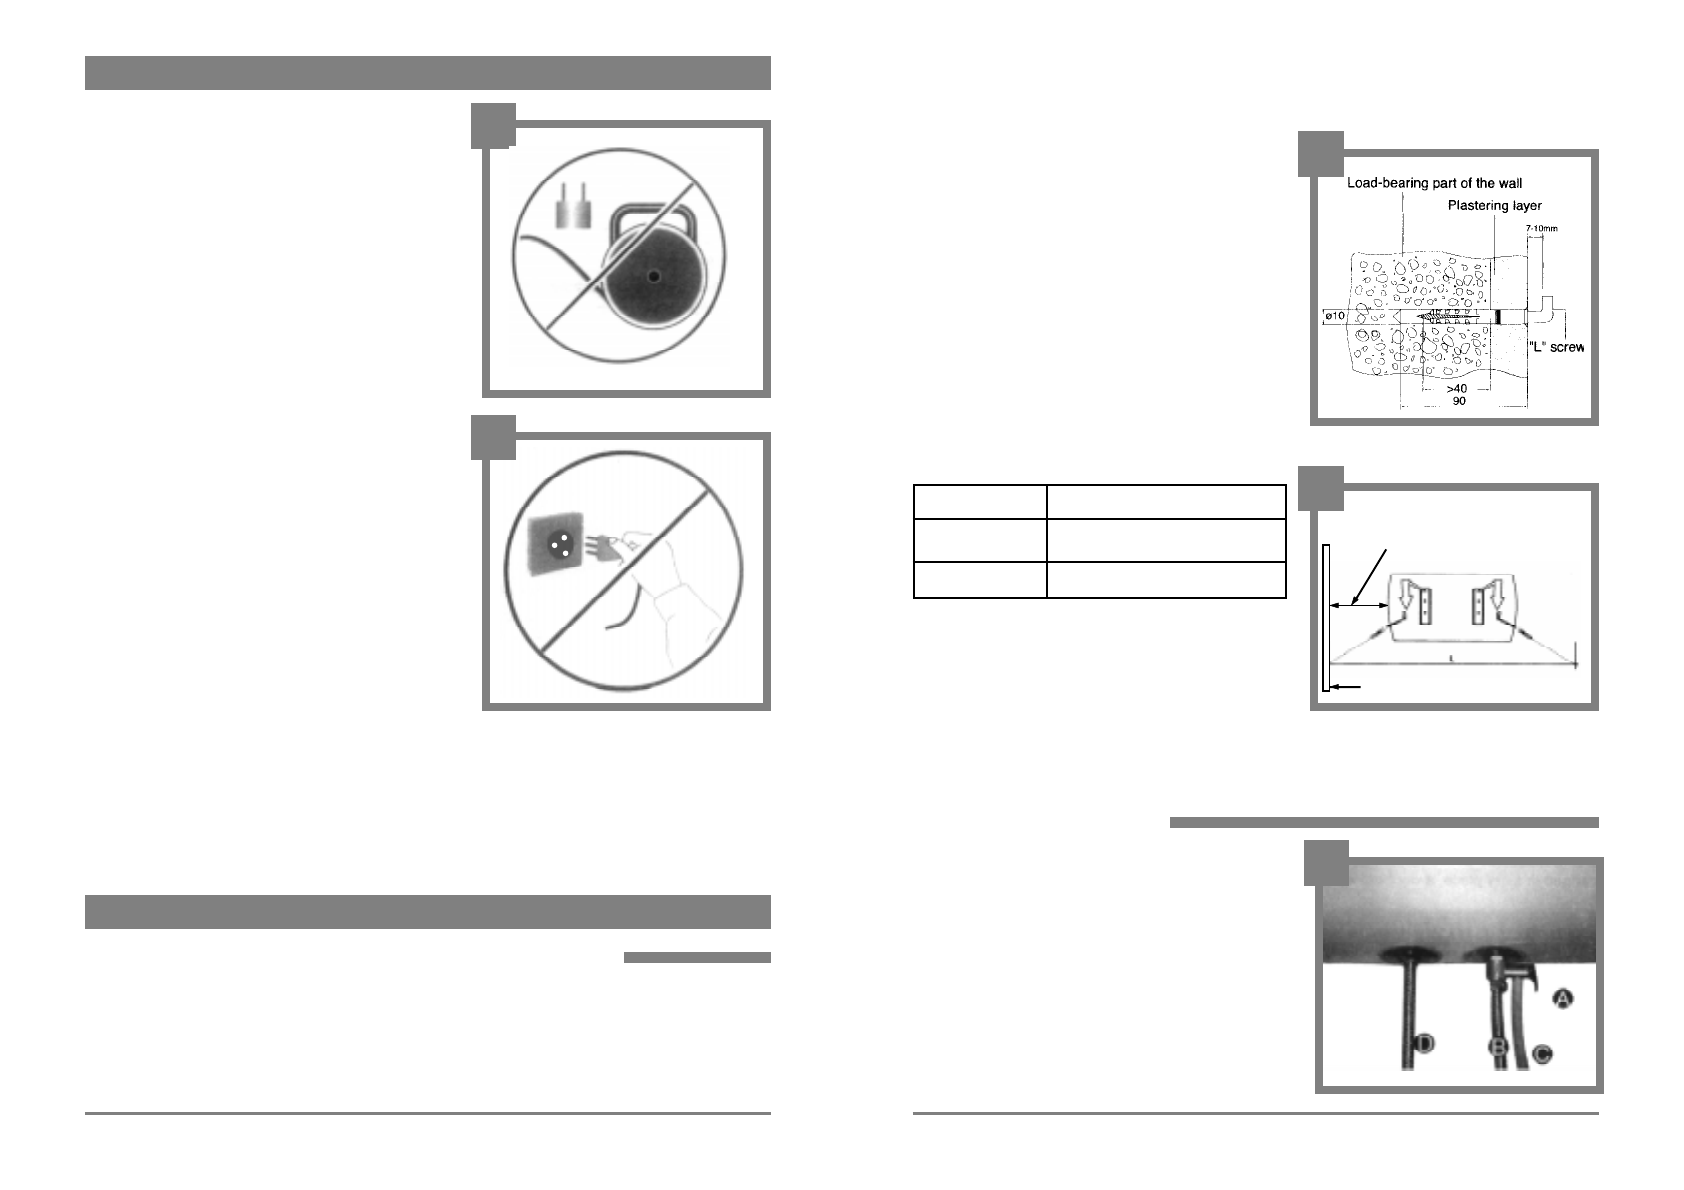
Drill two pre-holes with the diameter a little smaller than that of the plastic expansive plug
using a hammer drill. Then expand the holes using normal drill, until the diameter of the holes is
equal to the diameter of plastic expansive plug.
4
Installation instruction
=
To reduce heat loss, the water heater should
be installed in a place nearest to the point of use.
At least a space of 50 cm around the heater should
be kept empty for maintenance purpose.
=
You could use other kinds of expansive plugs
and screws according to the str ucture of the wall.
But make sure that the depth of the expansive plug
in load-bearing par t of the wall should not be less
than 40 mm (see Fig. 5).
=
L e a n t h e w a t e r h e a t e r o n t h e w a l l a n d m o v e
d o w n w a r d s s l o w l y t i l l t h e h e a t e r c a t c h c o u p l e s
w i t h t h e " L " s c r e w s o n t h e w a l l . P u l l t h e h e a t e r
d o w n w a r d s t o m a k e s u r e t h a t t h e a p p l i a n c e h a s
b e e n f a s t e n e d r e l i a b l y ( s e e F i g . 6 ) .
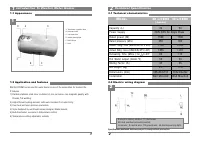
Model
Installation distance L (mm)
35 LITERS
366.5
50 LITERS
505
Caution :
The appliance should be installed indoor.
Empty the water heater when it is not in use. Avoid
freezing and damaging the heater during winter.
To empty the water heater, see 7.2
5
6
7
3
4
=
Inser t the plastic expansive plug. Then using spanner or other fitting tools to install "L"
screw until the dimension between the head of "L" screw and wall is 7~ 10 mm. The head of
"L" screw must be up. (see Fig 5).
Minimum required distance
from wall - 1'6"
1
1
1
1
1
1
1
1
1
1
1
1
1
1
1
Wall


