
Винные шкафы Pando PVMAVP 88-49CRR - инструкция пользователя по применению, эксплуатации и установке на русском языке. Мы надеемся, она поможет вам решить возникшие у вас вопросы при эксплуатации техники.
Если остались вопросы, задайте их в комментариях после инструкции.
"Загружаем инструкцию", означает, что нужно подождать пока файл загрузится и можно будет его читать онлайн. Некоторые инструкции очень большие и время их появления зависит от вашей скорости интернета.


INOXPAN S.L.
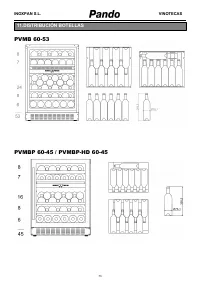
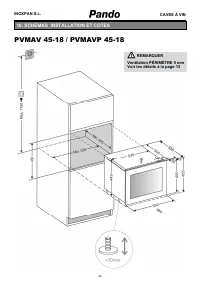
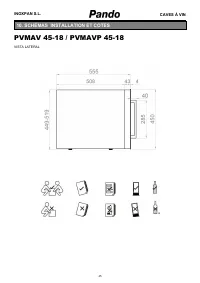
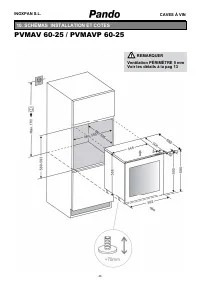
WINE CABINETS
14
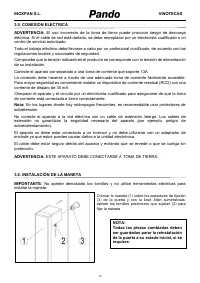
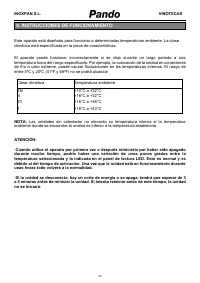
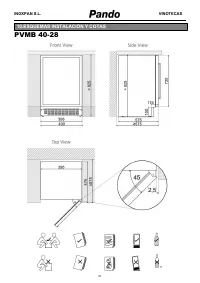
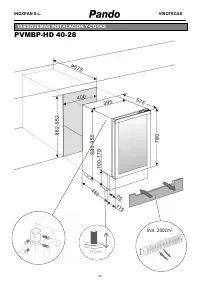
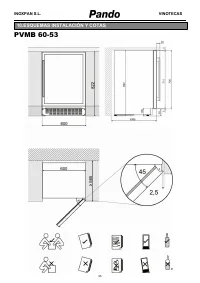
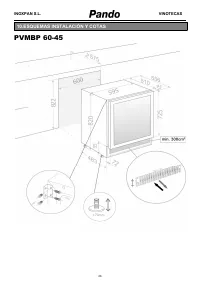
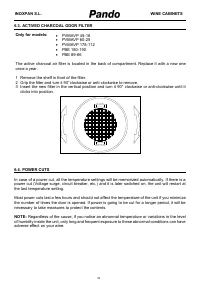
3.5. ELECTRICAL CONNECTION
WARNING: Incorrect grounding of the unit may pose an electrical shock hazard. If the mains cable
is damaged, it must be replaced by a qualified electrician or an authorized service center.
All electrical work must be carried out by qualified professionals, in compliance with national and
local safety regulations.
Check that the voltage indicated on the unit corresponds to the voltage supplied by the mains.
Connect the unit separately to a mains socket with 13A capacity
Connection must be made to an adequate power socket that is easily accessible. For greater
safety, it is recommendable to install a residual current device (RCD) with a triggering current of
30 mA.
Have a qualified electrician check the device and the circuit to ensure that the power socket is
correctly connected to earth.
Note: In locations where lightning is frequent, it is recommended to use voltage surge protectors.
Do not connect the unit to the mains through an extension lead. Extension leads do not offer the
necessary safety for the appliance (e.g. danger of overheating).
The unit should not be connected to an inverter and should not be used with a multiple connection
socket adaptor, as this could damage the electronic unit.
The cable should be securely behind the appliance avoiding it getting entangled or hanging in an
unprotected manner.
WARNING: THIS APPLIANCE MUST BE GROUNDED.
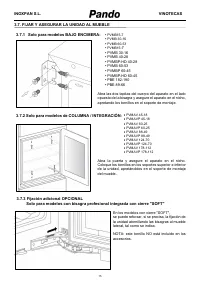
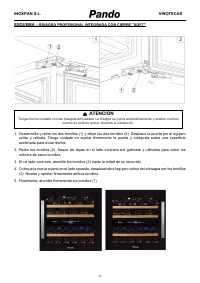
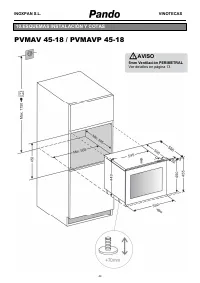
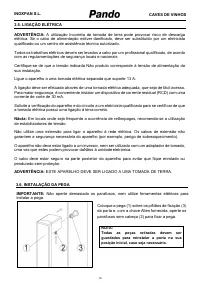
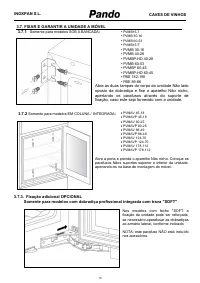
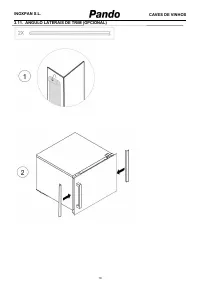
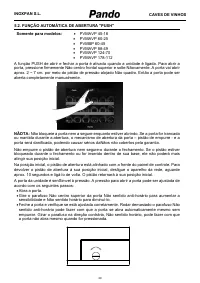
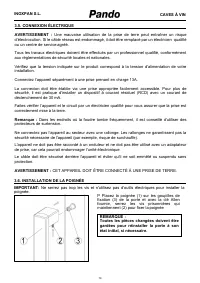
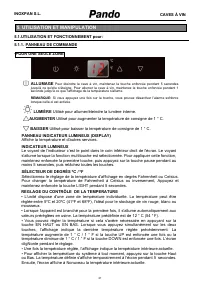
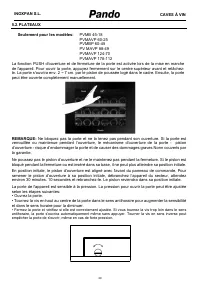
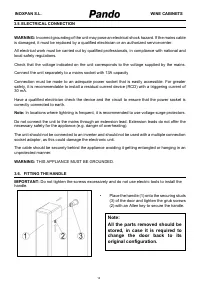
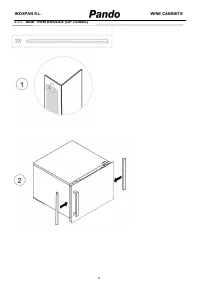
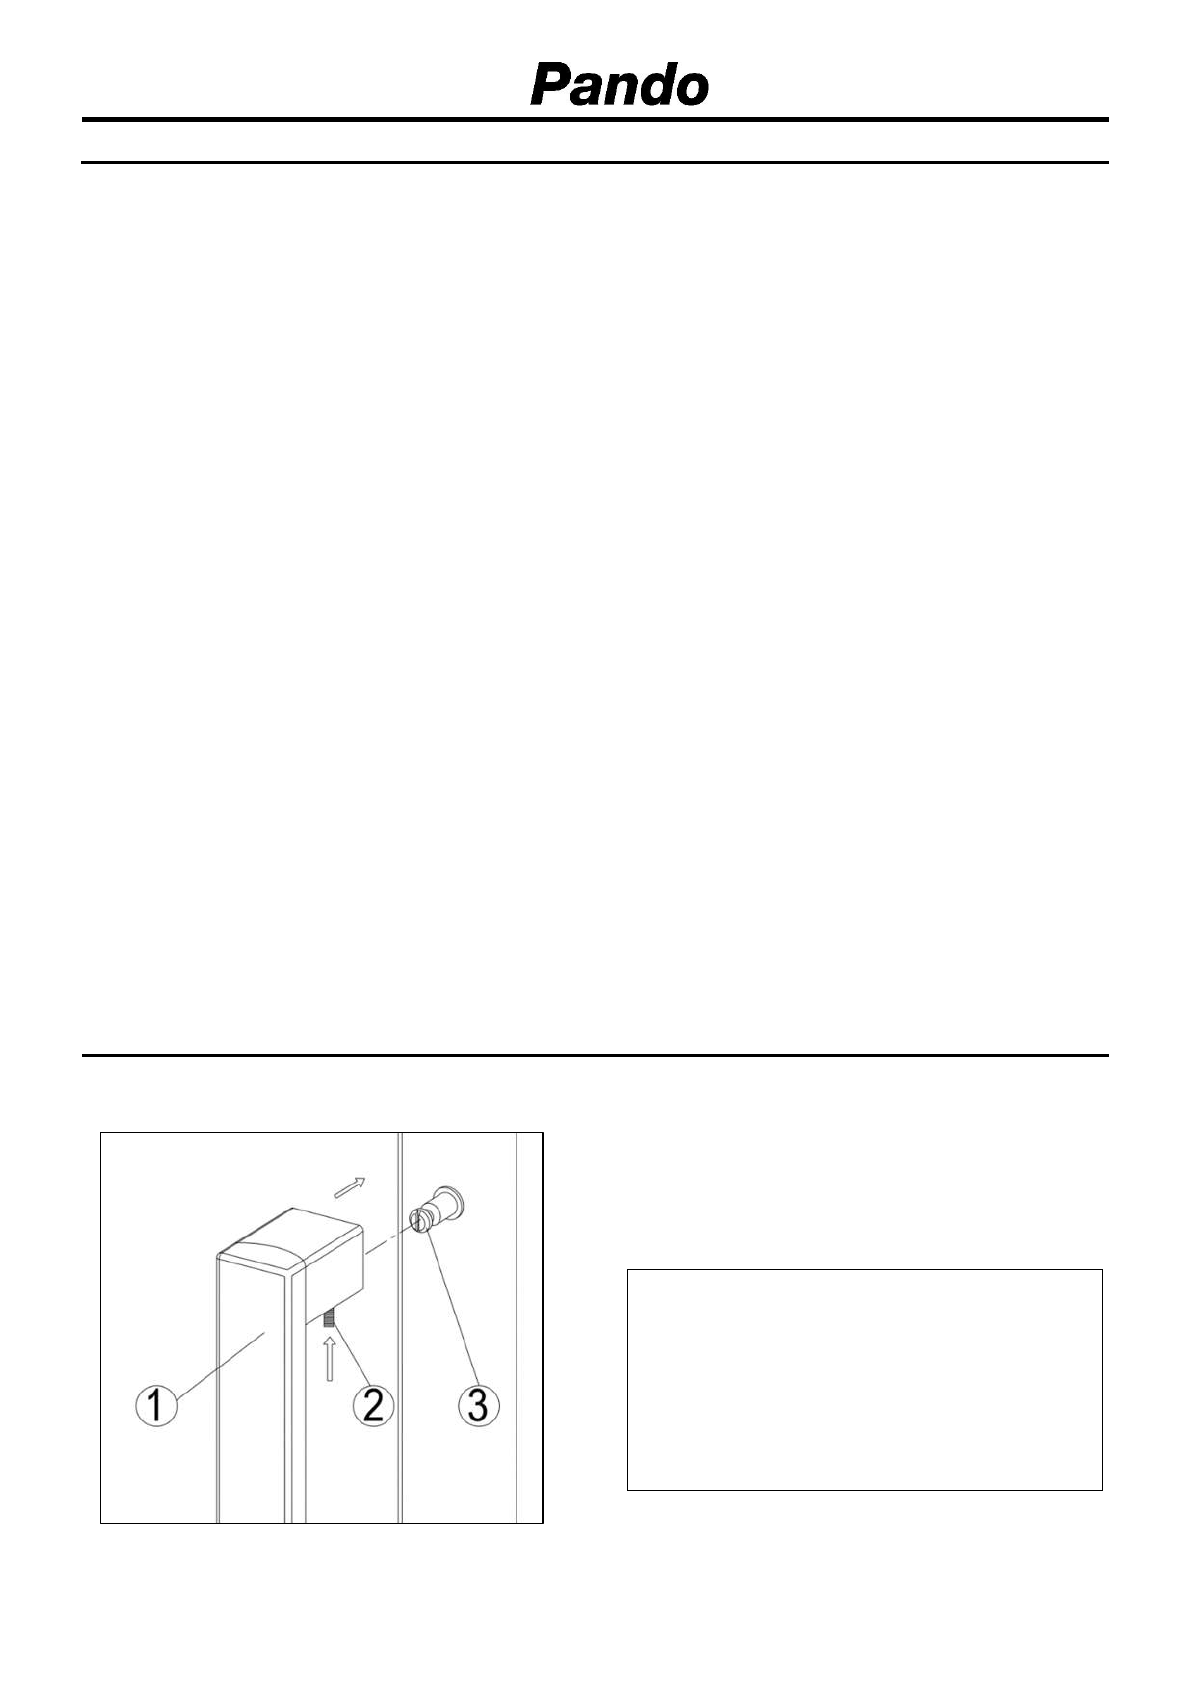
3.6. FITTING THE HANDLE
IMPORTANT: Do not tighten the screws excessively and do not use electric tools to install the
handle.
•
Place the handle (1) onto the securing studs
(3) of the door and tighten the grub screws
(2) with an Allen key to secure the handle.
Note:
All the parts removed should be
stored, in case it is required to
change the door back to its
original configuration.
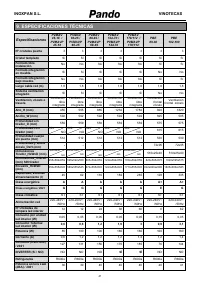
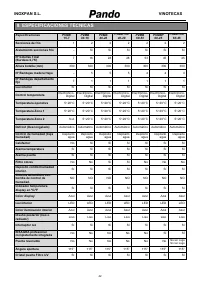
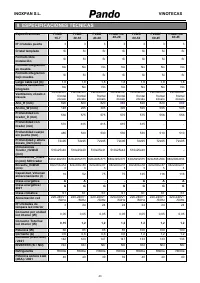
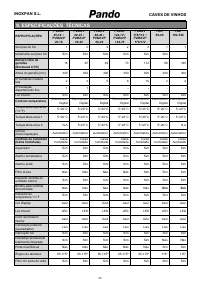
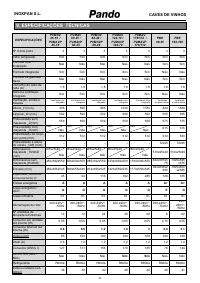
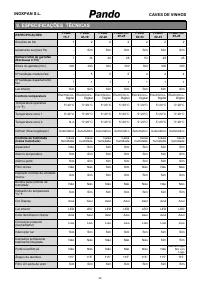
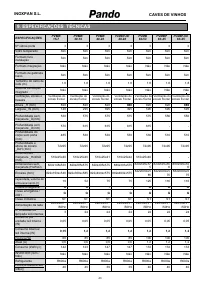
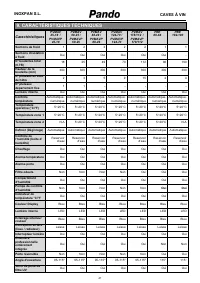
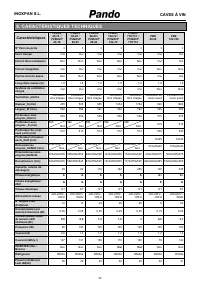
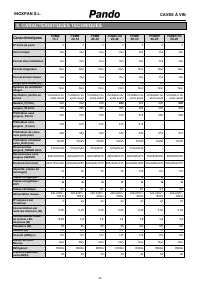
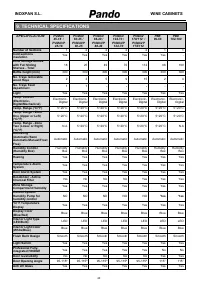
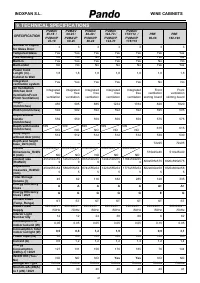
Характеристики

Остались вопросы?Не нашли свой ответ в руководстве или возникли другие проблемы? Задайте свой вопрос в форме ниже с подробным описанием вашей ситуации, чтобы другие люди и специалисты смогли дать на него ответ. Если вы знаете как решить проблему другого человека, пожалуйста, подскажите ему :)


