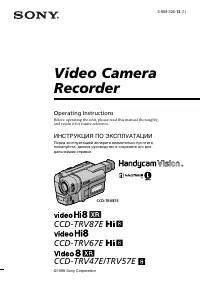
Видеокамеры Sony CCD-TRV47E - инструкция пользователя по применению, эксплуатации и установке на русском языке. Мы надеемся, она поможет вам решить возникшие у вас вопросы при эксплуатации техники.
Если остались вопросы, задайте их в комментариях после инструкции.
"Загружаем инструкцию", означает, что нужно подождать пока файл загрузится и можно будет его читать онлайн. Некоторые инструкции очень большие и время их появления зависит от вашей скорости интернета.


80
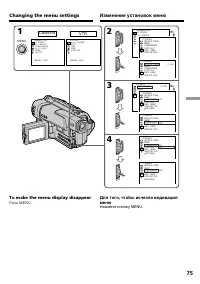
Changing the menu settings
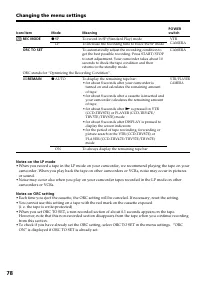
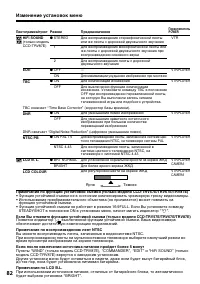
Icon/item
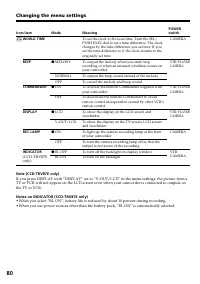
WORLD TIME
BEEP
COMMANDER
DISPLAY
REC LAMP
INDICATOR
Mode
z
MELODY
NORMAL
OFF
z
ON
OFF
z
LCD
V-OUT/LCD
z
ON
OFF
z
BL OFF
BL ON
Meaning
To set the clock to the local time. Turn the SEL/
PUSH EXEC dial to set a time difference. The clock
changes by the time difference you set here. If you
set the time difference to 0, the clock returns to the
originally set time.
To output the melody when you start/stop
recording or when an unusual condition occurs on
your camcorder
To output the beep sound instead of the melody
To cancel the melody and beep sound
To activate the Remote Commander supplied with
your camcorder
To deactivate the Remote Commander to avoid
remote control misoperation caused by other VCR’s
remote control
To show the display on the LCD screen and
viewfinder
To show the display on the TV screen, LCD screen
and viewfinder
To light up the camera recording lamp at the front
of your camcorder
To turn the camera recording lamp off so that the
subject is not aware of the recording
To turn off the backlight on display window
To turn on the backlight
POWER
switch
CAMERA
VTR/PLAYER
CAMERA
VTR/PLAYER
CAMERA
VTR/PLAYER
CAMERA
CAMERA
VTR
CAMERA
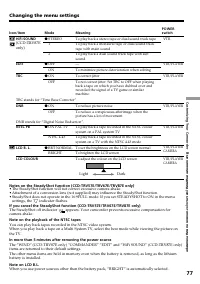
Note (CCD-TRV87E only)
If you press DISPLAY with “DISPLAY” set to “V-OUT/LCD” in the menu settings, the picture from a
TV or VCR will not appear on the LCD screen even when your camcorder is connected to outputs on
the TV or VCR.
Notes on INDICATOR (CCD-TRV87E only)
• When you select “BL ON”, battery life is reduced by about 10 percent during recording.
• When you use power sources other than the battery pack, “BL ON” is automatically selected.
(CCD-TRV87E
only)
Содержание
- 2 English; VisionTM camcorder. With your; WARNING; Русский; ПРЕДУПРЕЖДЕНИЕ
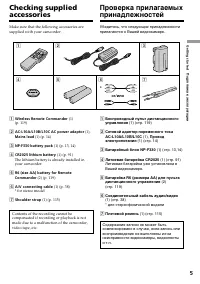
- 4 Оглавление; Подготовка к эксплуатации
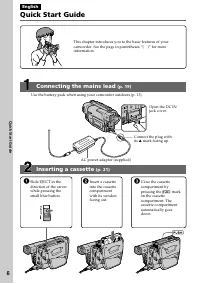
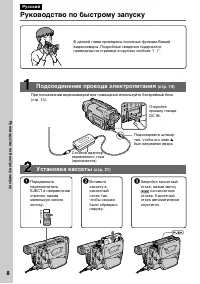
- 8 Руководство по быстрому запуску; Установка кассеты; на кассетном; Сетевой адаптер
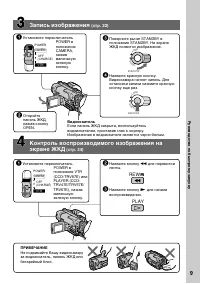
- 9 Запись изображения; Видоискатель
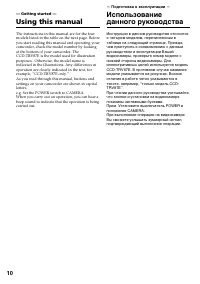
- 10 — Getting started —; Using this manual; — Подготовка к эксплуатации —
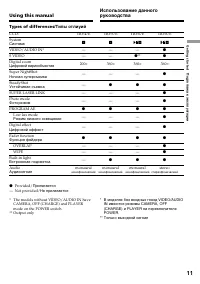
- 11 Types of differences/; Типы отлиуий
- 12 • Do not let your camcorder get wet. Keep your
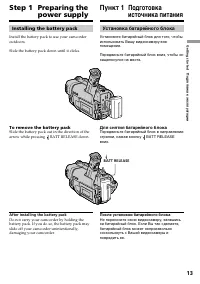
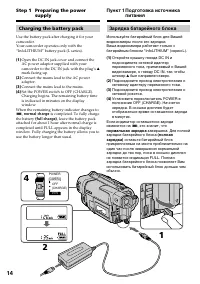
- 13 Installing the battery pack; Slide the battery pack down until it clicks.; To remove the battery pack; After installing the battery pack; Step 1 Preparing the; Установка батарейного блока; Для снятия батарейного блока; После установки батарейного блока; Пункт 1 Подготовка; BATT RELEASE
- 14 Connect the mains lead to the mains.; normal charge; is completed. To fully charge; Пункт 1 Подготовка источника; был направлен вверх.; нормальная зарядка; завершена. Для полной
- 15 Notes; • Prevent metallic objects from coming into; Remaining battery time indicator; “– – – – min” appears in the display window.; Step 1 Preparing the power; Примечания; • Не допускайте контакта металлических; Батарейный блок; – Что-то не в порядке с батарейным блоком.
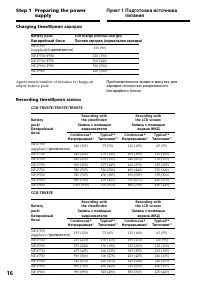
- 16 Время зарядки
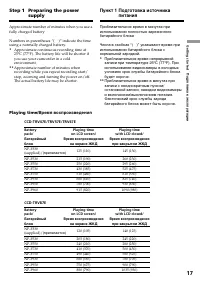
- 17 Время воспроизведения
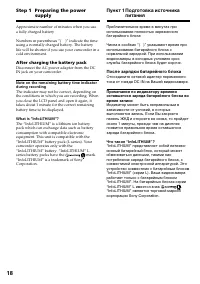
- 18 После зарядки батарейного блока; Что такое “InfoLITHIUM”?; After charging the battery pack; What is ”InfoLITHIUM”?
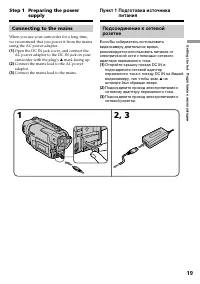
- 19 на; Connecting to the mains
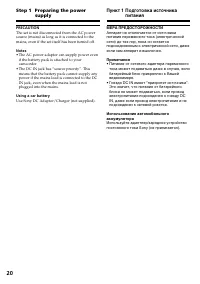
- 20 PRECAUTION; • The AC power adaptor can supply power even; Using a car battery; • Питание от сетевого адаптера переменного
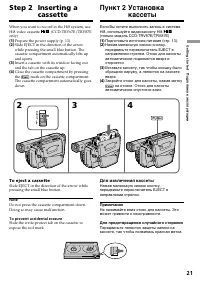
- 21 Закройте отсек для кассеты, нажав метку; Для извлечения кассеты; Примечание; mark on the cassette compartment.; To eject a cassette; Note; Step 2 Inserting a; Пункт 2 Установка
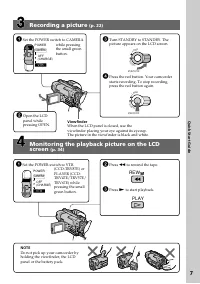
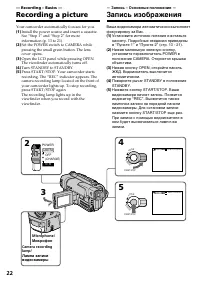
- 22 — Recording – Basics —; Your camcorder automatically focuses for you.; Микрофон
- 23 After recording; Turn STANDBY down to LOCK.; После записи
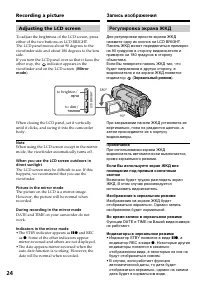
- 24 Xz; Зеркальный режим; • Индикатор STBY появится в виде; ярче
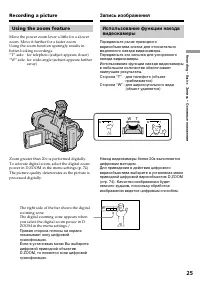
- 25 Using the zoom feature; Zoom greater than 20
- 26 • Digital zoom starts to function when zoom
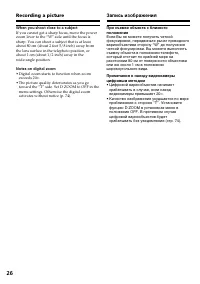
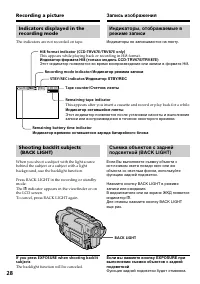
- 28 Индикаторы не записываются на ленту.; Recording mode indicator/; BACK LIGHT
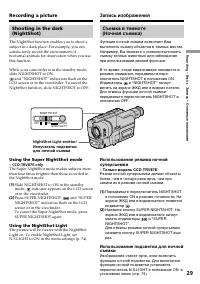
- 29 and “NIGHTSHOT” indicators flash on the; Using the Super NightShot mode; indicator appears on the LCD screen; Using the NightShot Light; NightShot Light emitter/; и “NIGHTSHOT” начнут; – Только модель CCD-TRV87E; и “SUPER
- 30 • Do not use the NightShot function in bright; NightShot Light
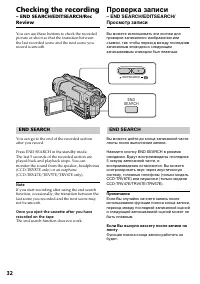
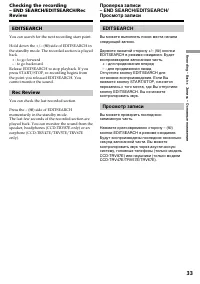
- 32 Checking the recording; The end search function does not work.; Проверка записи; END SEARCH
- 33 You can search for the next recording start point.; Rec Review; You can check the last recorded section.; Нажмите кратковременно сторону – (
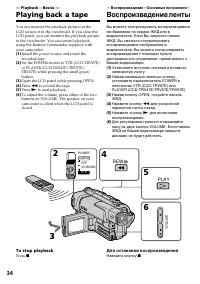
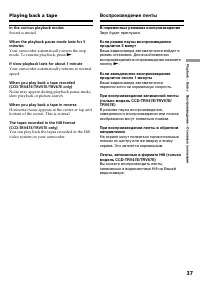
- 34 — Playback – Basics —; Playing back a tape; Open the LCD panel while pressing OPEN.; — Воспроизведение – Основные положения—; Воспроизведение ленты; To stop playback; Press; Для остановки воспроизведения
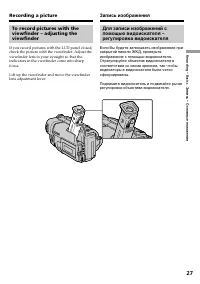
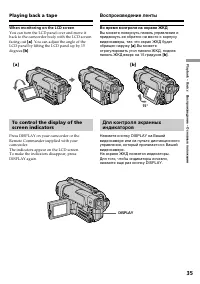
- 35 DISPLAY; When monitoring on the LCD screen; . You can adjust the angle of the; Во время контроля на экране ЖКД
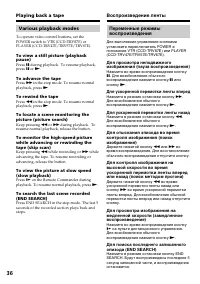
- 36 Various playback modes; To advance the tape; Для ускоренной перемотки ленты вперед
- 37 In the various playback modes; Звук будет приглушен.
- 38 Передача сигнала
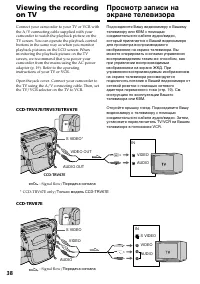
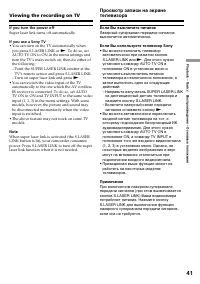
- 39 Viewing the recording on TV
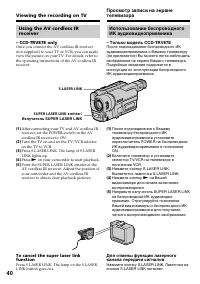
- 40 Нажмите кнопку; SUPER LASER LINK emitter/
- 41 If you turn the power off; Если Вы выключите питание; • Вы можете включать телевизор
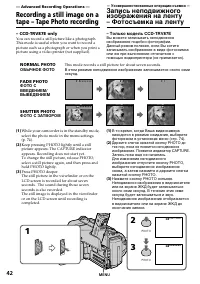
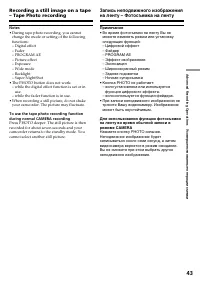
- 42 — Advanced Recording Operations —; NORMAL PHOTO; This mode records a still picture for about seven seconds.; — Усовершенствованные операции съемки —; Запись неподвижного; MENU
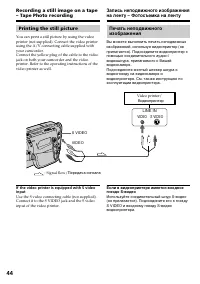
- 44 Printing the still picture; LINE IN
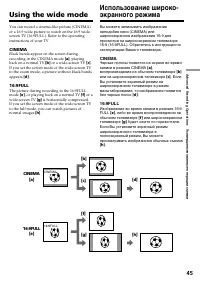
- 45 back on a normal TV; Using the wide mode; CINEMA; CINEMA
- 46 To cancel the wide mode; Set 16:9WIDE to OFF in the menu settings.; In the wide mode; ”, и функция устойчивой; В широкоэкранном режиме
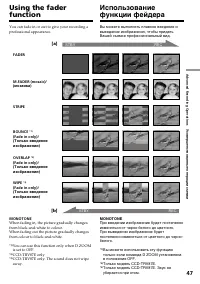
- 47 MONOTONE
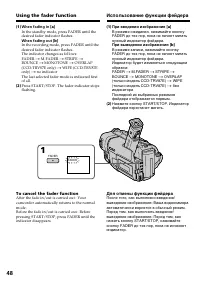
- 48 Using the fader function; STRIPE; To cancel the fader function; Использование функции фейдера; При введении изображения; Для отмены функции фейдера
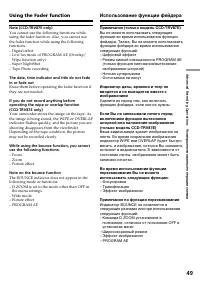
- 49 Note on the bounce function; the menu settings; Using the Fader function; Примечание по функции перескакивания
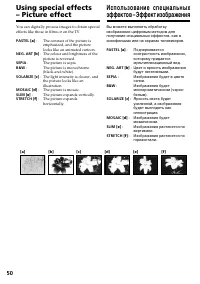
- 50 : The colour and brightness of the; The picture is sepia.; SEPIA; : Яркость света будет
- 51 When you turn the power off; PICTURE EFFECT
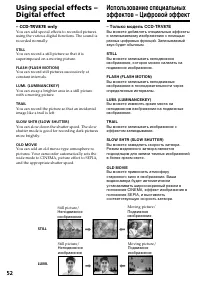
- 52 STILL
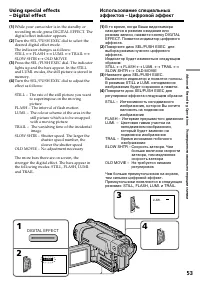
- 53 DIGITAL EFFECT
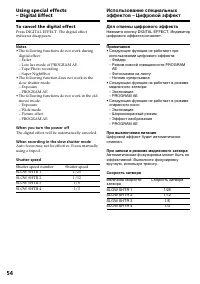
- 54 To cancel the digital effect; Для отмены цифрового эффекта
- 55 Spotlight mode
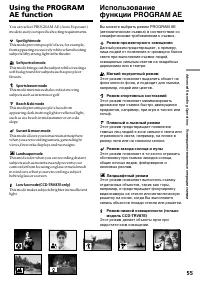
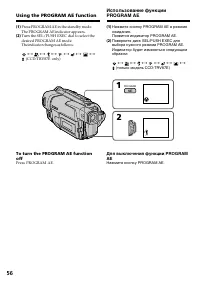
- 56 Using the PROGRAM AE function; Нажмите кнопку PROGRAM AE.
- 57 • In the spotlight, sports lesson and beach & ski
- 58 ночных сцен) с большой достоверностью; – Старинное кино (только модель
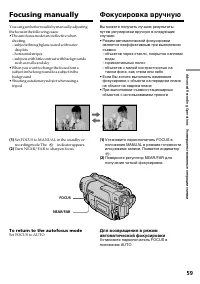
- 59 FOCUS; Focusing manually; droplets; To return to the autofocus mode; Фокусировка вручную; воды
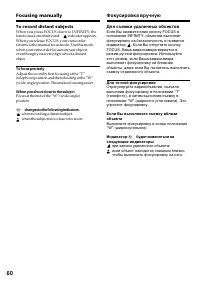
- 60 To record distant subjects; To focus precisely; Для съемки удаленных объектов; . Если Вы отпустите кнопку; Для точной фокусировки
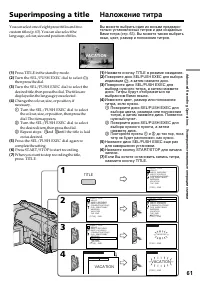
- 61 Superimposing a title; Наложение титра; VACATION; TITLE
- 62 • Цвет титра изменяется следующим образом:; Во время выбора и установки титра; Зуммерного сигнала не будет.
- 63 Turn the SEL/PUSH EXEC dial to select
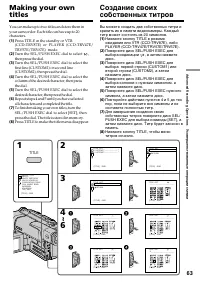
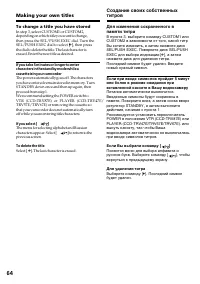
- 64 To change a title you have stored; To delete the title; Making your own titles; Если Вы выбрали команду [; вернуться к предыдущему экрану.; Для удаления титра
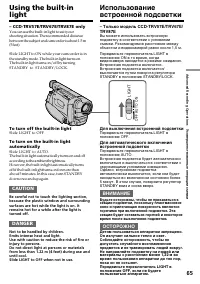
- 65 To turn off the built-in light; CAUTION; Для выключения встроенной подсветки; ВНИМАНИЕ
- 66 Replacing the bulb; Замена лампы накаливания
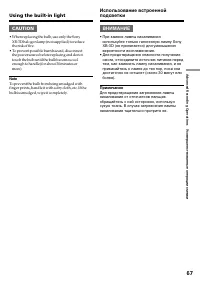
- 67 • When replacing the bulb, use only the Sony; Using the built-in light; • При замене лампы накаливания
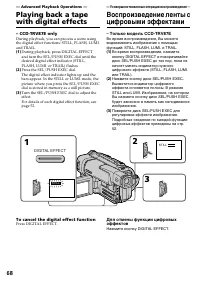
- 68 — Advanced Playback Operations —; To cancel the digital effect function; Press DIGITAL EFFECT.; Усовершенствованные операции воспроизведения —; Нажмите кнопку DIGITAL EFFECT.
- 70 — Editing —; Dubbing a tape; —Монтаж —; Перезапись ленты
- 71 Если Вы закончили перезапись ленты
- 73 Recording video or TV programmes; You cannot record dual sound broadcasts.; If your VCR is a monaural type
- 74 — Customizing Your Camcorder —
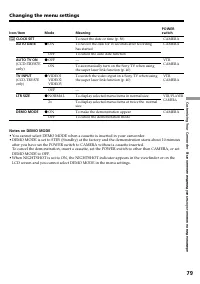
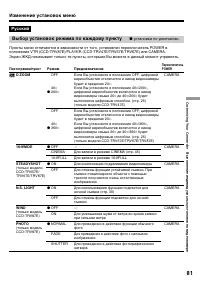
- 81 Выбор установок режима по каждому пункту; установки по умолчанию.
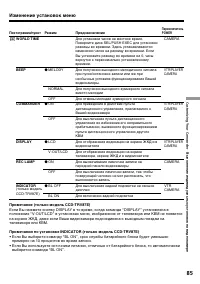
- 82 Примечание по воспроизведению лент NTSC
- 83 Примечания по режиму LP; записанных в режиме LP на других видеокамерах или КВМ.; Примечания по установке ORC; выполните установку заново.
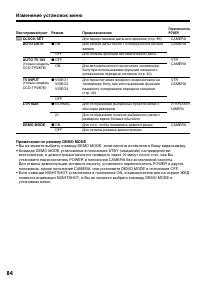
- 84 Примечания по режиму DEMO MODE
- 85 примерно на 10 процентов во время записи.
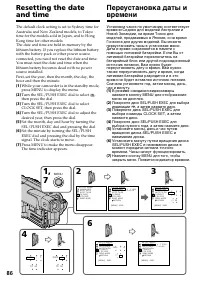
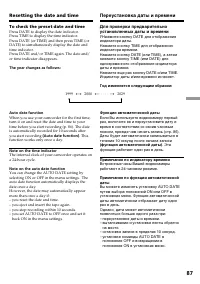
- 87 To check the preset date and time; The year changes as follows:; function works only once a day.; Note on the time indicator; back ON in the menu settings.; Resetting the date and time; Нажмите кнопку DATE для отображения; Год изменяется следующим образом:; функция работает один раз в день.; Примечание по индикатору времени; Переустановка даты и времени
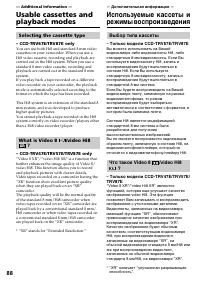
- 88 — Additional Information —; Selecting the cassette type; — Дополнительная информация —; Выбор типа кассеты
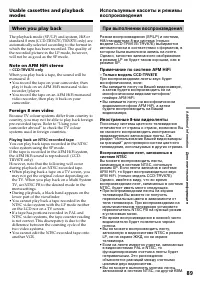
- 89 When you play back; Note on AFM HiFi stereo; Playing back an NTSC-recorded tape; При выполнении воспроизведения; Примечание по системе AFM HiFi; Иностранные 8-мм видеоленты
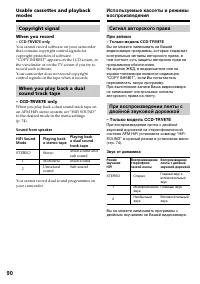
- 90 Copyright signal; When you record; Сигнал авторского права; При записи; Звук от динамика
- 91 replace the battery
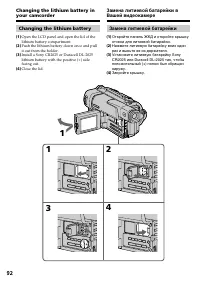
- 92 Changing the lithium battery; Замена литиевой батарейки
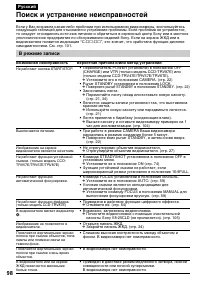
- 98 Поиск и устранение неисправностей; В режиме записи; Возможная неисправность
- 99 В режиме воспроизведения
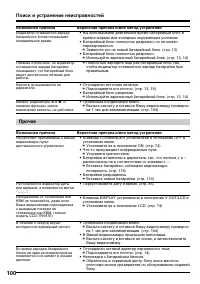
- 100 Прочее; Возможная причина
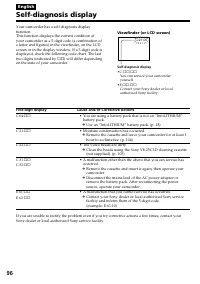
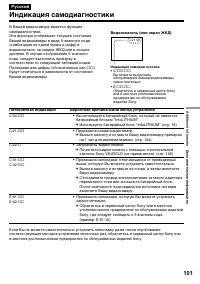
- 101 Пятизначная индикация; Индикация самодиагностики
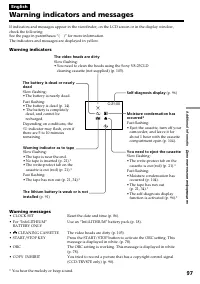
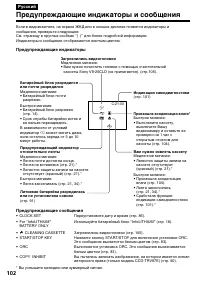
- 102 Предупреждающие индикаторы и сообщения; Предупреждающие индикаторы; Загрязнились видеоголовки
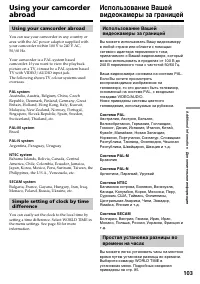
- 103 Using your camcorder abroad; PAL system; Brazil; NTSC system; Бразилия; Система NTSC
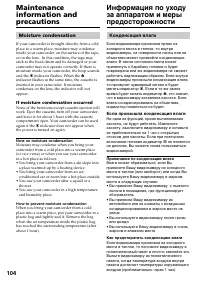
- 104 Moisture condensation; If moisture condensation occurred; Note on moisture condensation; Конденсация влаги; Если произошла конденсация влаги; Примечание по конденсации влаги
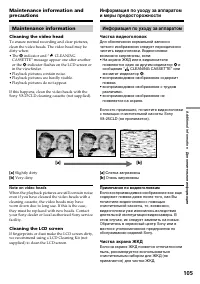
- 105 Maintenance information; Cleaning the video head; indicator and “; Note on video heads; Cleaning the LCD screen; Информация по уходу за аппаратом; Чистка видеоголовок; Примечание по видеоголовкам; Чистка экрана ЖКД
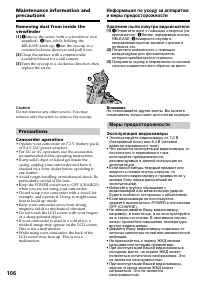
- 106 Caution; Precautions; Camcorder operation; Удаление пыли изнутри видоискателя; Внимание; Меры предосторожности; Эксплуатация видеокамеры
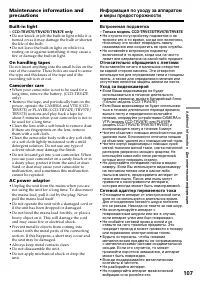
- 107 On handling tapes; Встроенная подсветка
- 108 If batteries are leaking
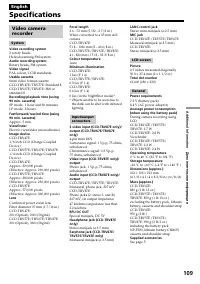
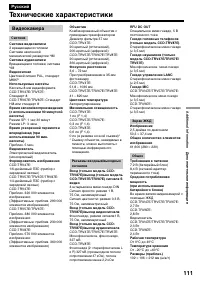
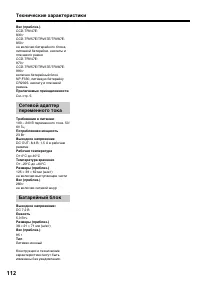
- 111 Технические характеристики; Видеокамера
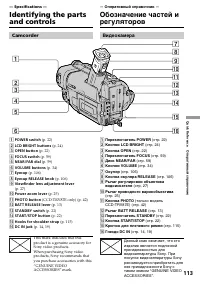
- 113 — Specifications —; Camcorder
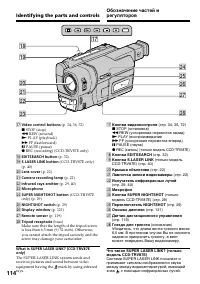
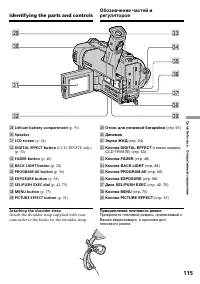
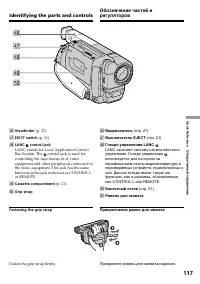
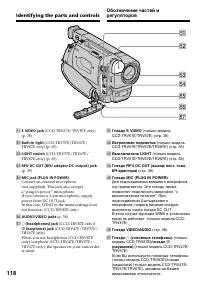
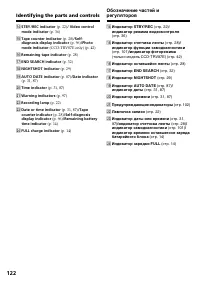
- 114 Identifying the parts and controls
- 117 rj; Fasten the grip strap firmly.
- 118 S VIDEO jack; ts
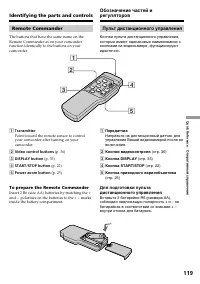
- 119 Remote Commander; Transmitter; Пульт дистанционного управления; Передатчик; To prepare the Remote Commander
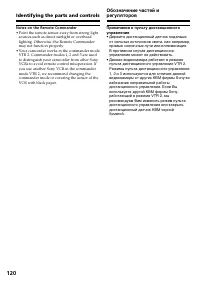
- 120 Notes on the Remote Commander; • Point the remote sensor away from strong light
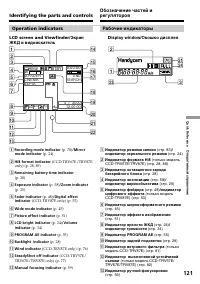
- 121 Operation indicators; Рабочие индикаторы; LCD screen and Viewfinder/; Экран; STBY
- 124 Руководство по быстрым функциям
- 126 Алфавитный указатель


