Вентиляторы Elenberg FS-4016 - инструкция пользователя по применению, эксплуатации и установке на русском языке. Мы надеемся, она поможет вам решить возникшие у вас вопросы при эксплуатации техники.
Если остались вопросы, задайте их в комментариях после инструкции.
"Загружаем инструкцию", означает, что нужно подождать пока файл загрузится и можно будет его читать онлайн. Некоторые инструкции очень большие и время их появления зависит от вашей скорости интернета.


8
The only tool needed for this assembly proce-
dure is a screw driver.
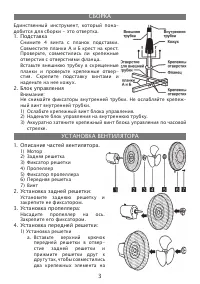
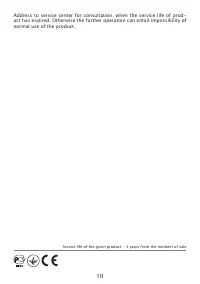
1. Assembling the cross-bar feet
First of all, loosen and remove the four
screws from bars. Next cross the bar A and
bar B. Be sure to align the four holes, in the
bars to the four holes on the flange.
At the same time align the projection on
hole the flange with the extra hole on bar
A. Then tighten the four screws and insert
the base cap down over the feet,
2. Mounting the switch box
Caution:
Never removes the inner pipe stopper. If you remove the inner pipe stop-
per service may be necessary. Never loosen the inner pipe set screw.
1) Locsen the switch box set screw by turning it to the left.
2) Now place the hole in the bottom of the switch box over the inner
pipe.
3) Turn the switch box set screw clockwise and firmly tighten.
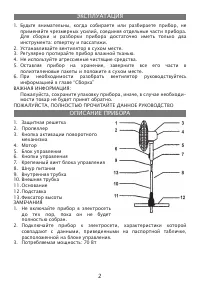
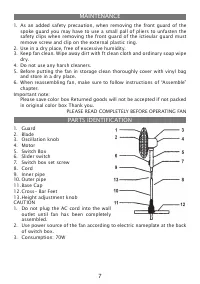
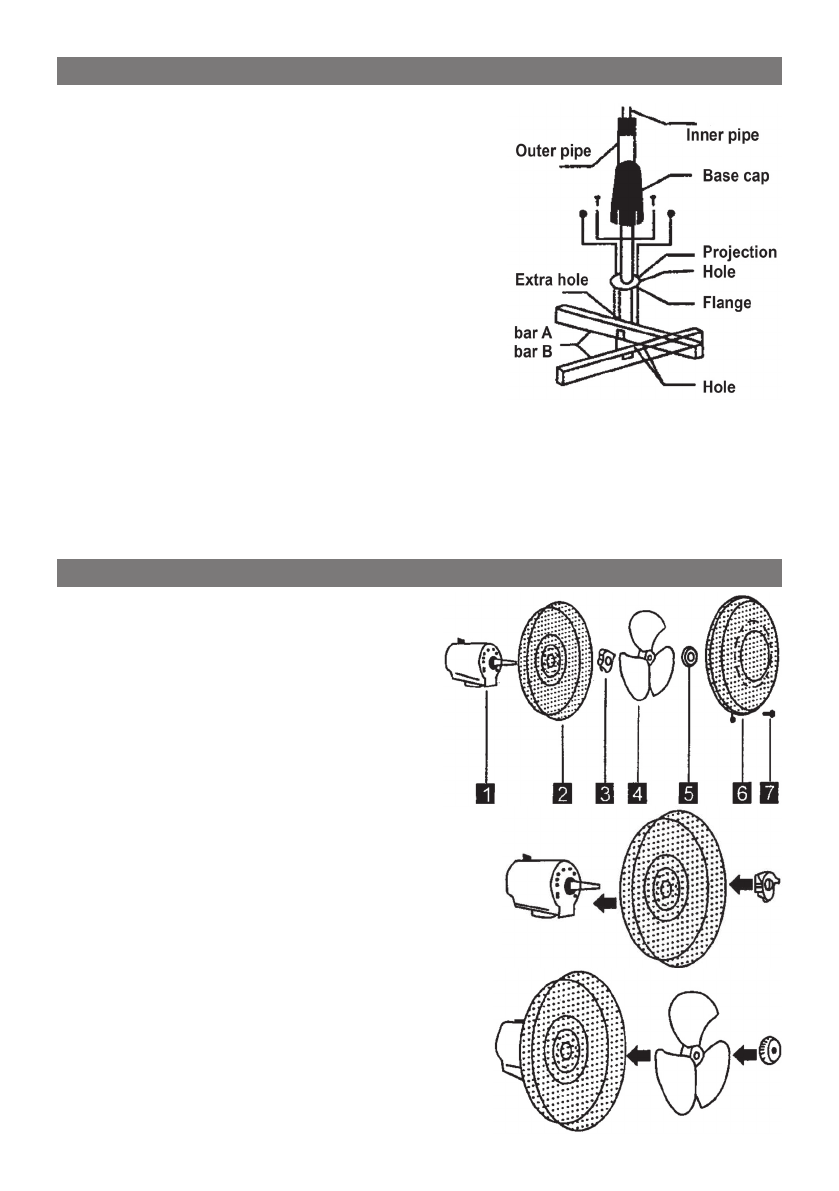
1. Parts identification of the fan
nose.
1) Motor
2) Rear Guard
3) Guard Lock Nut
4) Blade
5) Blade Gap
6) Front Guard
7) Screw
2. Mounting the rear guard.
Mount the Rear Guard on the Motor
and secure it with the Guard Lock
Nut.
3. Mounting the blade
Insert the Blade onto the Motor shaft.
Tight the Blade with the Blade cap.
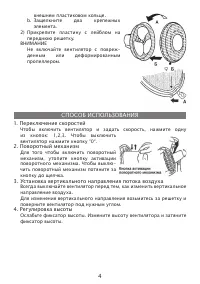
4. Mounting the front guard
There are two typical constructions
of fan front guard, each is assembled
according to following
1) Mounting the reticular guard
a. Mount the Front Guard by in-
MOUNTING, NOSE OF THE FAN
ASSEMBLE

