
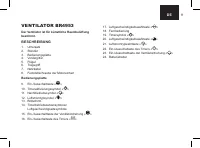
Вентиляторы Brayer BR4953 - инструкция пользователя по применению, эксплуатации и установке на русском языке. Мы надеемся, она поможет вам решить возникшие у вас вопросы при эксплуатации техники.
Если остались вопросы, задайте их в комментариях после инструкции.
"Загружаем инструкцию", означает, что нужно подождать пока файл загрузится и можно будет его читать онлайн. Некоторые инструкции очень большие и время их появления зависит от вашей скорости интернета.


7
EN
OR LABORATORY PURPOSES.
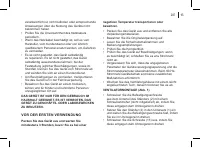
BEFORE THE FIRST USE
After the unit’s transportation or storage at negative
temperature, unpack it and wait for at least 3 hours
before using it.
•
Unpack the unit and remove all the packaging
materials.
•
Keep the original package.
• Read the safety measures and operating
recommendations.
•
Check the delivery set.
• Examine the unit for damages, in case of damage do
not plug it into the mains.
•
Make sure that specified specifications of power
supply voltage of the unit correspond to the
specifications of your mains. When using the unit in
the mains with 60 Hz frequency, the unit does not
need any additional settings.
•
Wipe the fan body with a slightly damp cloth and then
wipe it dry.
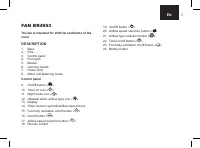
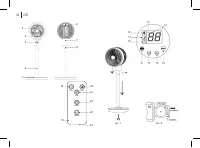
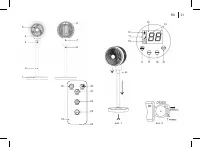
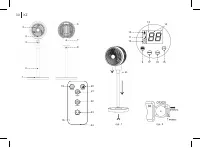
FAN ASSEMBLY (fig. 1)
•
Using a screwdriver (not included in the delivery
package), screw out the fastening screw from the
bottom of the pole (2) by rotating it counterclockwise.
•
Place the pole (2) into the base (1), tighten up the
fastening screw by rotating it clockwise.
•
Screw out the screw (8) by rotating it
counterclockwise.
•
Place the motor unit on the pole (2), tighten up the
screw (8) by rotating it clockwise, make sure that the
motor unit is securely fastened to the pole (2).
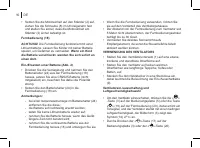
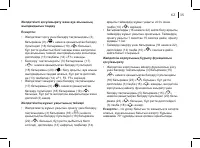
Remote control (18)
ATTENTION!
A lithium battery is used in the remote
control. To avoid danger, do not allow children to play
with the battery.
If your child has swallowed a battery,
immediately see a doctor.
Battery installation/replacing (pic. 2)
•
Press on the clamp and remove the battery holder
(24) from the remote
•
control (18) body, insert a CR2025 battery (supplied
with the unit) into the holder, strictly following the
polarity.
•
Install the battery holder (24) into the remote control
(18).
Notes:
- if there is an isolation insert in the battery holder
(24), remove the insert;
- replace the battery in time;
- do not recharge the lithium battery;
- remove the battery if you are not planning to use
the unit for a long time;
- remove the used battery from the remote control
(18) and dispose of it.
Характеристики

Остались вопросы?Не нашли свой ответ в руководстве или возникли другие проблемы? Задайте свой вопрос в форме ниже с подробным описанием вашей ситуации, чтобы другие люди и специалисты смогли дать на него ответ. Если вы знаете как решить проблему другого человека, пожалуйста, подскажите ему :)


