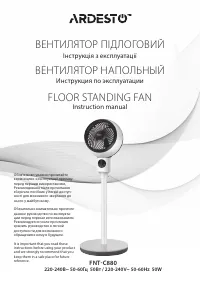
Вентиляторы Ardesto FNT—C880 - инструкция пользователя по применению, эксплуатации и установке на русском языке. Мы надеемся, она поможет вам решить возникшие у вас вопросы при эксплуатации техники.
Если остались вопросы, задайте их в комментариях после инструкции.
"Загружаем инструкцию", означает, что нужно подождать пока файл загрузится и можно будет его читать онлайн. Некоторые инструкции очень большие и время их появления зависит от вашей скорости интернета.


11
RU
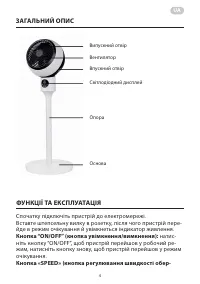
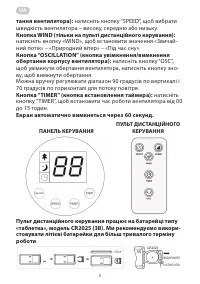
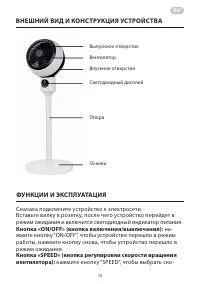
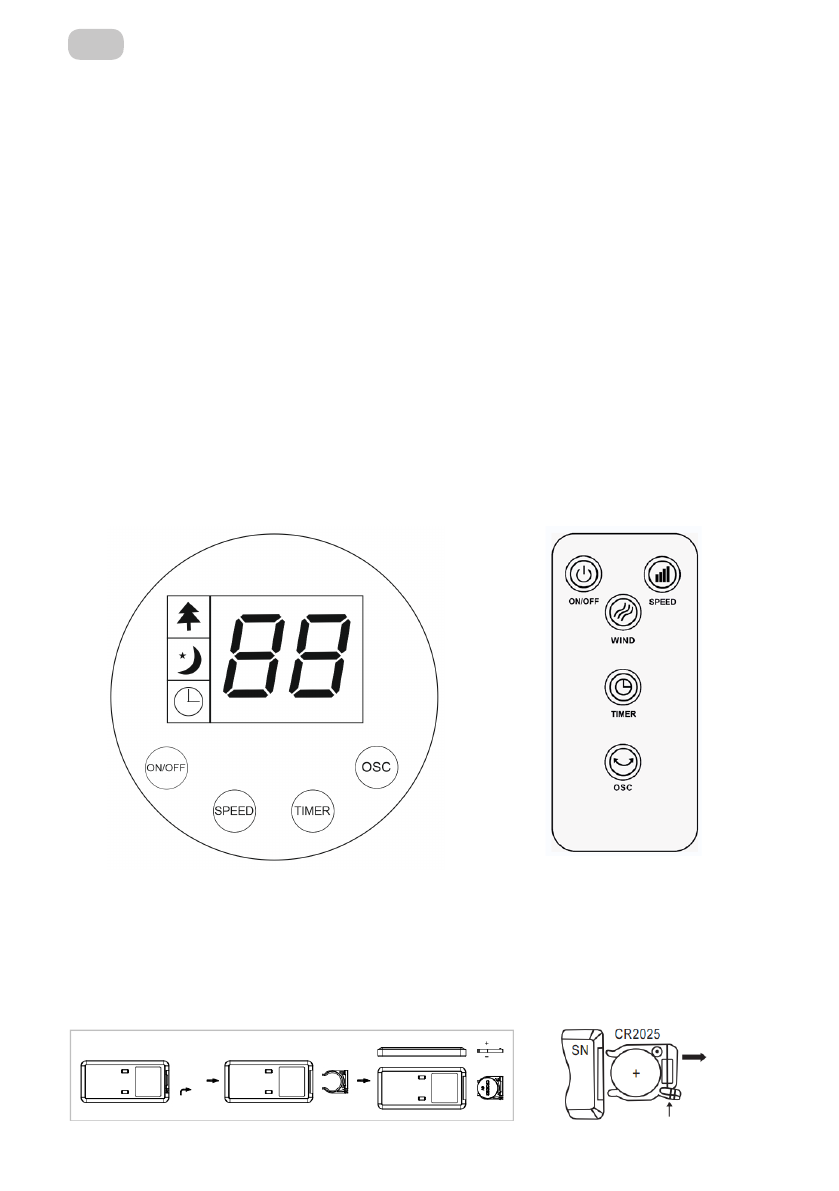
рость работы вентилятора – высокую, среднюю или низкую.
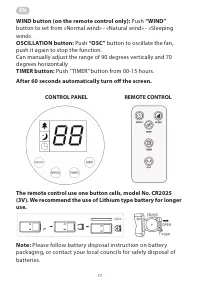
Кнопка WIND (только на пульте дистанционного управ-
ления):
нажмите кнопку «WIND», чтобы установить значение
«Обычный поток» – «Ветер» – «Для сна».
Кнопка «OSCILLATION» (кнопка включения/выключения
вращение корпуса вентилятора (обдува)):
нажмите кнопку
“OSC”, чтобы включить вращение вентилятора, нажмите кнопку
снова, чтобы отключить вращение.
Кнопка TIMER (кнопка установки таймера):
нажмите кнопку
TIMER, чтобы установить время работы вентилятора от 00 до 15
часов.
Экран автоматически выключится через 60 секунд.
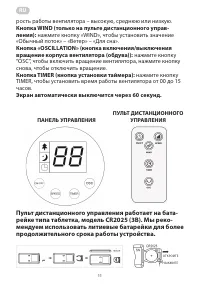
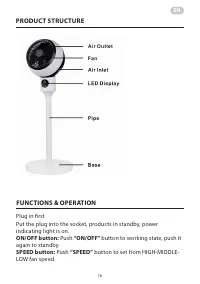
4
Can manually adjust the range of 90 degrees vertically and 70 degrees
horizontally
TIMER button:
Push
”TIMER”
button from 00-15 hours.
After 60 seconds automatically turn off the screen
CONTROL PANEL
REMOTE CONTROL
Same as control panel
4
Can manually adjust the range of 90 degrees vertically and 70 degrees
horizontally
TIMER button:
Push
”TIMER”
button from 00-15 hours.
After 60 seconds automatically turn off the screen
CONTROL PANEL
REMOTE CONTROL
Same as control panel
ПУЛЬТ ДИСТАНЦИОННОГО
УПРАВЛЕНИЯ
ПАНЕЛЬ УПРАВЛЕНИЯ
Пульт дистанционного управления работает на бата-
рейке типа таблетка, модель CR2025 (3В). Мы реко-
мендуем использовать литиевые батарейки для более
продолжительного срока работы устройства.
5
The remote control use one button cells, model No. CR2025 (3V). We
recommend the use of Lithium type battery for longer use.
Note: Please follow battery disposal instruction on battery packaging, or
contact your local councils for safely disposal of batteries.
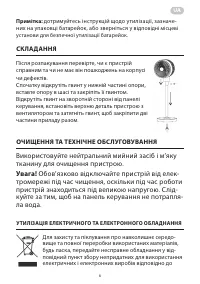
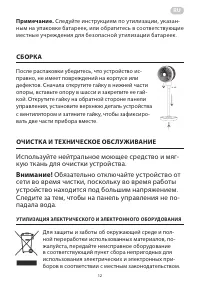
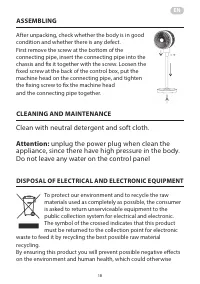
ASSEMBLING
After unpacking, check whether the body is in good condition
and whether there is any defect.
First remove the screw at the bottom of the connecting
pipe, insert the connecting pipe into the chassis and fix it
together with the screw. Loosen the fixed screw at the back
of the control box, put the machine head on the connecting
pipe, and tighten the fixing screw to fix the machine head
and the connecting pipe together.
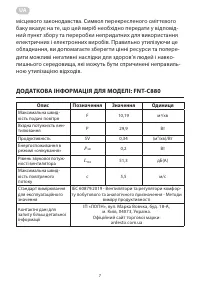
CLEANING AND MAINTENANCE
Clean with neutral detergent and soft cloth.
Attention: unplug the power plug when clean the appliance, since there have
high pressure in the body. Do not leave any water on the control panel.
DISPOSAL OF ELECTRICAL AND ELECTRONIC EQUIPMENT
To protect our environment and to recycle the raw materials used as completely as
possible, the consumer is asked to return unserviceable equipment to the public
collection system for electrical and electronic. The symbol of the crossed indicates that
this product must be returned to the collection point for electronic waste to feed it by
recycling the best possible raw material recycling.
By ensuring this product you will prevent possible negative effects on the environment and human
health, which could otherwise be caused due to improper disposal of that product. The recycling of
materials from this product, you will help to preserve a healthy environment and natural resources.
ОТКРОЙТЕ
НАЖМИТЕ
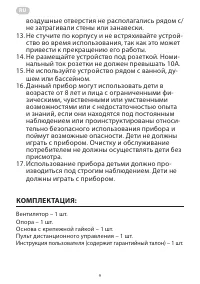
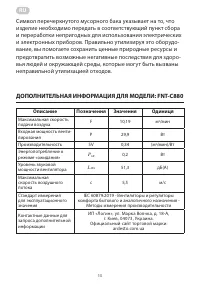
Характеристики

Остались вопросы?Не нашли свой ответ в руководстве или возникли другие проблемы? Задайте свой вопрос в форме ниже с подробным описанием вашей ситуации, чтобы другие люди и специалисты смогли дать на него ответ. Если вы знаете как решить проблему другого человека, пожалуйста, подскажите ему :)
