Варочная панель Gaggenau CK 481-110 - инструкция пользователя по применению, эксплуатации и установке на русском языке. Мы надеемся, она поможет вам решить возникшие у вас вопросы при эксплуатации техники.
Если остались вопросы, задайте их в комментариях после инструкции.
"Загружаем инструкцию", означает, что нужно подождать пока файл загрузится и можно будет его читать онлайн. Некоторые инструкции очень большие и время их появления зависит от вашей скорости интернета.

26
Installation CK 481
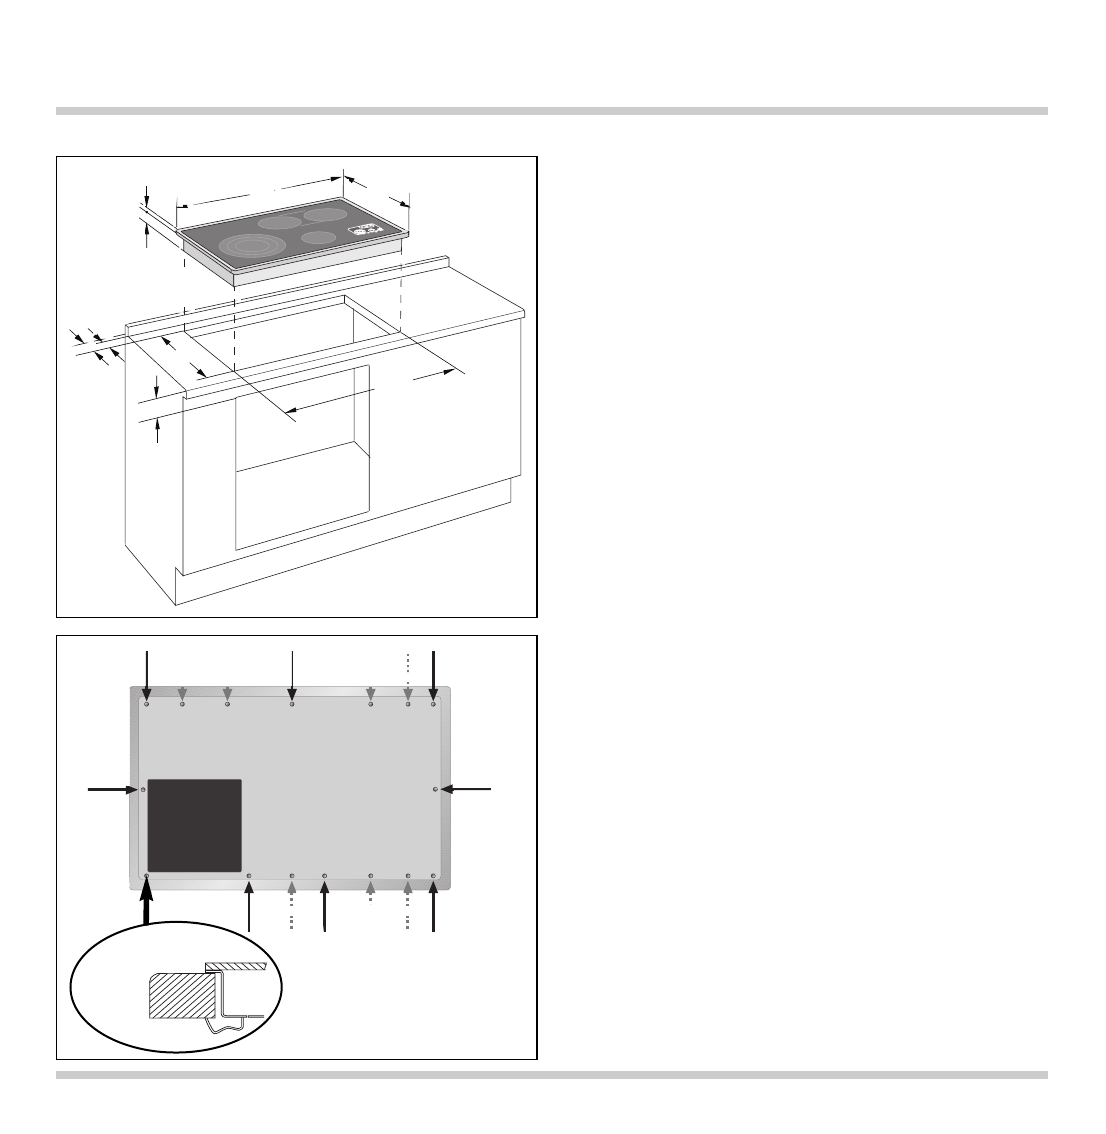
The appliance is installed in a base cabinet with a
width of more than 900 mm.
• Produce the recess for the hob in your worktop.
Proceed as indicated on the installation sketch.
Note:
the hob must not be stuck onto the worktop
with silicone.
• Insert the hob with the control panel front right
into the cut-out and align it.
• Secure the appliance on the worktop with the
clamping screws included. Fasten the clamping
screws as marked by the black arrows in the
picture. The dotted arrows show alternative fixing
points if required by the installation conditions.
Note:
During installation be careful that the front right
clamping screw is fitted to the worktop front side, as
fitting the clamping screw to the side can damage
the appliance base. Do not tighten the clamping
screws too tightly, as a uniform sealing gap should
be left all round.
• Connect the appliance to the electricity.
Check the appliance works correctly.
Removal of the hob
Disconnect the appliance from the electricity. Undo
all the clamping screws. Carefully push out the
appliance by the metal base from below.
Note:
Do not try to lever the hob out of the worktop cut out
using a tool.
min. 60
800
520
49 0
±
2,5
780
±
2,5
min. 3
0
46
min. 5
0
3
worktop
front
Характеристики
Остались вопросы?Не нашли свой ответ в руководстве или возникли другие проблемы? Задайте свой вопрос в форме ниже с подробным описанием вашей ситуации, чтобы другие люди и специалисты смогли дать на него ответ. Если вы знаете как решить проблему другого человека, пожалуйста, подскажите ему :)


