
Варочная панель Kuppersberg FQ3TG L - инструкция пользователя по применению, эксплуатации и установке на русском языке. Мы надеемся, она поможет вам решить возникшие у вас вопросы при эксплуатации техники.
Если остались вопросы, задайте их в комментариях после инструкции.
"Загружаем инструкцию", означает, что нужно подождать пока файл загрузится и можно будет его читать онлайн. Некоторые инструкции очень большие и время их появления зависит от вашей скорости интернета.


14
Technical passporT
english
gas hob
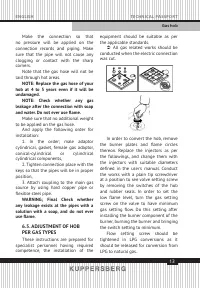
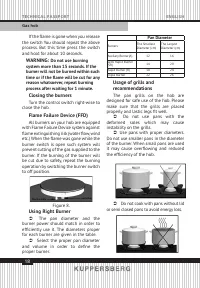
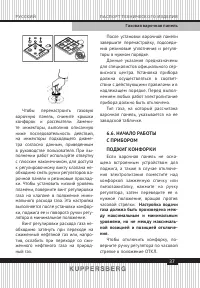
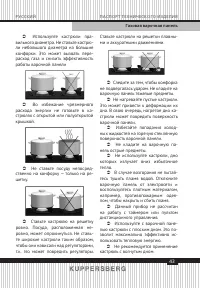
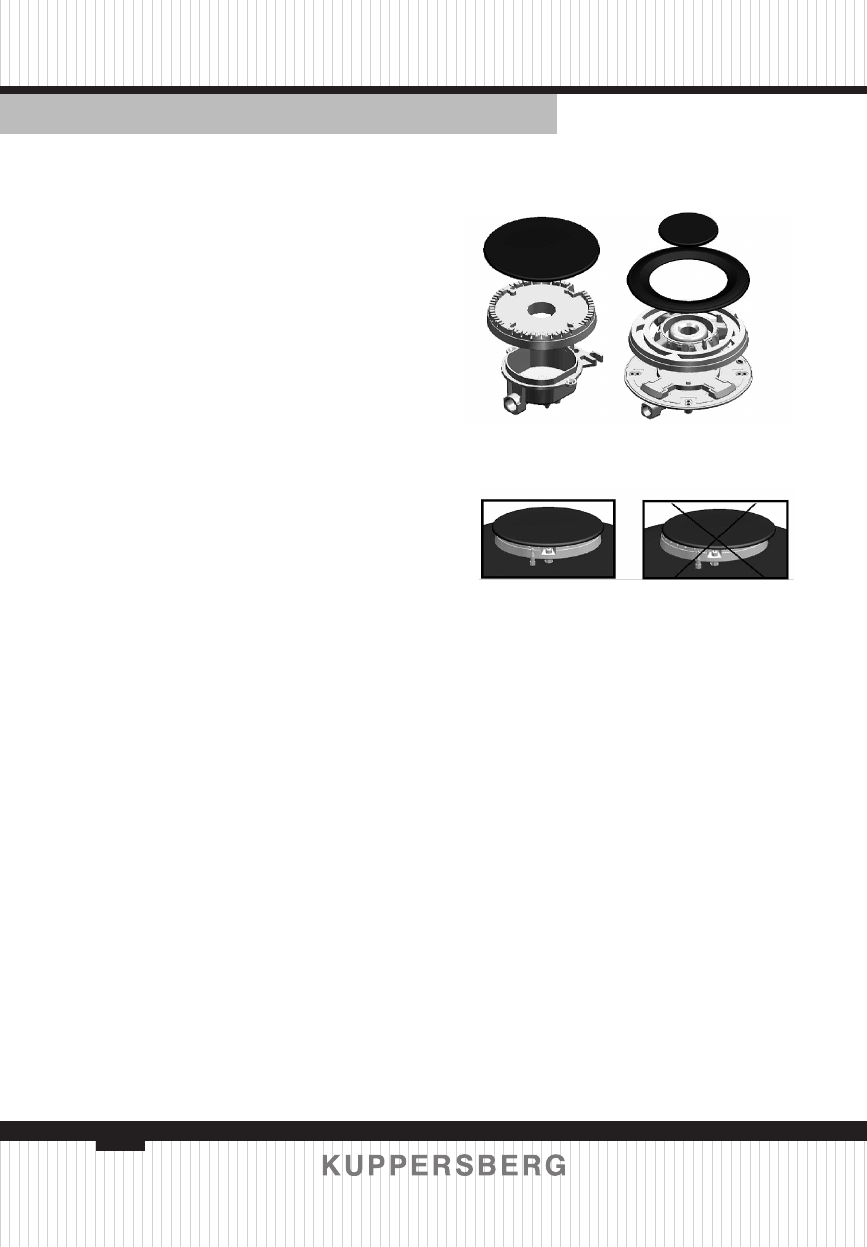
Figure 6.
RIGHT
WRONG
Â
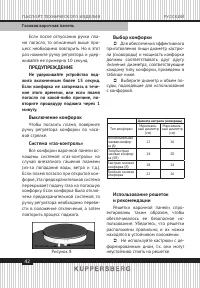
In order that the hob will
operate properly the grills and burner
components should be properly
positioned.(Figure 6)
Â
Make sure that the flame of your
burner is in blue color and work quietly.
If the burner will burn in yellow color
or work with voice make sure that all
burners fit properly. If the flame color
does not change to blue color then
apply the authorized service.
After realization of the hob,
complete the conversion transaction
by connecting the rubber seals and
switched in the same order.
These instructions should be
used by an authorized service. The
products should be installed as per
the regulations in force and in proper
manner. Before conducting any
transaction the electrical connections
of the hob should be cut by no means.
The type label on the hob indicates
the gas type planned to be used with
the unit.
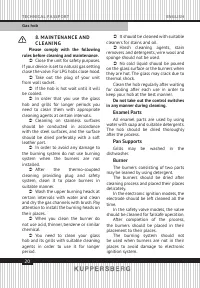
6.6. STARTING THE APPLIANCE
FIRING OF BURNER
If your hob does not have built in
lighter or during black out place the
naked flame over the burner and push
the switch to bring it to the desired
position with counter-clockwise
movement.
Gas adjustment should
be between maximum and minimum
levels, it should not be realized between
maximum and off positions.
To close the
burner turn the switch clockwise till to
reach “off” position.
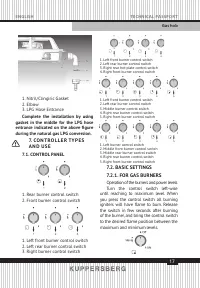
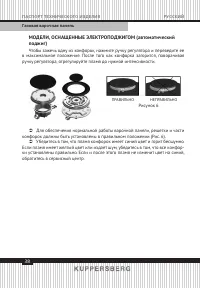
MODELS EQUIPPED WITH
LIGHTER SWITCH (Automatic
ignition)
In order to burn one of the burners,
press the switch down and bring the
switch to maximum position. When it
burns, flame is adjusted to the desired
intensity with the switch.
Содержание
- 28 О К Р УЖ А Ю Щ Е Й С Р Е Д Ы; Соответствует применимым поло-
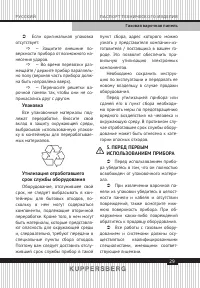
- 29 Упаковка
- 30 И Н С Т Р У К Ц И Я
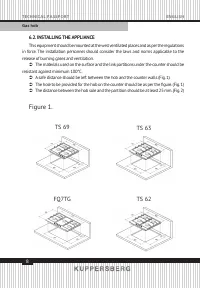
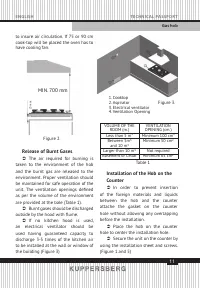
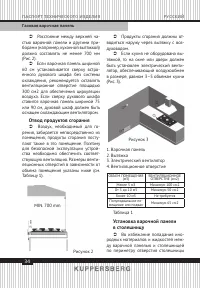
- 34 Отвод продуктов сгорания; Установка варочной панели
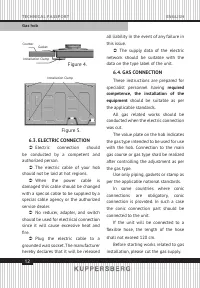
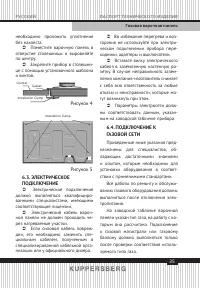
- 35 Рисунок 4; ПОДКЛЮЧЕНИЕ
- 37 Настройка подачи
- 38 МОДЕЛИ, ОСНАЩЕННЫЕ ЭЛЕКТРОПОДЖИГОМ (автоматический; ручку регулятора, отрегулируйте пламя до нужной интенсивности.; Рисунок 6
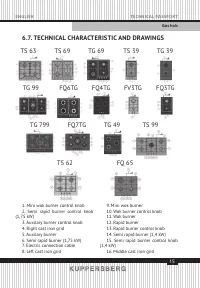
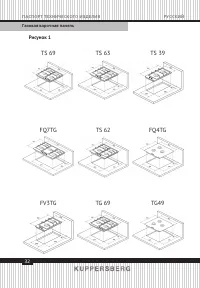
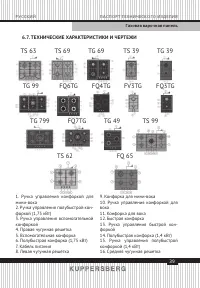
- 39 ТЕХНИЧЕСКИЕ ХАРАКТЕРИСТИКИ И ЧЕРТЕЖИ
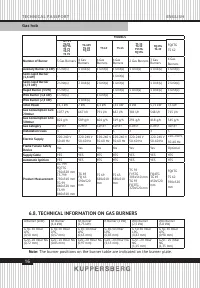
- 40 ТЕХНИЧЕСКИЕ СВЕДЕНИЯ О ГАЗОВЫХ КОНФОРКАХ
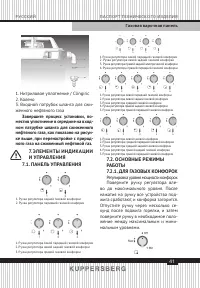
- 41 местив уплотнение в середине на вход-; ЭЛЕМЕНТЫ ИНДИКАЦИИ
- 42 Не удерживайте устройство под
- 44 Предупреждения
- 45 Во время чистки не снимайте
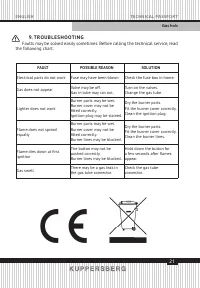
- 46 П О И С К И УС Т РА Н Е Н И Е Н Е И С П РА В Н О С Т Е Й
- 48 УС ТА Н О В КА, ГА РА Н Т И Й Н О Е И П О С Т ГА РА Н Т И Й Н О Е О Б С Л УЖ И В А Н И Е; Телефон горячей линии Kuppersberg:; Полный список авторизованных сервисных центров Kuppersberg; УСЛОВИЯ ГАРАНТИИ
Характеристики

Остались вопросы?Не нашли свой ответ в руководстве или возникли другие проблемы? Задайте свой вопрос в форме ниже с подробным описанием вашей ситуации, чтобы другие люди и специалисты смогли дать на него ответ. Если вы знаете как решить проблему другого человека, пожалуйста, подскажите ему :)


