
Варочная панель Korting HI 64013 B - инструкция пользователя по применению, эксплуатации и установке на русском языке. Мы надеемся, она поможет вам решить возникшие у вас вопросы при эксплуатации техники.
Если остались вопросы, задайте их в комментариях после инструкции.
"Загружаем инструкцию", означает, что нужно подождать пока файл загрузится и можно будет его читать онлайн. Некоторые инструкции очень большие и время их появления зависит от вашей скорости интернета.


13
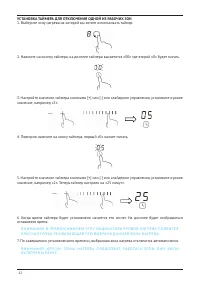
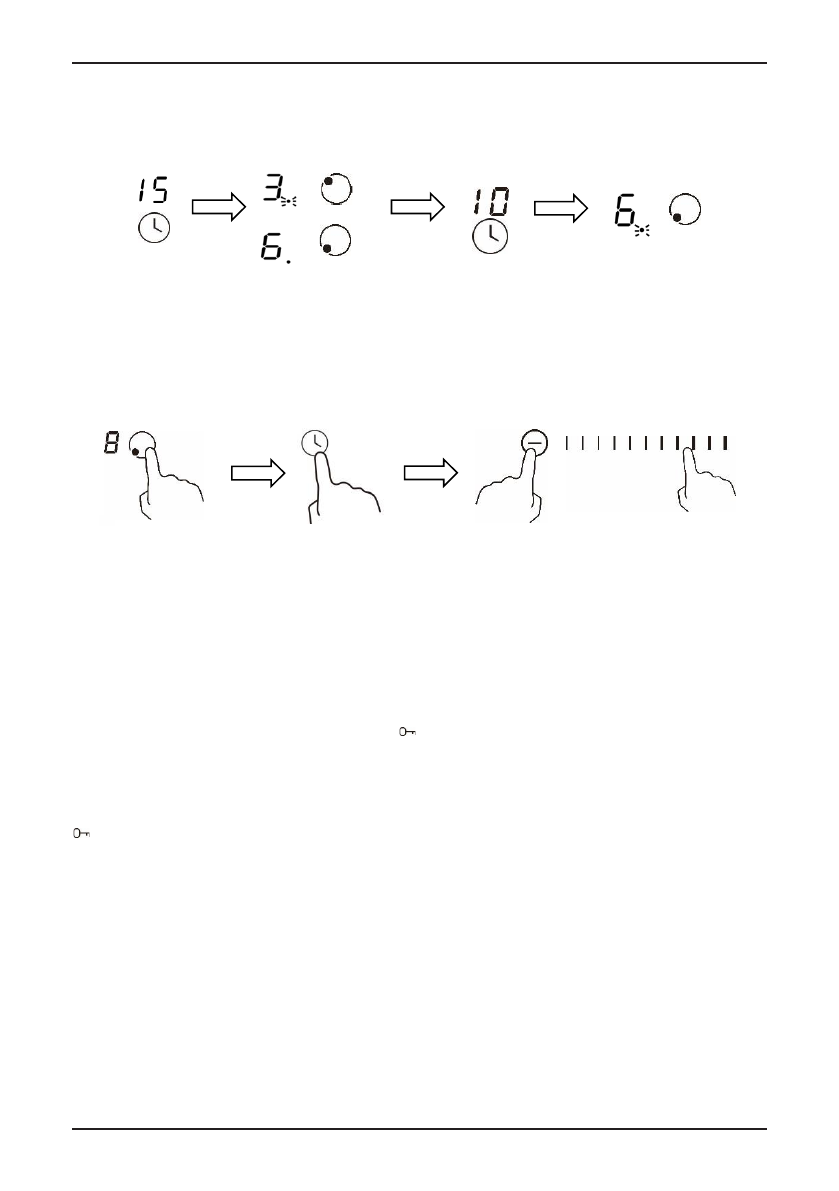
УСТА Н О В КА ТА Й М Е РА Н А Н Е С КОЛ Ь КО РА Б О Ч И Х З О Н
Если таймер выбран на несколько зон нагрева, то в правом нижнем углу индикаторов уровня нагре-
ва будут светиться красные точки, где установлен таймер. На дисплее таймера будет отображаться
время самой ранней к отключению зоны нагрева и красная точка напротив этой зоны будет мигать.
15
6.
When the time is set, it will begin to count down immediately. The display will
show the remaining time.
NOTE: There will be a red dot in the right bottom corner of power level indication
which indicating that zone is selected.
7.
When cooking timer expires, the correspondingcookingzone will be switch off
automatically.
Note: Other cooking zones will keep operating if they are turned on previously.
If the timer is set on more than one zone:
1.
When you set timer for several cooking zones, red dots of the relevant cooking
zones are indicated. The timer display shows the min. timer. The dot of the
corresponding zone blinks.
(set to 15 minutes)
(set to 25 minutes)
2. Once the countdown timer expires, the corresponding zone will switch off. Then it
will show the new min. timer and the dot of corresponding zone will flash.
Note: Touch the heating zone selection control, the corresponding timer will be
shown in the timer indicator.
Cancelled the timer
1.
Touching the heating zone selection controlthat you want
to cancel the timer.
2.
Touching the timer control, the indicator will flash.
3.
Touching the slidercontrolor “-” to set the timer to “00”, the timer is cancelled.
Если вы хотите узнать, сколько времени таймера осталось у другой зоны нагрева, нажмите на соот-
ветствующую кнопку выбора зоны нагрева.
ОТКЛЮЧЕНИЯ ТАЙМЕРА
1. Выберите зону нагрева.
2. Нажмите на кнопку таймера, индикатор начнет мигать.
3. Переведите значение таймера на «00» кнопкой [-] или слайдером управления.
14
5.
Set the time by touching “+” “-” or slider control, (e.g.2), now the timer you set is
25 minutes.
6.
When the time is set, it will begin to count down immediately. The display will
show the remaining time.
7.
Buzzer will bips for 30 seconds and the timer indicator shows
“- - ” when the setting timefinished.
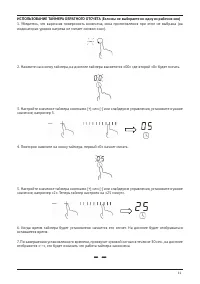
Using the timer to switch off one or more cooking zones
1.
Touching the heating zone selection control that you want
to set the timer for.
2.
Touch timer control, the “00” will show in the timer
display. And the “0” flashes.
3.
Set the time by touching “+” “-” or sliding the control. (e.g.5)
4.
Touch timer control again, the “0” will flash.
5.
Set the time by touching “+” “-” or slider control (e.g.2), now the timer you set is 25
minutes.
15
6.
When the time is set, it will begin to count down immediately. The display will
show the remaining time.
NOTE: There will be a red dot in the right bottom corner of power level indication
which indicating that zone is selected.
7.
When cooking timer expires, the correspondingcookingzone will be switch off
automatically.
Note: Other cooking zones will keep operating if they are turned on previously.
If the timer is set on more than one zone:
1.
When you set timer for several cooking zones, red dots of the relevant cooking
zones are indicated. The timer display shows the min. timer. The dot of the
corresponding zone blinks.
(set to 15 minutes)
(set to 25 minutes)
2. Once the countdown timer expires, the corresponding zone will switch off. Then it
will show the new min. timer and the dot of corresponding zone will flash.
Note: Touch the heating zone selection control, the corresponding timer will be
shown in the timer indicator.
Cancelled the timer
1.
Touching the heating zone selection controlthat you want
to cancel the timer.
2.
Touching the timer control, the indicator will flash.
3.
Touching the slidercontrolor “-” to set the timer to “00”, the timer is cancelled.
БЛОКИРОВКА УПРАВЛЕНИЯ
Заблокировать кнопки управления можно во избежание непредусмотренного использования
оборудования (например, случайного включения рабочих зон детьми).
При блокировке все кнопки управления, кроме кнопки включения / выключения и кнопки будут
недоступны для нажатия.
ЧТОБЫ ЗАБЛОКИРОВАТЬ КНОПКИ УПРАВЛЕНИЯ
Нажмите и удерживайте кнопку блокировки
12
Cancel Boost function
1. Select the zone with boost function.
2. Touching the booster key “P” or select the power level to cancel the Boost
function, and select the level you want to set.
Or Or
• Boost function only can last for 5 minutes and twin boost function can last for 10
minutes, after that the zone willgo to level 9 automatically.
Locking the Controls
•
You can lock the controls to prevent unintended use (for example children
accidentally turning the cooking zones on).
•
When the controls are locked, all the controls except the ON/OFF control are
disabled.
To lock the controls
Touch the keylock control
. The timer indicator will show “Lo “.
To unlock the controls
1.
Make sure the hob is turned on.
2.
Touch and hold the keylock control
for 3 seconds.
3.
You can now start using your hob.
When the hob is in lock mode, all the controls are disabledexcept the ON/OFF,
you can always turn the hob off with the ON/OFF control in an emergency, but
you shall unlock the hob first in the next operation.
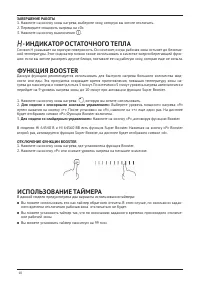
Residual Heat Warning
When the hob has been operating for some time, there will be some residualheat. The
letter “H” appears to warn you to keep away from it.
в течение 1 секунды. Индикатор таймера будет
показывать символ «Lo». Управление варочной поверхности будет заблокировано.
ЧТОБЫ РАЗБЛОКИРОВАТЬ КНОПКИ УПРАВЛЕНИЯ
Убедитесь, что варочная поверхность подключена. Нажмите и удерживайте кнопку блокировки
12
Cancel Boost function
1. Select the zone with boost function.
2. Touching the booster key “P” or select the power level to cancel the Boost
function, and select the level you want to set.
Or Or
• Boost function only can last for 5 minutes and twin boost function can last for 10
minutes, after that the zone willgo to level 9 automatically.
Locking the Controls
•
You can lock the controls to prevent unintended use (for example children
accidentally turning the cooking zones on).
•
When the controls are locked, all the controls except the ON/OFF control are
disabled.
To lock the controls
Touch the keylock control
. The timer indicator will show “Lo “.
To unlock the controls
1.
Make sure the hob is turned on.
2.
Touch and hold the keylock control
for 3 seconds.
3.
You can now start using your hob.
When the hob is in lock mode, all the controls are disabledexcept the ON/OFF,
you can always turn the hob off with the ON/OFF control in an emergency, but
you shall unlock the hob first in the next operation.
Residual Heat Warning
When the hob has been operating for some time, there will be some residualheat. The
letter “H” appears to warn you to keep away from it.
в течение 3 секунд. Управление варочной поверхности будет разблокировано.
ВНИМАНИЕ! КОГДА УСТРОЙСТВО НАХОДИТСЯ В РЕЖИМЕ БЛОКИРОВКИ, ВСЕ КНОПКИ
УПРАВЛЕНИЯ, КРОМЕ КНОПКИ ВК ЛЮЧЕНИЯ / ВЫК ЛЮЧЕНИЯ И ФУНКЦИИ STOP & GO,
ДЕАКТИВИРОВАНЫ. ВЫ ВСЕГДА МОЖЕТЕ ОТК ЛЮЧИТЬ ВАРОЧНУЮ ПОВЕРХНОСТЬ В ЭКС-
ТРЕННОМ СЛУЧАЕ С ПОМОЩЬЮ КНОПКИ ВК ЛЮЧЕНИЯ / ВЫК ЛЮЧЕНИЯ, НО Д ЛЯ ПЕРЕ-
ХОДА К СЛЕДУЮЩЕЙ ОПЕРАЦИИ НЕОБХОДИМО ПРОВЕСТИ РАЗБЛОКИРОВКУ.


