Варочная панель Gorenje G 640 AX1 - инструкция пользователя по применению, эксплуатации и установке на русском языке. Мы надеемся, она поможет вам решить возникшие у вас вопросы при эксплуатации техники.
Если остались вопросы, задайте их в комментариях после инструкции.
"Загружаем инструкцию", означает, что нужно подождать пока файл загрузится и можно будет его читать онлайн. Некоторые инструкции очень большие и время их появления зависит от вашей скорости интернета.

41
INSTALLATION
4) FIXING THE HOT PLATE
The hot plate has a special seal which prevents liquid from getting into the cabinet. Strictly comply with the
following instructions in order to correctly apply this seal:
-
detach the seals from their backing, checking that the transparent protection still adheres to the seal itself.
-
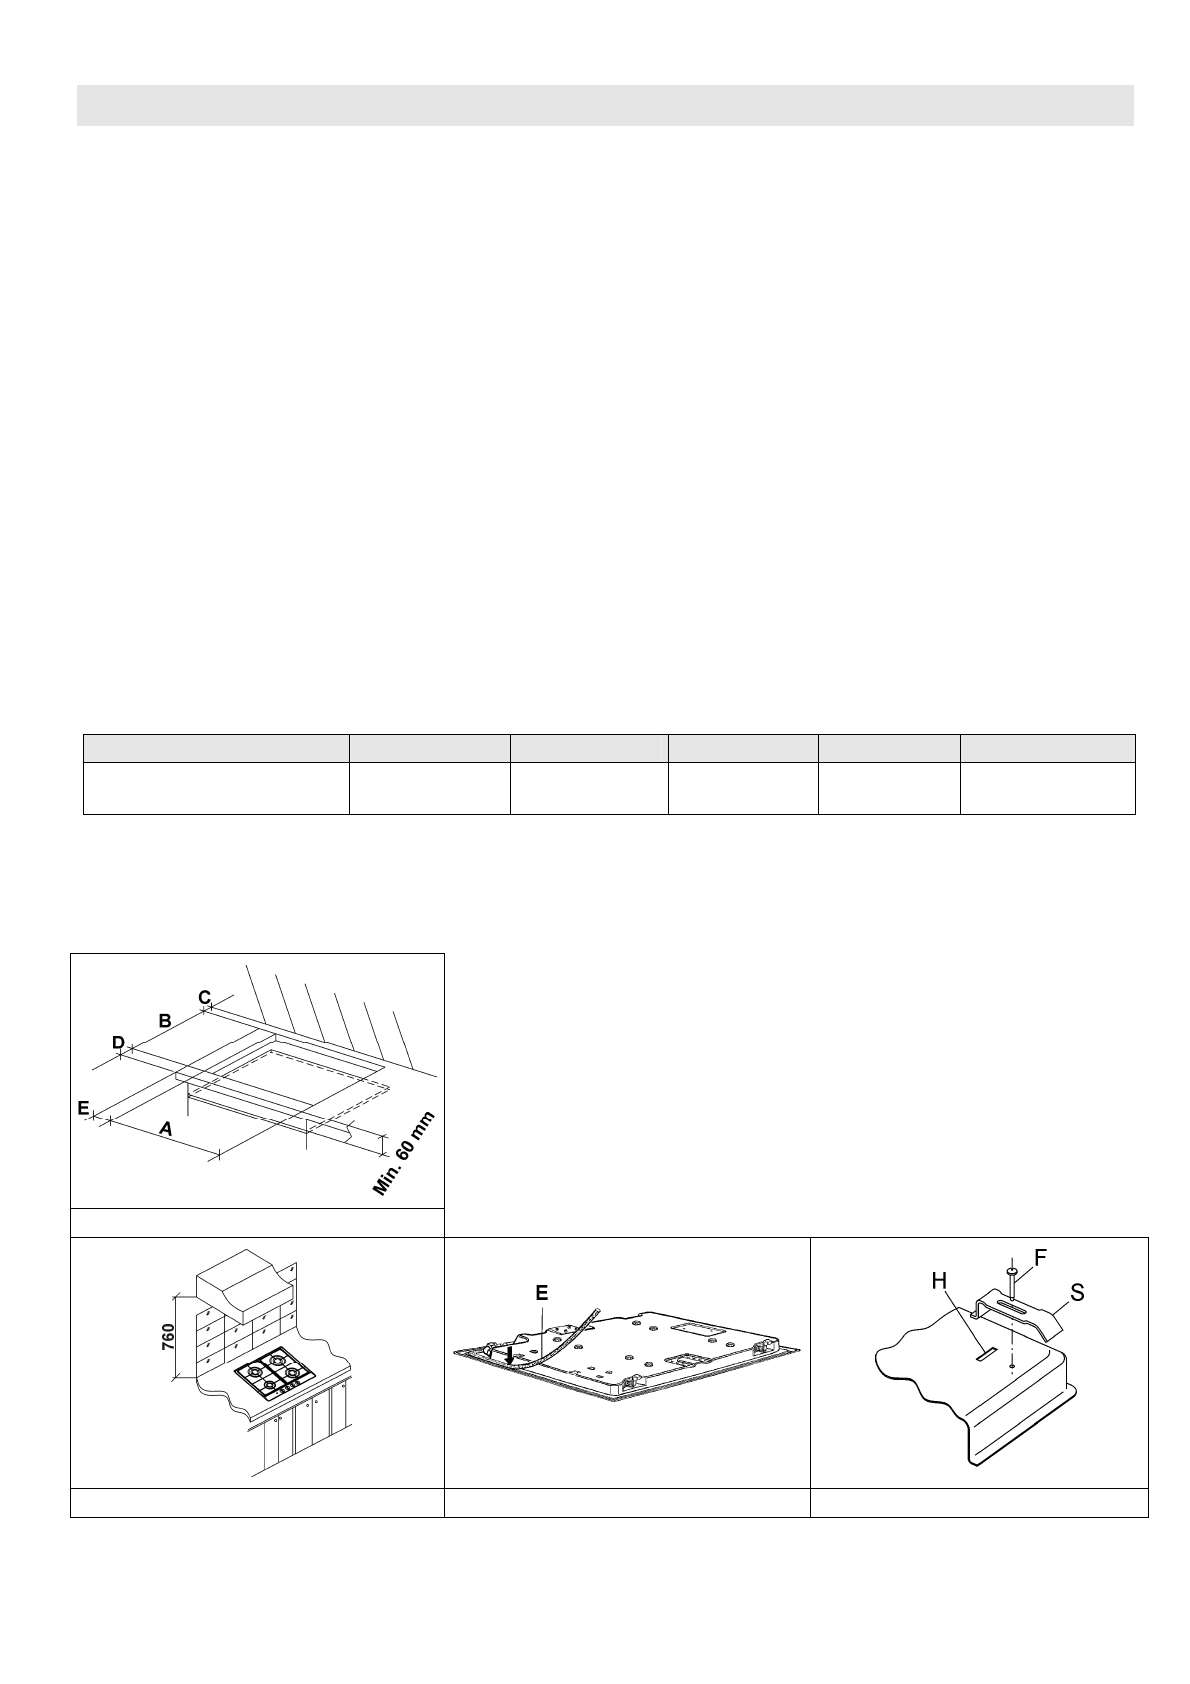
Overturn the hot plate and correctly position seal “E” (fig. 9) under the edge of the hot plate itself, so that
the outer side of the seal perfectly matches the outer edge of the hot plate. The ends of the strips must fit
together without overlapping.
-
Evenly and securely fix the seal to the hot plate, pressing into place with the fingers and remove the strip
of protective paper from the seal and set the plate into the hole made in the cabinet.
-
Fix the hob with the proper brackets “S” and fit the prominent part into the porthole “H” on the bottom;
turn the screw “F” until the bracket “S” stick on the top (fig. 10).
-
In order to avoid accidental touch with the overheating bottom of the hob, during the working, is
necessary to put a wooden insert, fixed by screws, at a minimum distance of 60 mm from the top (see fig. 7).
COMPLY WITH THE DIMENSIONS (mm)
A
B
C
D
E
4 burners
553
473
63.5
63.5
100 min.
FIG. 7
FIG. 8
FIG. 9
FIG. 10


