
Варочная панель Candy CEHDD30TCT - инструкция пользователя по применению, эксплуатации и установке на русском языке. Мы надеемся, она поможет вам решить возникшие у вас вопросы при эксплуатации техники.
Если остались вопросы, задайте их в комментариях после инструкции.
"Загружаем инструкцию", означает, что нужно подождать пока файл загрузится и можно будет его читать онлайн. Некоторые инструкции очень большие и время их появления зависит от вашей скорости интернета.


EN-19
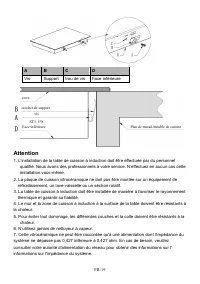
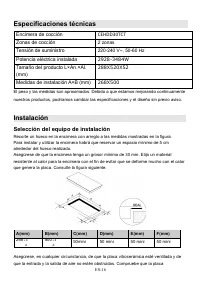
We have professionals at your service. Please never conduct the operation by
yourself.
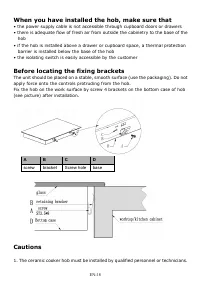
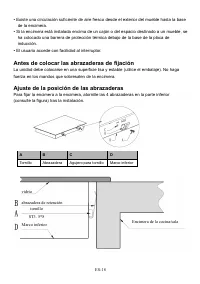
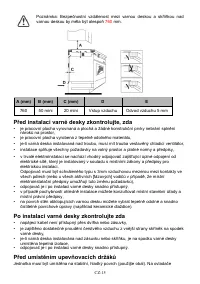
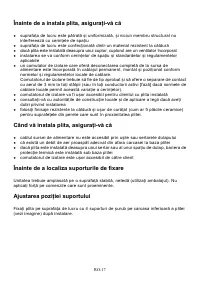
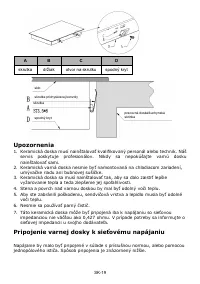
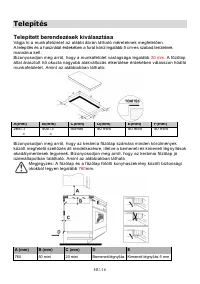
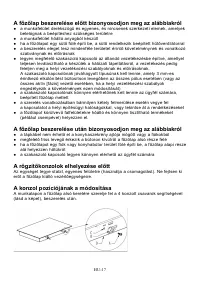
2. The ceramic cooker hob shall not be mounted to cooling equipment,
dishwashers and rotary dryers.
3. The ceramic cooker hob shall be installed such that better heat radiation can be
ensured to enhance its reliability.
4. The wall and induced heating zone above the work surface shall withstand heat.
5. To avoid any damage, the sandwich layer and adhesive must be resistant to
heat.
6. A steam cleaner is not to be used.
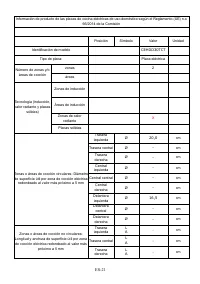
7. This ceramic can be connected only to a supply with system impedance no more
than 0.427 ohm. In case necessary, please consult your supply authority for
system impedance information.
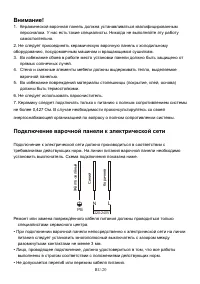
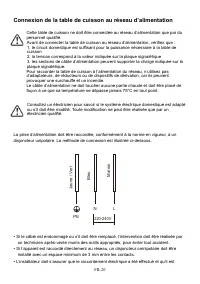
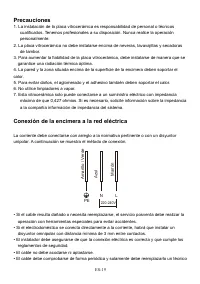
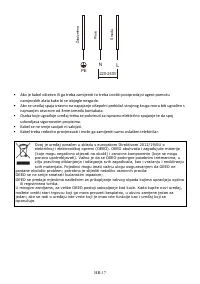
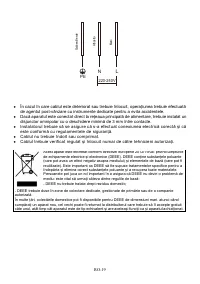
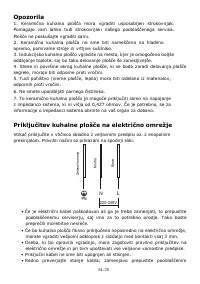
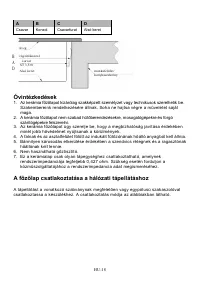
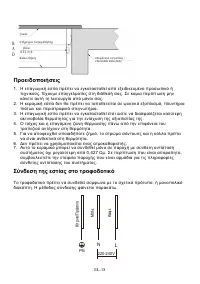
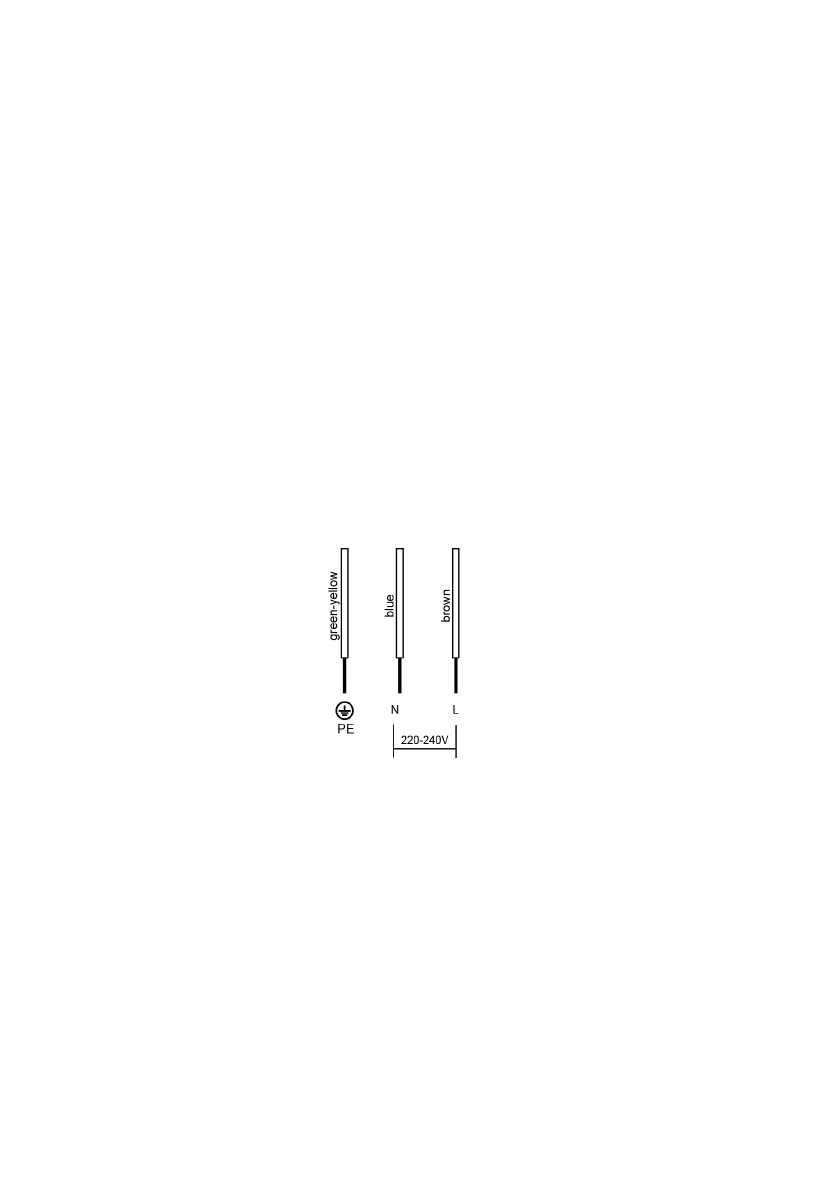
Connecting the hob to the mains power supply
The power supply should be connected in compliance with the relevant standard,
or a single-pole circuit breaker. The method of connection is shown below.
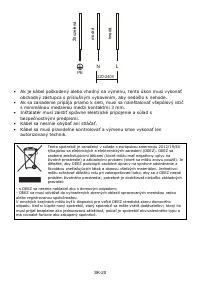
1. If the cable is damaged or needs replacing, this should be done by an
after-sales technician using the proper tools, so as to avoid any accidents.
2. If the appliance is being connected directly to the mains supply, an omnipolar
circuit breaker must be installed with a minimum gap of 3mm between the
contacts.
3. The installer must ensure that the correct electrical connection has been made
and that it complies with safety regulations.
4. The cable must not be bent or compressed.
5. The cable must be checked regularly and only replaced by a properly qualified
person.
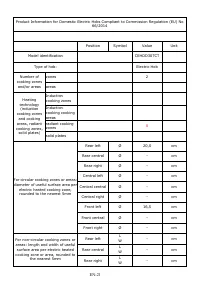
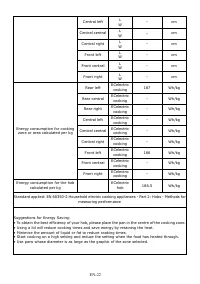
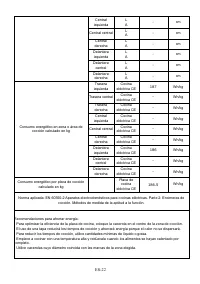
Содержание
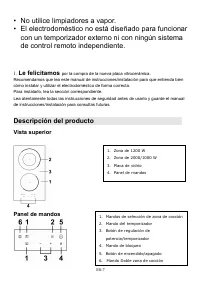
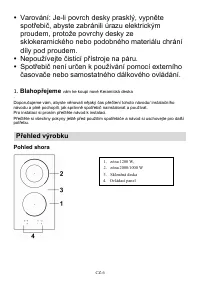
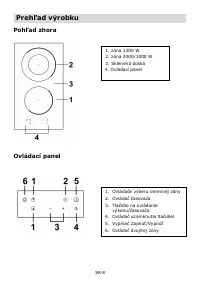
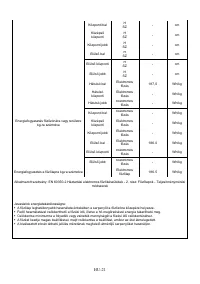
- 30 Поздравляем вас
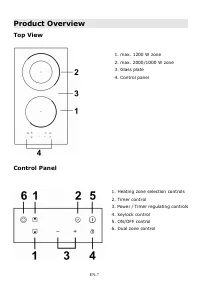
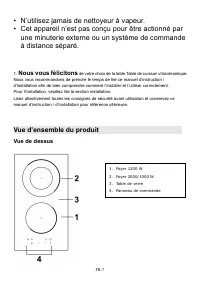
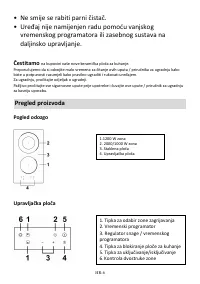
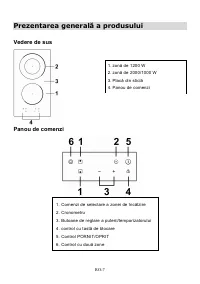
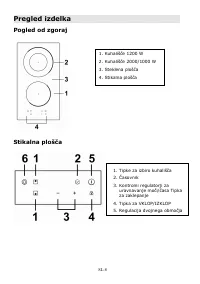
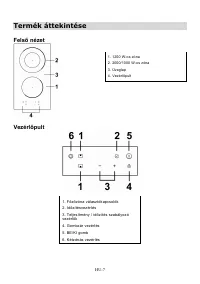
- 31 Обзор продукта; Вид сверху
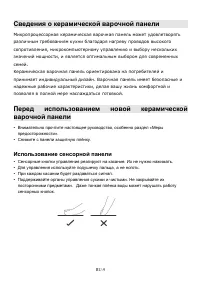
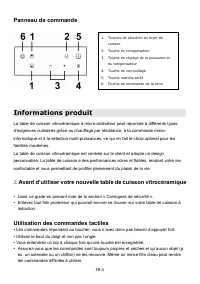
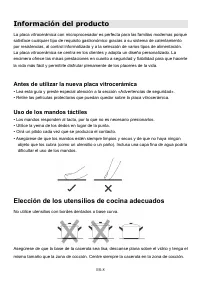
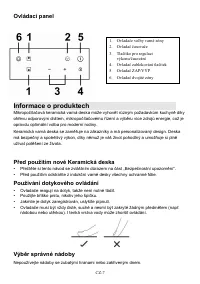
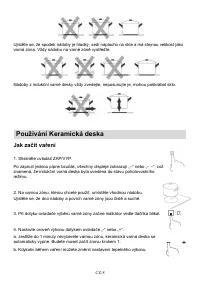
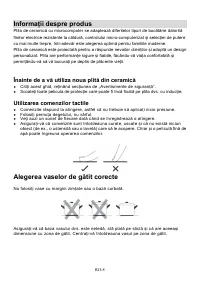
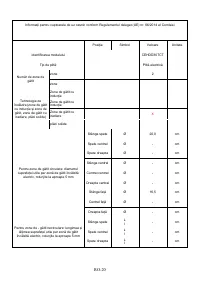
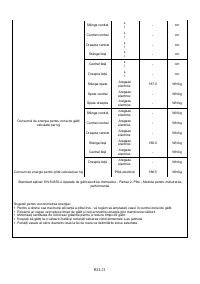
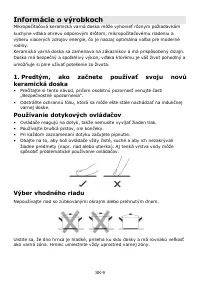
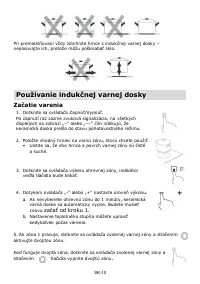
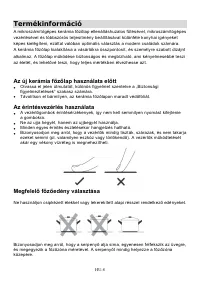
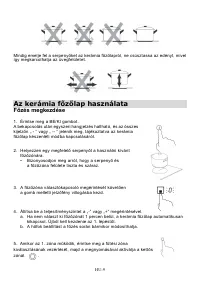
- 32 Сведения о керамической варочной панели; Перед использованием новой керамической; Использование сенсорной панели
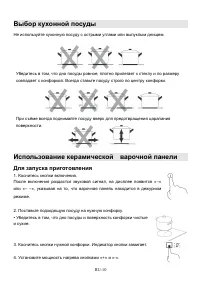
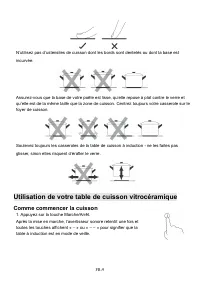
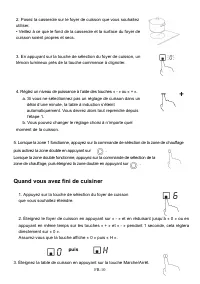
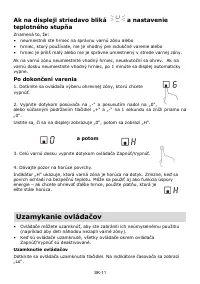
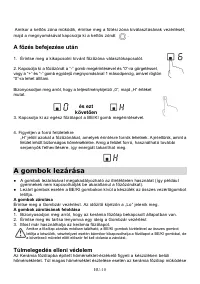
- 33 Для запуска приготовления
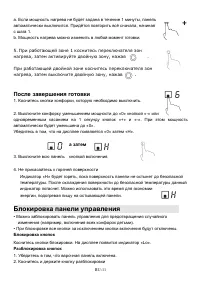
- 34 После завершения готовки; а затем; Блокировка панели управления
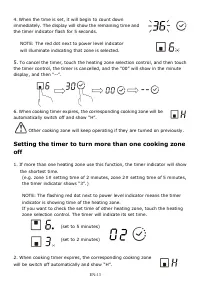
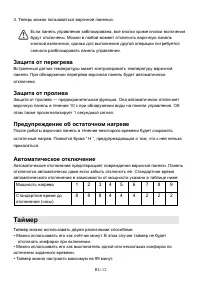
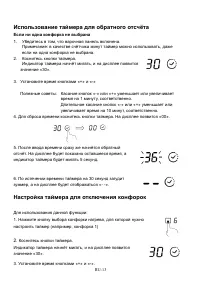
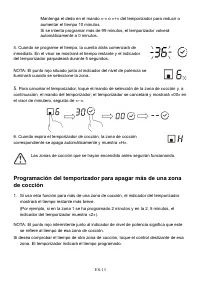
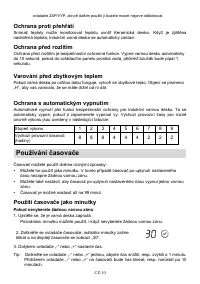
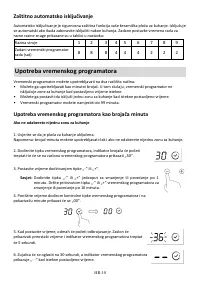
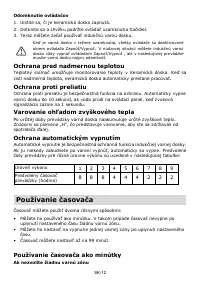
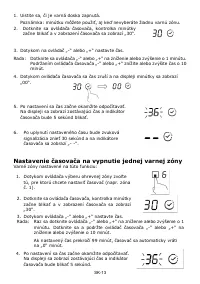
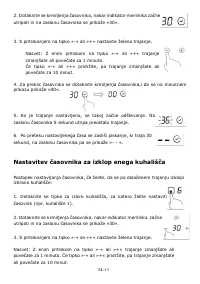
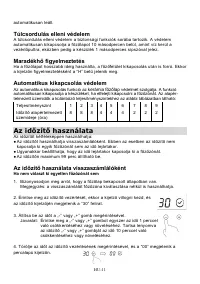
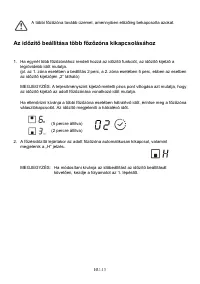
- 35 Таймер
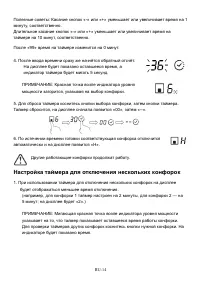
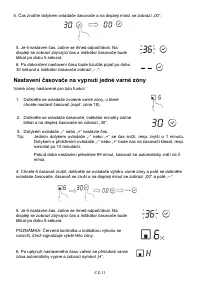
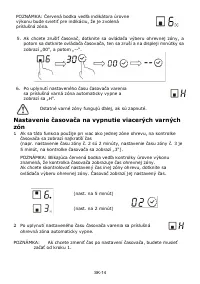
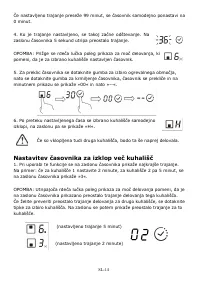
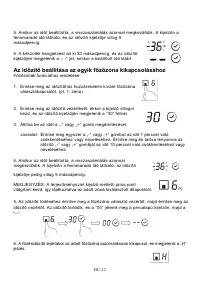
- 36 Использование таймера для обратного отсчёта; Настройка таймера для отключения конфорок
- 37 Настройка таймера для отключения нескольких конфорок
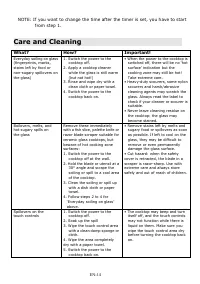
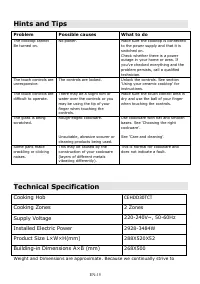
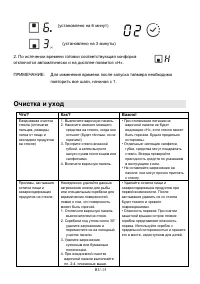
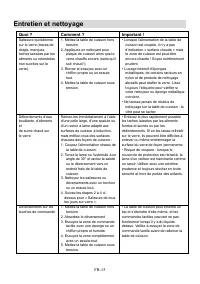
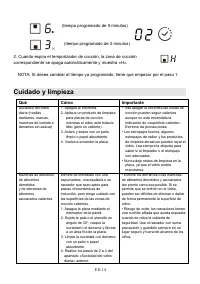
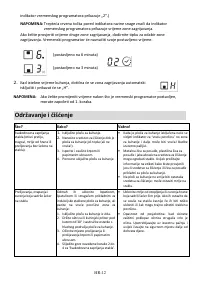
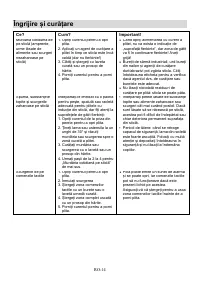
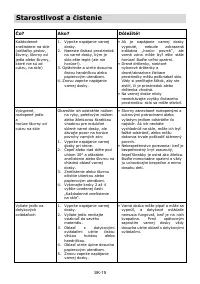
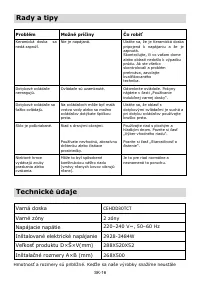
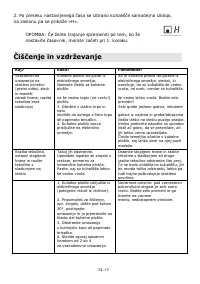
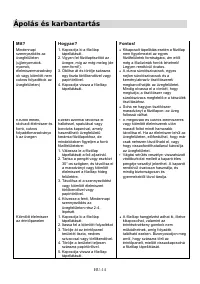
- 38 Очистка и уход
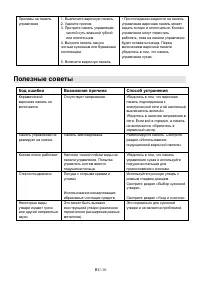
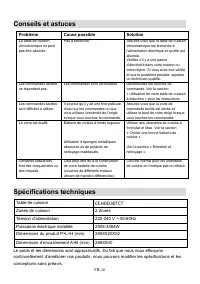
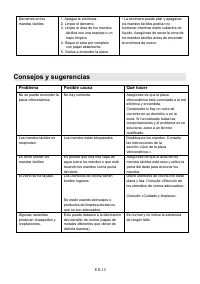
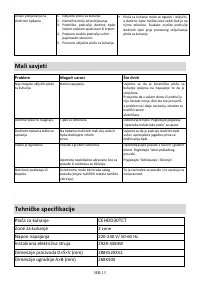
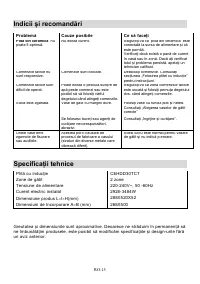
- 39 Полезные советы
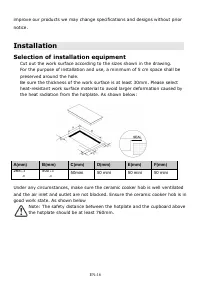
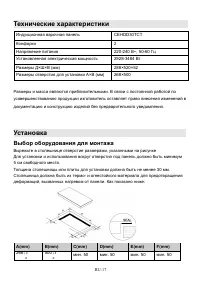
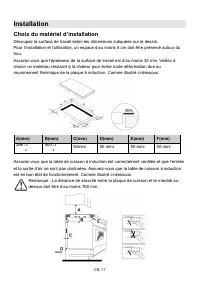
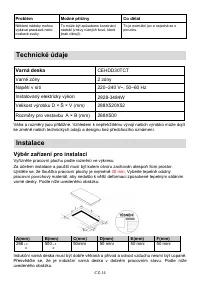
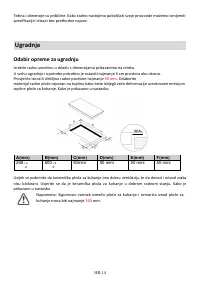
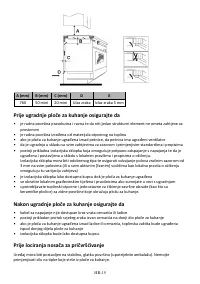
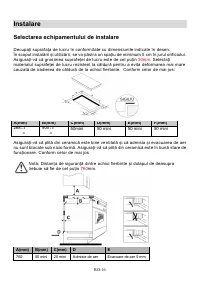
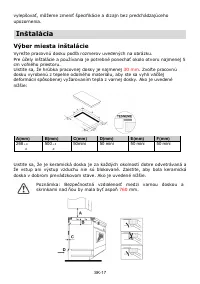
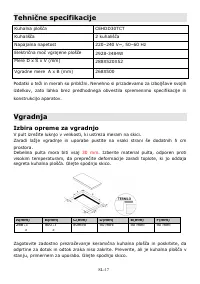
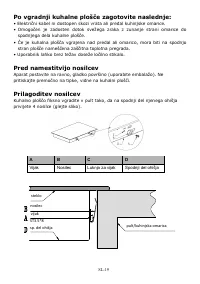
- 40 Выбор оборудования для монтажа
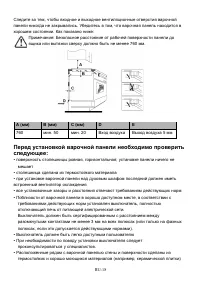
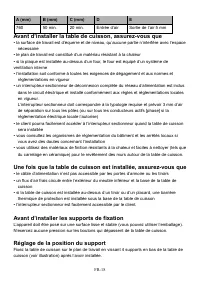
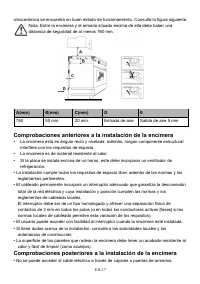
- 41 Перед установкой варочной панели необходимо проверить
- 43 Подключение варочной панели к электрической сети


