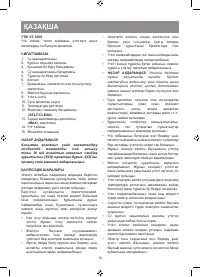
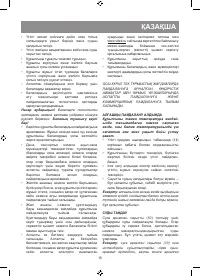
Утюги VITEK VT-1268 - инструкция пользователя по применению, эксплуатации и установке на русском языке. Мы надеемся, она поможет вам решить возникшие у вас вопросы при эксплуатации техники.
Если остались вопросы, задайте их в комментариях после инструкции.
"Загружаем инструкцию", означает, что нужно подождать пока файл загрузится и можно будет его читать онлайн. Некоторые инструкции очень большие и время их появления зависит от вашей скорости интернета.


5
ENGLISH
higher temperature (silk/wool). Cotton and linen
items should be ironed last.
•
If an item is made of mixed fabrics, the iron
should be set to the lowest temperature (for
instance, if an item is 60% polyester and 40%
cotton, it should be ironed at temperature used
for polyester ironing «•»).
•
If you cannot define the fabric structure, find
a spot that is inconspicuous when the item is
being worn and select the ironing temperature
experimentally (always start with the lowest tem-
perature and raise it gradually until you get the
desired result).
•
Corduroy and other fabrics that become glossy
quickly should be ironed strictly in one direction
(in the direction of the pile) with slight pressure.
•
To avoid appearance of glossy spots on syn-
thetic and silk fabrics, iron them backside.
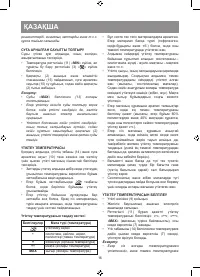
SETTING THE IRONING TEMPERATURE
•
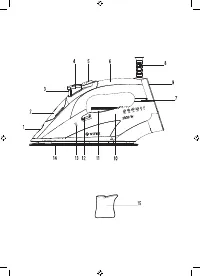
Place the iron on its base (9).
•
Insert the power plug into the mains socket.
•
Turn the control knob (11) to set the required
ironing temperature: «•», «••», «•••» or
«MAX», depending on the type of fabric, the
indicator (7) will light up.
•
Once the temperature of the soleplate (14)
reaches the set point, the indicator (7) will go
out and you can start ironing.
Note:
•
If you are ironing at high temperature but you
need to switch to lower temperature, wait until
the soleplate temperature decreases and the
indicator (7) lights up, and only then you may
start ironing.
WATER SPRAY
•
You can dampen the fabric by pressing the water
spray button (4) several times.
•
Make sure that there is enough water in the
water tank (10).
DRY IRONING
•
Place the iron on its base (9).
•
Insert the power plug into the mains socket.
•
Set the continuous steam supply knob (5) to the
position «
» – the steam supply is off.
•
Turn the control knob (11) to set the required
ironing temperature: «•», «••», «•••» or
«MAX», depending on the type of fabric, the
indicator (7) will light up.
•
Once the temperature of the soleplate (14)
reaches the set point, the indicator (7) will go
out and you can start ironing.
•
After you finish ironing, set the temperature con-
trol knob (11) to the «MIN» position.
•
Pull the power plug out of the mains socket and
let the iron cool down completely.
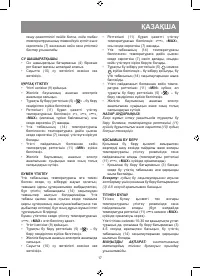
STEAM IRONING
The iron is provided with an anti-drip valve that
stops water supply if the iron soleplate temperature
is too low, it prevents dripping from the iron sole-
plate (14) openings. During heating and cooling of
the iron soleplate, you will hear characteristic clicks
of the anti-drip valve opening/closing, which indi-
cates its normal operation.
While steam ironing it is necessary to set the ironing
temperature «•••», «МАХ».
•
Place the iron on its base (9).
•
Set the continuous steam supply knob (5) to the
position «
» – the steam supply is off.
•
Insert the power plug into the mains socket.
•
Make sure that there is enough water in the
water tank (10).
•
Turn the control knob (11) to set the required
ironing temperature: «•••» or «MAX», the pilot
lamp (7) will light up.
•
When the soleplate (14) reaches the set tem-
perature, the indicator (7) will go out, you can
start ironing.
•
Turn the continuous steam supply knob (5) to
the position «
» or «
» – steam supply is on,
steam will start going out from the iron soleplate
(14) openings.
•
After you finish ironing, set the temperature
control knob (11) to the position «MIN», and the
continuous steam supply knob (5) to the posi-
tion «
» – steam supply is off.
•
Pull the power plug out of the mains socket and
let the iron cool down completely.
ATTENTION!
If the steam is not constantly supplied during oper-
ation, check whether the temperature control knob
(11) is set properly and there is water in the water
tank (10).
BURST OF STEAM
The burst of steam function is useful for ironing
folds and can only be used at high ironing tempera-
tures (when the temperature control knob (11) is set
to the position «•••», «МАХ»).
Характеристики

Остались вопросы?Не нашли свой ответ в руководстве или возникли другие проблемы? Задайте свой вопрос в форме ниже с подробным описанием вашей ситуации, чтобы другие люди и специалисты смогли дать на него ответ. Если вы знаете как решить проблему другого человека, пожалуйста, подскажите ему :)


