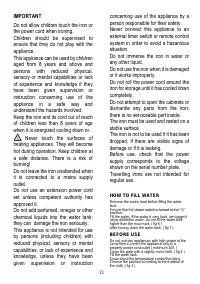
Утюги Gorenje SIH1100TBT - инструкция пользователя по применению, эксплуатации и установке на русском языке. Мы надеемся, она поможет вам решить возникшие у вас вопросы при эксплуатации техники.
Если остались вопросы, задайте их в комментариях после инструкции.
"Загружаем инструкцию", означает, что нужно подождать пока файл загрузится и можно будет его читать онлайн. Некоторые инструкции очень большие и время их появления зависит от вашей скорости интернета.


14
● Synthetic fabrics (e.g. acrylic, nylon,
polyamide, polyester)
●● Silk,Woll
●●● Cotton, linen
Put the cloth and prepare the ironing.
DRY IRONING
Make sure that the iron voltage ( see name plate )
and the mains voltage match.
Insert the mains plug into a correctly installed
safety socket. ( fig 8 ). Ensure that the steam
switch is turned to the “ 0 ” position ( fig 11 ). Sort
out the garments according to their ironing
temperatures. Start with the lower temperatures.
( fig 3 ). The LED high up. As soon as it shuts off,
the set temperature is reached ( approximately 3
min ). Now you can start to iron. Always pull the
plug out of the socket after using the iron.
STEAM IRONING
Make sure that the iron voltage ( see name plate )
and the mains voltage match. Insert the mains plug
into a correctly installed safety socket. ( fig 8 ).
Ensure that the steam switch is turned to the “ 0 ”
position ( fig 11 ). Turn the temperature knob to the
max, ( fig 10 ) for several minutes. Water may leak
from the sole-plate if the temperature selected is
too low. The LED shut off. Ensure that the steam
switch is turned to the steam position. ( fig 5 )
Release the steam for several seconds, then iron
the cloth. When use, power lamp will switch off
upon reaching selected temperature and will
continue to switch on and off indicating
maintenance of constant temperature. ( fig 12)
After use, close the steam and temperature
variation. Disconnect the appliance from the mains
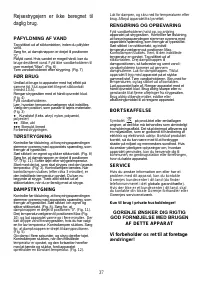
CLEANING AND STORAGE
Fill the half of the water tank and place it to the
plate. Make sure that the iron voltage ( see name
plate ) and the mains voltage match. Insert the
mains plug into the socket and set the temperature
to the max. The LED shut off. Ensure that the
temperature is reached. Remove the plug from the
socket. Turn the steam switch to steam position,
then the dirty will come from the hole with the
steam. Close the steam knob. Connect the
appliance. Use the ironing on an old cloth. Empty
the water tank. Close the temperature control, and
remove the plug from the socket.
Allow the iron to cool. Clean the iron with a slightly
moist cloth. Never use sharp or rough objects to
remove the deposits on the sole plate.
Never use any abrasive, vinegar or descaling
agents to clean the iron.
WASTE DISPOSAL
The symbol
on the product or on its
packaging indicates that this product may not be
treated as household waste. Instead it shall be
handed over to the applicable collection point for
the recycling of electrical and electronic equipment.
By ensuring this product is
disposed of correctly, you will help prevent
potential negative consequences for the
environment and human health, which could
otherwise be caused by inappropriate waste
handling of this product. For more detailed
information about recycling of this product, please
contact your local city office, your household
waste disposal service or the shop where you
purchased the product.
SERVICE
If you need information or if you have a
problem, please contact the Gorenje Customer
Care Centre in your country (you find its phone
number in the worldwide guarantee leaflet). If
there is no Customer Care Centre in your
country, go to your local Gorenje dealer or
contact the Service department of Gorenje
domestic appliances.
For personal use only!
GORENJE
WISHES YOU A LOT OF
PLEASURE WHEN USING YOUR
APPLIANCE
We reserve the right to any
modifications !
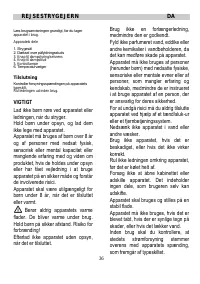
REISEBÜGELEISEN
DE
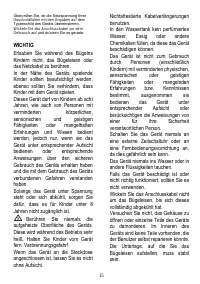
Bevor Sie Ihr neues Bügeleisen gebrauchen,
sollten Sie sorgfältig die Gebrauchsanleitung
durchlesen.
Wichtige Teile
1. Bügelfläche
2. Deckel der Nachfüllöffnung
3. Schalter für die Kontrolle des
Dampfes/Schalter zur automatischen
Reinigung
4. Dampfstoßtaste
5. Indikatorlämpchen
6. Temperaturwahlknebel
ANSCHLUSS
Характеристики

Остались вопросы?Не нашли свой ответ в руководстве или возникли другие проблемы? Задайте свой вопрос в форме ниже с подробным описанием вашей ситуации, чтобы другие люди и специалисты смогли дать на него ответ. Если вы знаете как решить проблему другого человека, пожалуйста, подскажите ему :)


