Усилители Pioneer VSX-820 - инструкция пользователя по применению, эксплуатации и установке на русском языке. Мы надеемся, она поможет вам решить возникшие у вас вопросы при эксплуатации техники.
Если остались вопросы, задайте их в комментариях после инструкции.
"Загружаем инструкцию", означает, что нужно подождать пока файл загрузится и можно будет его читать онлайн. Некоторые инструкции очень большие и время их появления зависит от вашей скорости интернета.

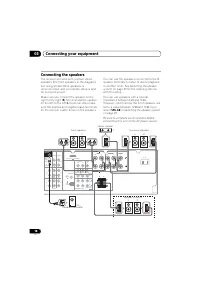

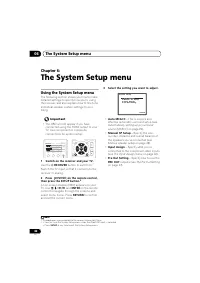


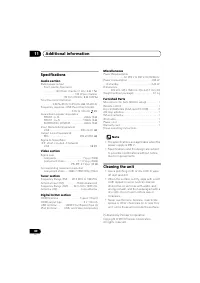


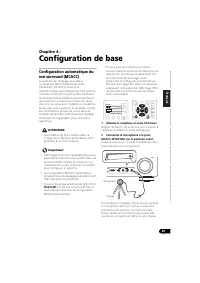


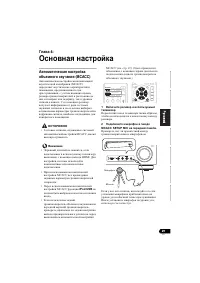

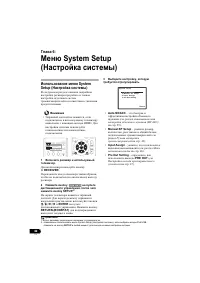


Basic Setup
04
30
En
3
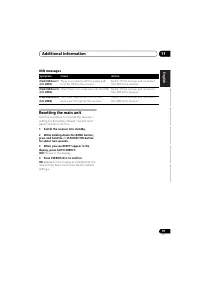
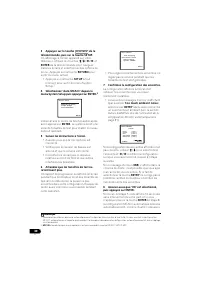
Press
on the remote control,
then press the SETUP button.
An on-screen display (OSD) appears on your
TV. Use
///
and
ENTER
on the remote
control to navigate through the screens and
select menu items. Press
RETURN
to exit the
current menu.
• Press
SETUP
at any time to exit the System
Setup menu.
1
4
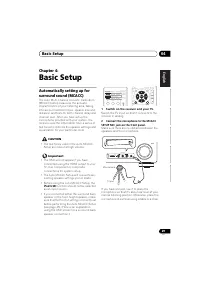
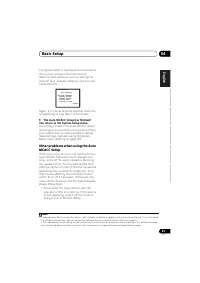
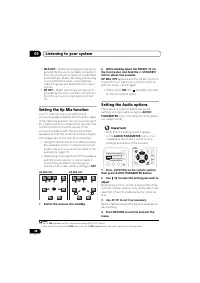
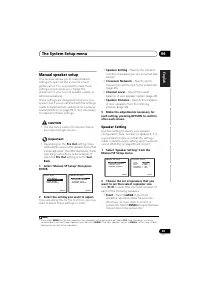
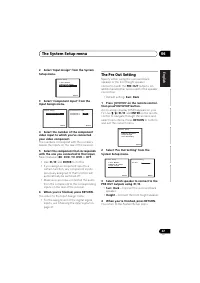
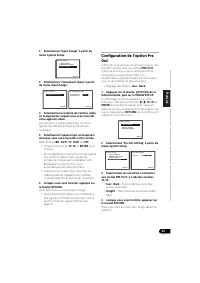
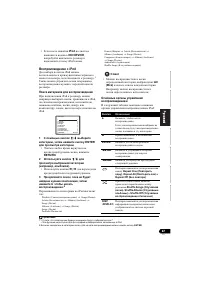
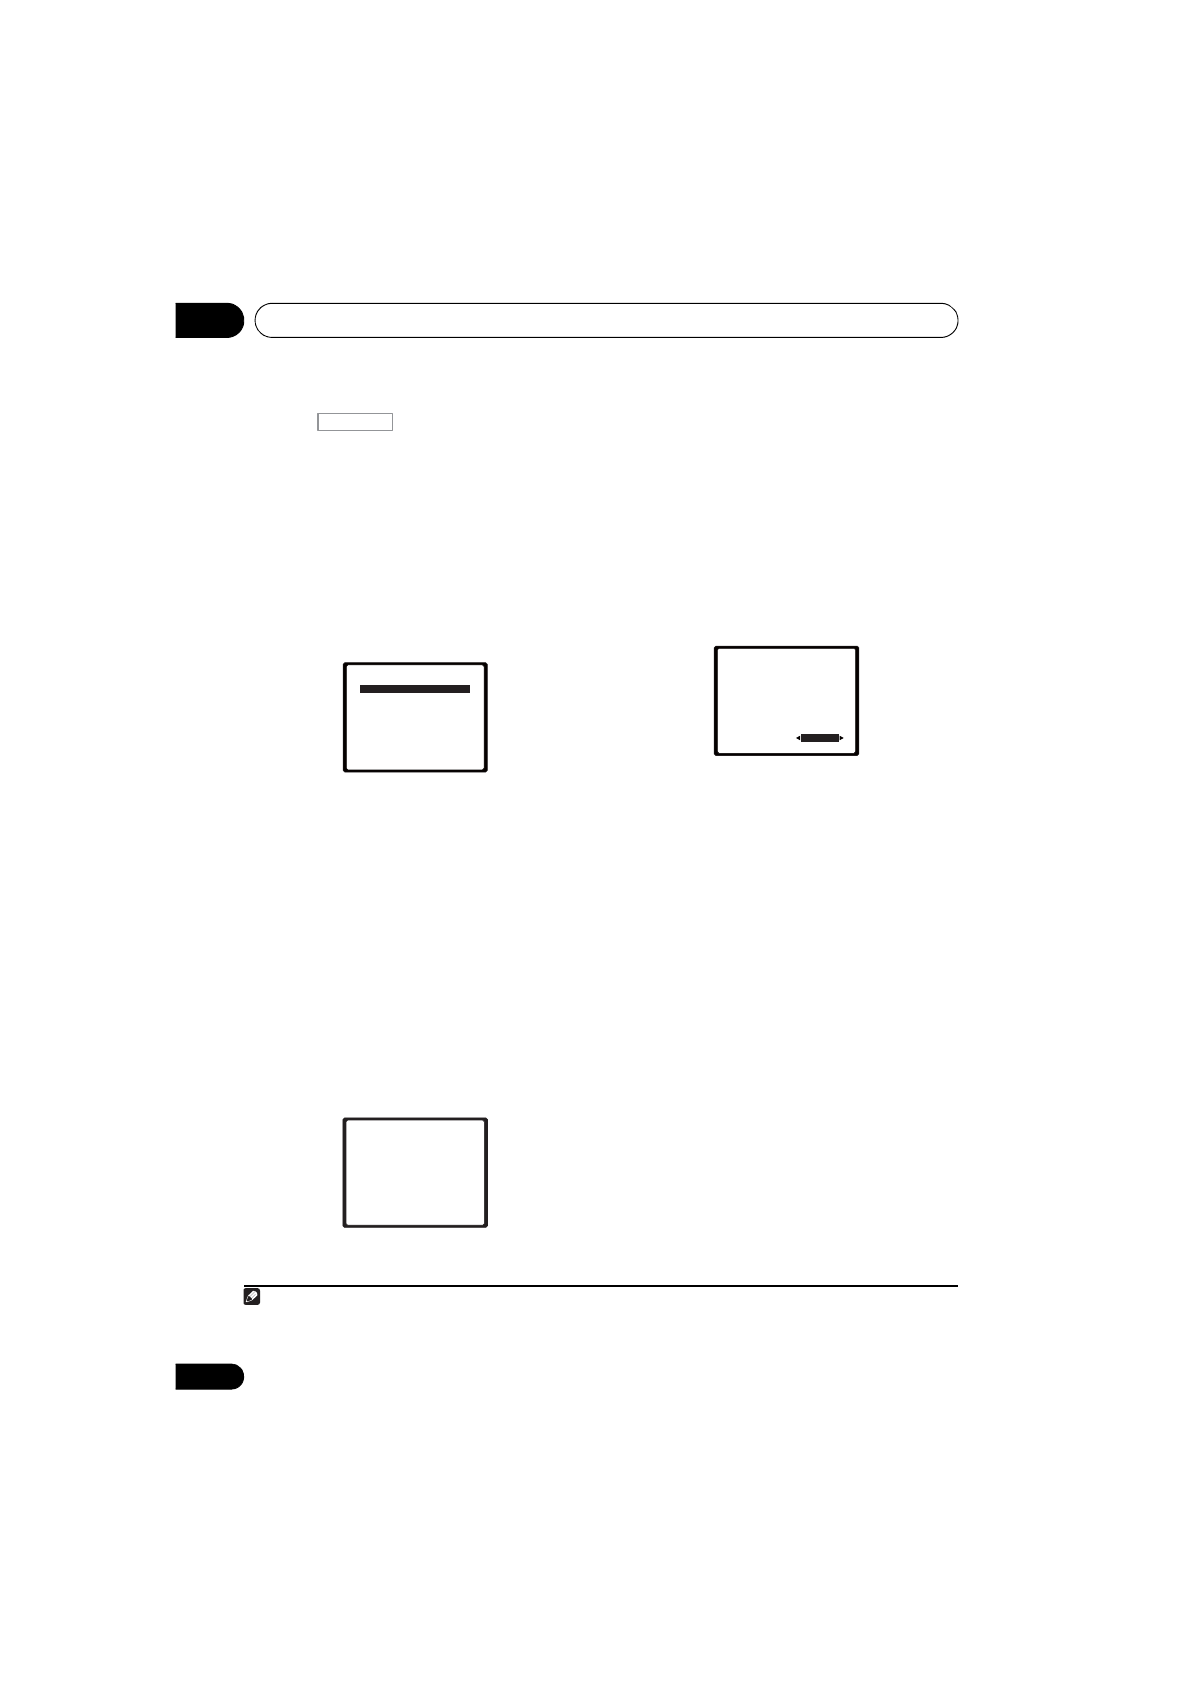
Select ‘Auto MCACC’ from the System
Setup menu then press ENTER.
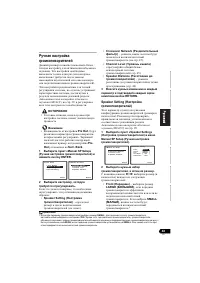
2
Try to be as quiet as possible after pressing
ENTER
. The system outputs a series of test
tones to establish the ambient noise level.
5
Follow the instructions on-screen.
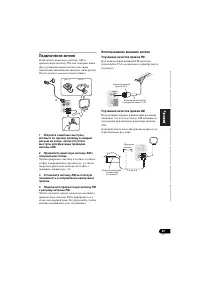
• Make sure the microphone is connected.
• Make sure the subwoofer is on and the
volume is turned up.
• See below for notes regarding background
noise and other possible interference.
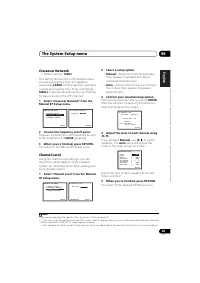
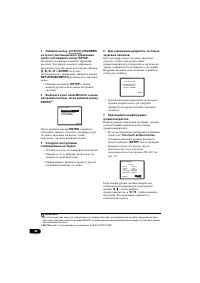
6
Wait for the test tones to finish.
A progress report is displayed on-screen while
the receiver outputs test tones to determine the
speakers present in your setup. Try to be as
quiet as possible while it’s doing this.
• For correct speaker settings, do not adjust
the volume during the test tones.
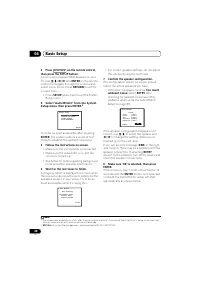
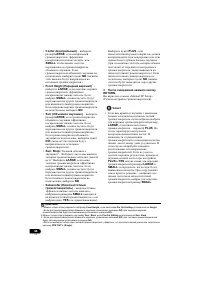
7
Confirm the speaker configuration.
The configuration shown on-screen should
reflect the actual speakers you have.
• With error messages (such as
Too much
ambient noise
) select
RETRY
after
checking for ambient noise (see
Other
problems when using the Auto MCACC
Setup
on page 31).
If the speaker configuration displayed isn’t
correct, use
/
to select the speaker and
/
to change the setting. When you’re
finished, go to the next step.
If you see an error message (
ERR
) in the right
side column, there may be a problem with the
speaker connection. If selecting
RETRY
doesn’t fix the problem, turn off the power and
check the speaker connections.
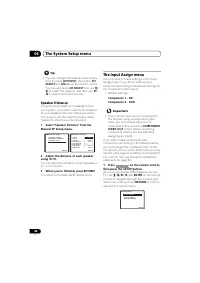
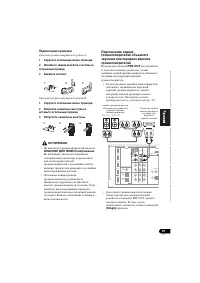
8
Make sure ‘OK’ is selected, then press
ENTER.
If the screen in step 7 is left untouched for 10
seconds and the
ENTER
button is not pressed
in step 8, the Auto MCACC setup will start
automatically as shown below.
Note
1 The screensaver automatically starts after three minutes of inactivity. If you cancel the Auto MCACC Setup at any time, the
receiver automatically exits and no settings will be made.
2
MIC IN
blinks when the microphone is not connected to MCACC SETUP MIC.
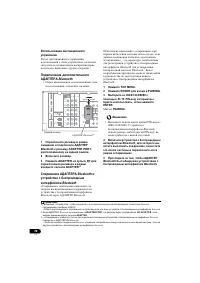
RECEIVER
S y s t e m S e t u p
1 . Au t o M C AC C
2 . M a n u a l S P S e t u p
3 . I n p u t A s s i g n
4 . P r e O u t S e t t i n g
R e t u r n
1 . Au t o M C AC C
N o w A n a l y z i n g
E nv i r o n m e n t C h e c k
A m b i e n t N o i s e
S p e a k e r Y E S / N O
R e t u r n
1 . Au t o M C AC C
C h e c k !
O K
R e t u r n
1 0 : N e x t
F r o n t
C e n t e r
S u r r
S u r r. B a c k
S u b w o o f e r
[ Y E S ]
[ Y E S ]
[ Y E S ]
[ Y E S x 2 ]
[ Y E S ]
VSX-820_SYXCN_En.book 30 ページ
年4月
日 月曜日 午後
時
分


