Усилители Pioneer VSX-420 - инструкция пользователя по применению, эксплуатации и установке на русском языке. Мы надеемся, она поможет вам решить возникшие у вас вопросы при эксплуатации техники.
Если остались вопросы, задайте их в комментариях после инструкции.
"Загружаем инструкцию", означает, что нужно подождать пока файл загрузится и можно будет его читать онлайн. Некоторые инструкции очень большие и время их появления зависит от вашей скорости интернета.


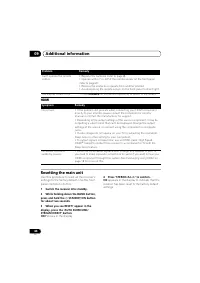


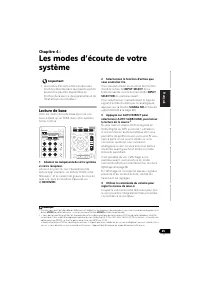

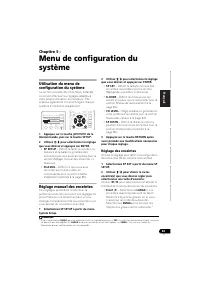


The System Setup menu
05
34
En
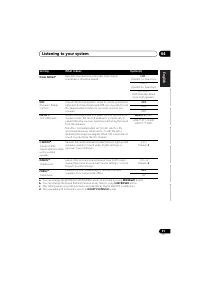
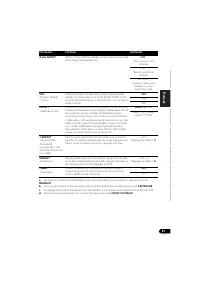
•
Center
(
C
) – Select
LARGE
if your center
speaker reproduces bass frequencies
effectively, or select
SMALL
to send bass
frequencies to the other speakers or
subwoofer. If you didn’t connect a center
speaker, choose
NO
(the center channel is
sent to the other speakers).
•
Surround
(
S
) – Select
LARGE
if your
surround speakers reproduce bass
frequencies effectively. Select
SMALL
to
send bass frequencies to the other
speakers or subwoofer. If you didn’t
connect surround speakers choose
NO
(the sound of the surround channels is
sent to the other speakers).
•
Subwoofer
(
SW
) – LFE signals and bass
frequencies of channels set to
SMALL
are
output from the subwoofer when
YES
is
selected.
1
Choose the
PLUS
setting if you
want the subwoofer to output bass sound
continuously or you want deeper bass (the
bass frequencies that would normally
come out the front and center speakers are
also routed to the subwoofer). If you did not
connect a subwoofer choose
NO
(the bass
frequencies are output from other
speakers).
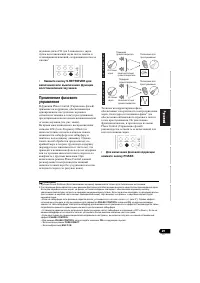
Crossover network
• Default setting:
100Hz
This setting decides the cutoff between bass
sounds playing back from the speakers
selected as
LARGE
, or the subwoofer, and bass
sounds playing back from those selected as
SMALL
.
2
It also decides where the cutoff will
be for bass sounds in the LFE channel.
1
Select ‘X.OVER’ from the SP SETUP menu.
2
Use
/
to choose the frequency cutoff
point.
Frequencies below the cutoff point will be sent
to the subwoofer (or
LARGE
speakers).
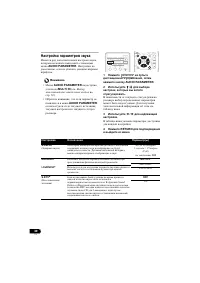
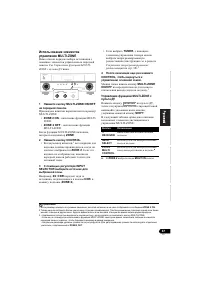
Channel level
Using these settings, you can adjust the overall
balance of your speaker system.
1
Select CH LEVEL from the SP SETUP menu.
2
Use
/
to select a setup option.
•
T. TONE M
– Move the test tone manually
from speaker to speaker and adjust
individual channel levels.
•
T. TONE A
– Adjust channel levels as the
test tone moves from speaker to speaker
automatically.
3
Confirm your selected setup option.
The test tones will start after you press
ENTER
.
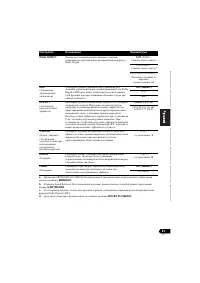
3
4
Adjust the level of each channel using
/
.
If you selected
T. TONE M
, use
/
to switch
speakers.
The
T. TONE A
setup outputs test tones in the
following order (depends on speaker settings):
L
C
R
SR
SL
SW
Adjust the level of each speaker as the test tone
is emitted.
4
Note
1 If you can’t get good bass results, listen to the bass response with the subwoofer set to
PLUS
and
YES
or the front speakers
set to
LARGE
and
SMALL
alternatively and let your ears judge which sounds best. If you’re having problems, the easiest option
is to route all the bass sounds to the subwoofer by selecting
SMALL
for the front speakers.
2 For more on selecting the speaker sizes, see
Speaker setting
on page 33.
3 After the volume increases to the reference level, test tones will be output.
4 • If you are using a Sound Pressure Level (SPL) meter, take the readings from your main listening position and adjust the level
of each speaker to 75 dB SPL (C-weighting/slow reading).
• The subwoofer test tone is output at low volumes. You may need to adjust the level after testing with an actual soundtrack.
• You can change the channel levels at any time by pressing
first and then starting the following operations:
CH SELECT
and
LEV +/–
on the remote control. You can also change the channel levels by pressing
first and then
TEST TONE
. In this case, use the
/
buttons to select the channel and use the
/
buttons to adjust the level.
RECEIVER
RECEIVER
VSX-420_SY_En.book 34 ページ
年
月
9日 金曜日 午前9時
7分


