Усилители беспроводного сигнала ASUS RP-AC53 - инструкция пользователя по применению, эксплуатации и установке на русском языке. Мы надеемся, она поможет вам решить возникшие у вас вопросы при эксплуатации техники.
Если остались вопросы, задайте их в комментариях после инструкции.
"Загружаем инструкцию", означает, что нужно подождать пока файл загрузится и можно будет его читать онлайн. Некоторые инструкции очень большие и время их появления зависит от вашей скорости интернета.
Set up using your web browser
Method Two
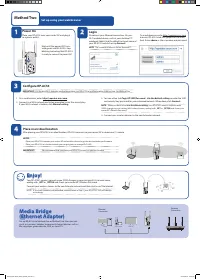
Login
Disconnect your Ethernet connection. On your
Wi-Fi enabled device, such as your desktop PC/
notebook/tablet, find the default network name of
your RP-AC53 and click or tap
Connect
.
NOTE
: The screenshot below is from a desktopPC.
On a web browser, enter
http://repeater.asus.com
to access RP-AC53 web GUI (graphical user inter-
face). Enter
admin
as the username and password.
2
ASUS_RPAC53
ASUS_RPAC53_5G
3
Configure RP-AC53
1. On a web browser, enter
http://repeater.asus.com
.
2. Connect to a Wi-Fi network and when prompted, enter the security key.
If your Wi-Fi network is hidden, click
Manual setting
.
3. You can either tick
Copy AP SSID/Password
,
Use the default setting
or enter the SSID
and security key/password for your extended network. When done, click
Connect
.
4. Connect your wireless devices to the new Extender network.
Enjoy!
Your RP-AC53’s wireless network name (SSID) changes to your existing Wi-Fi network name,
ending with
_RPT
or
_RPT5G
and shares your router/AP’s Wireless Password.
Connect your wireless devices to the new Extender network and then start to surf the Internet.
NOTE:
If you have renamed your extended network name in step 3, your RP-AC53’s SSID will change
accordingly.
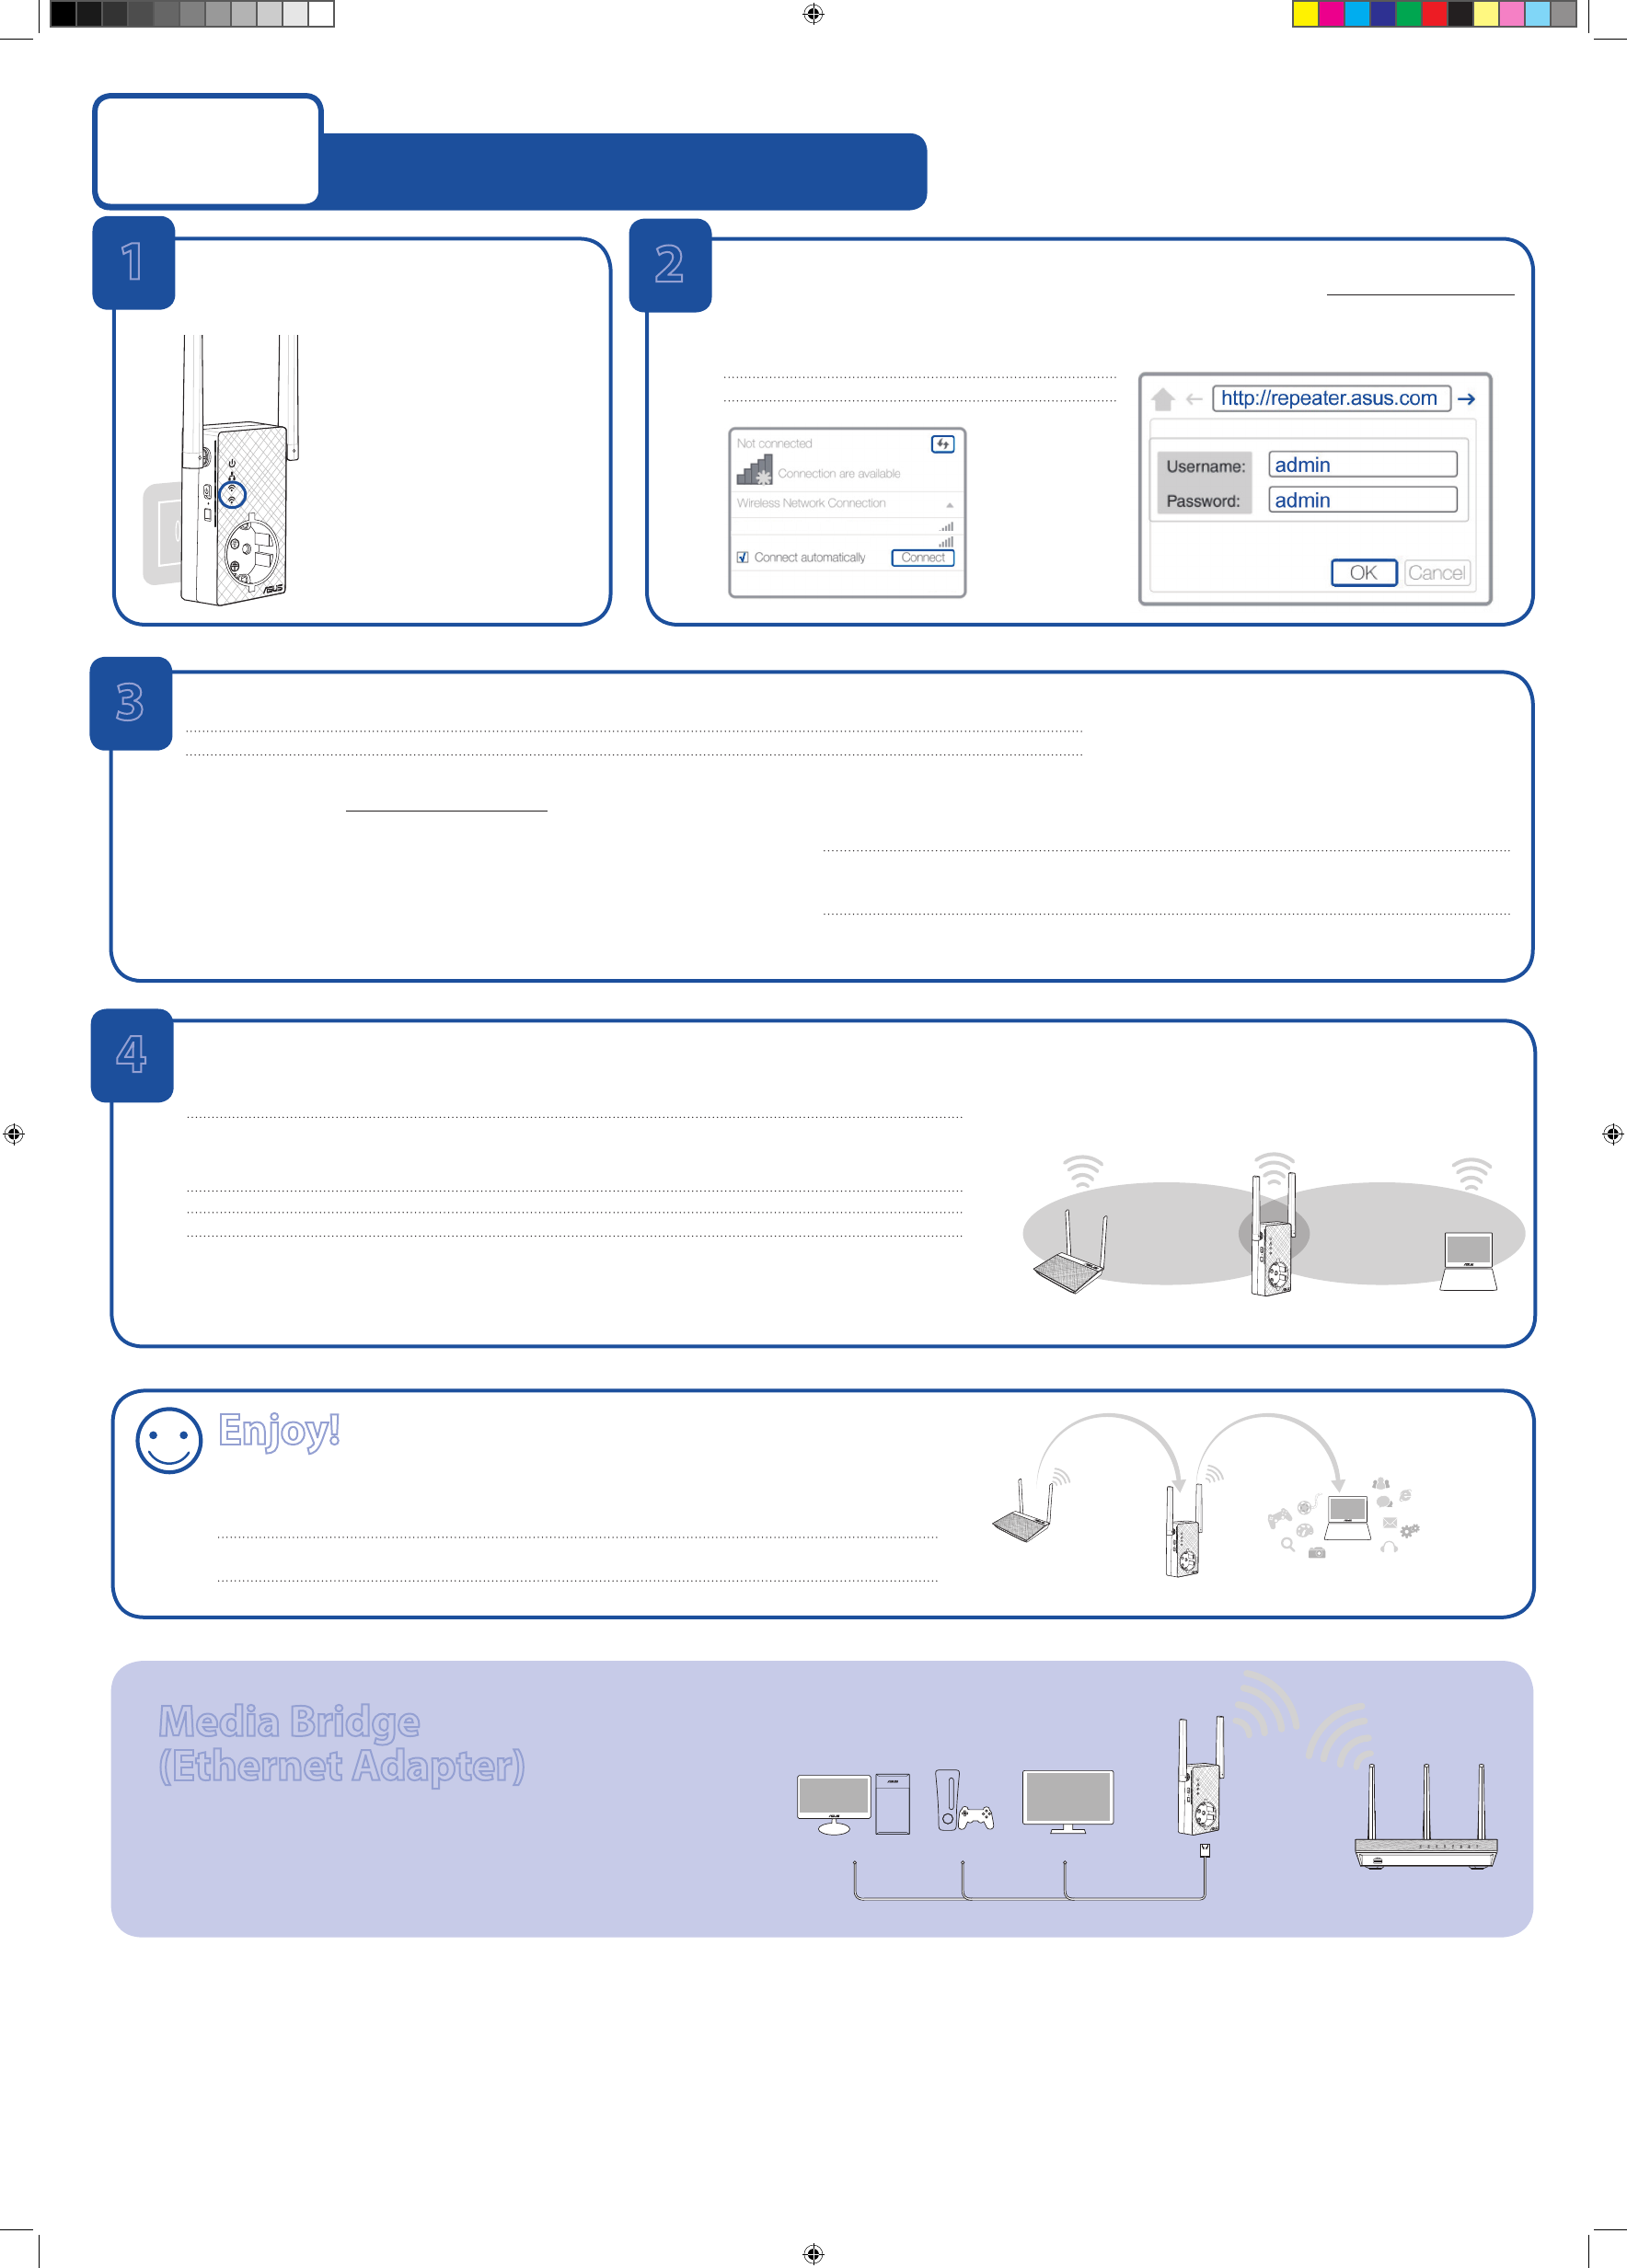
Media Bridge
(Ethernet Adapter)
Set up RP-AC53 via Method One or Method Two, then you can
use it as a wireless adapter to connect Ethernet devices such as
Blu-ray player, game console, DVR, or smart TV.
Desktop
Game Console
Smart TV
Ethemet
Connection
Wireless
Connection
IMPORTANT!
For the best Wi-Fi extender performance, place your RP-AC53 in an ideal location. Refer to Step 3 in Method One
NOTE:
When you have ticked
Use the default setting
, your RP-AC53’s wireless network name
(SSID) changes to your existing Wi-Fi network name, ending with
_RPT
or
_RPT5G
and shares your
router/AP’s Wireless Password.
1
v
4
Power On
Place your RP-AC53 near your router/AP and plug it
to a power outlet.
Wait until the power LED turns
solid green and Wi-fi LEDs stop
blinking, indicating that RP-AC53
is ready to connect to parent AP.
Place in an ideal location
After placing your RP-AC53 in an ideal location, RP-AC53 connects to your router/AP in about one (1) minute.
NOTES:
• Place your RP-AC53 between your router/AP and wireless device to get the best extender performance.
• Place your RP-AC53 in a location where you can get green or orange Wi-Fi LED.
IMPORTANT!
We recommend that you place your RP-AC53 in open or spacious location.
E11934_RP-AC53_QSG_Special_V2.indd 2
2016-08-19 16:20:20
Характеристики

Остались вопросы?Не нашли свой ответ в руководстве или возникли другие проблемы? Задайте свой вопрос в форме ниже с подробным описанием вашей ситуации, чтобы другие люди и специалисты смогли дать на него ответ. Если вы знаете как решить проблему другого человека, пожалуйста, подскажите ему :)


