
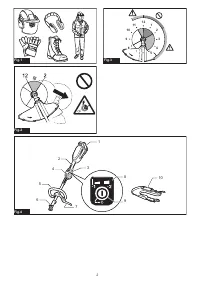
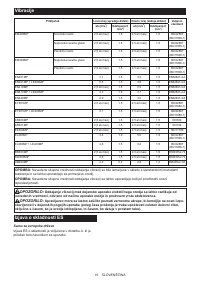
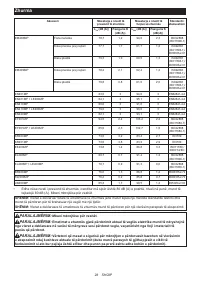
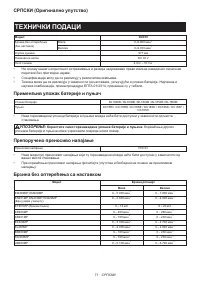
Триммеры комбимотор Makita LXT BL 18 В DUX18Z - инструкция пользователя по применению, эксплуатации и установке на русском языке. Мы надеемся, она поможет вам решить возникшие у вас вопросы при эксплуатации техники.
Если остались вопросы, задайте их в комментариях после инструкции.
"Загружаем инструкцию", означает, что нужно подождать пока файл загрузится и можно будет его читать онлайн. Некоторые инструкции очень большие и время их появления зависит от вашей скорости интернета.


14 ENGLISH
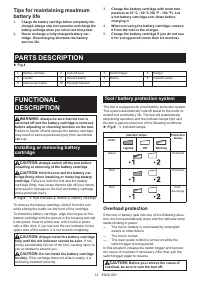
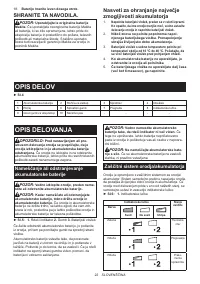
ASSEMBLY
WARNING:
Always be sure that the tool is
switched off and battery cartridge is removed
before carrying out any work on the tool.
Failure to
switch off and remove the battery cartridge may result
in serious personal injury from accidental start-up.
WARNING:
Never start the tool unless it is
completely assembled.
Operation of the tool in a
partially assembled state may result in serious per
-
sonal injury from accidental start-up.
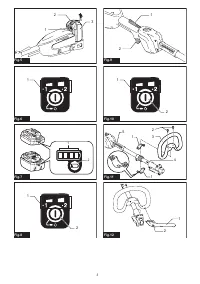
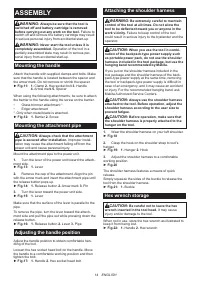
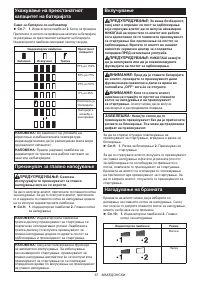
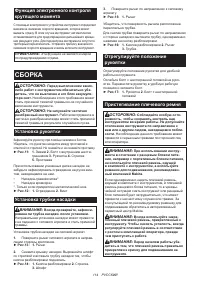
Mounting the handle
Attach the handle with supplied clamps and bolts. Make
sure that the handle is located between the spacer and
the arrow mark. Do not remove or shrink the spacer.
►
Fig.11:
1.
Clamp
2.
Hex socket bolt
3.
Handle
4.
Arrow mark
5.
Spacer
When using the following attachments, be sure to attach
the barrier to the handle using the screw on the barrier.
•
Grass trimmer attachment *
•
Edger attachment
*. Only when metal blade is attached.
►
Fig.12:
1.
Barrier
2.
Screw
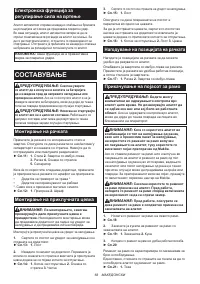
Mounting the attachment pipe
CAUTION:
Always check that the attachment
pipe is secured after installation.
Improper instal-
lation may cause the attachment falling off from the
power unit and cause personal injury.
Mount the attachment pipe to the power unit.
1.
Turn the lever of the power unit toward the attach-
ment side.
►
Fig.13:
1.
Lever
2.
Remove the cap of the attachment. Align the pin
with the arrow mark and insert the attachment pipe until
the release button pops up.
►
Fig.14:
1.
Release button
2.
Arrow mark
3.
Pin
3.
Turn the lever toward the power unit side.
►
Fig.15:
1.
Lever
Make sure that the surface of the lever is parallel to the
pipe.
To remove the pipe, turn the lever toward the attach-
ment side and pull the pipe out while pressing down the
release button.
►
Fig.16:
1.
Release button
2.
Lever
3.
Pipe
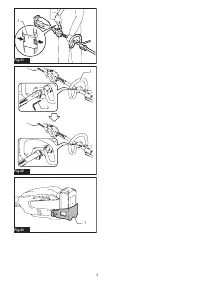
Adjusting the handle position
Adjust the handle position to obtain comfortable han
-
dling of the tool.
Loosen the hex socket head bolt on the handle. Move
the handle to a comfortable working position and then
tighten the bolt.
►
Fig.17:
1.
Handle
2.
Hex socket head bolt
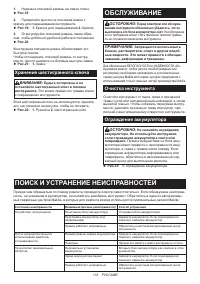
Attaching the shoulder harness
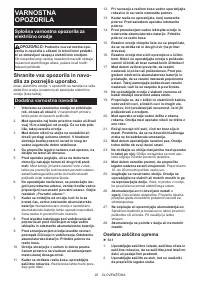
WARNING:
Be extremely careful to maintain
control of the tool at all times. Do not allow the
tool to be deflected toward you or anyone in the
work vicinity.
Failure to keep control of the tool
could result in serious injury to the bystander and the
operator.
CAUTION:
When you use the tool in combi
-
nation of the backpack-type power supply such
as portable power pack, do not use the shoulder
harness included in the tool package, but use the
hanging band recommended by Makita.
If you put on the shoulder harness included in the
tool package and the shoulder harness of the back
-
pack-type power supply at the same time, removing
the tool or backpack-type power supply is difficult in
case of an emergency, and it may cause an accident
or injury. For the recommended hanging band, ask
Makita Authorized Service Centers.
CAUTION:
Always use the shoulder harness
attached to the tool. Before operation, adjust the
shoulder harness according to the user size to
prevent fatigue.
CAUTION:
Before operation, make sure that
the shoulder harness is properly attached to the
hanger on the tool.
1.
Wear the shoulder harness on your left shoulder.
►
Fig.18
2.
Clasp the hook on the shoulder strap to tool's
hanger.
►
Fig.19:
1.
Hanger
2.
Hook
3.
Adjust the shoulder harness to a comfortable
working position.
►
Fig.20
The shoulder harness features a means of quick
release.
Simply squeeze the sides of the buckle to release the
tool from the shoulder harness.
►
Fig.21:
1.
Buckle
Hex wrench storage
CAUTION:
Be careful not to leave the hex
wrench inserted in the tool head.
It may cause
injury and/or damage to the tool.
When not in use, store the hex wrench as illustrated to
keep it from being lost.
►
Fig.22:
1.
Handle
2.
Hex wrench
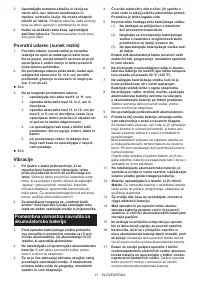
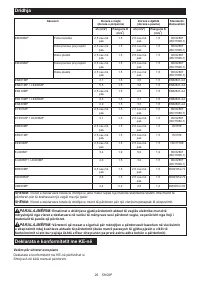
Содержание
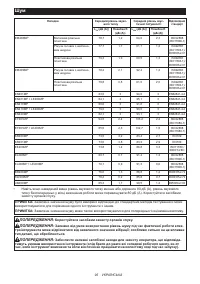
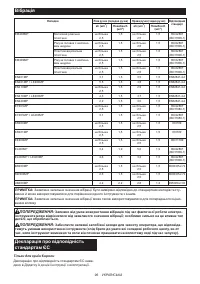
- 106 Одобренные аксессуары; Символы
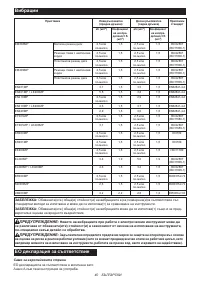
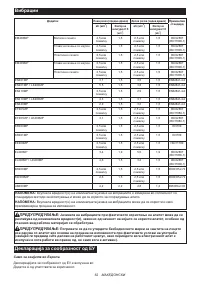
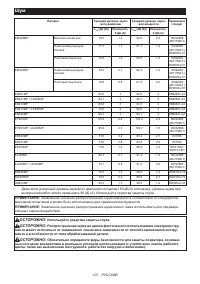
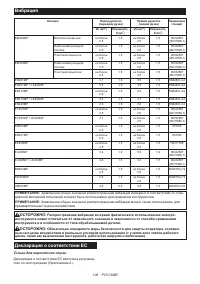
- 108 Вибрация; Декларация о соответствии ЕС
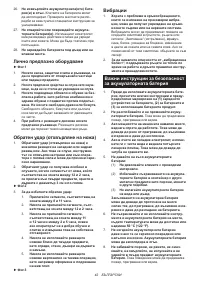
- 109 МЕРЫ БЕЗОПАСНОСТИ; Общие рекомендации по; Сохраните брошюру с инструк; Дополнительные инструкции по
- 110 Индивидуальные средства защиты
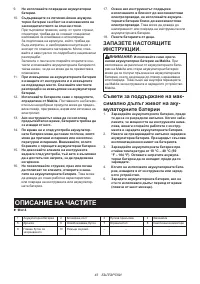
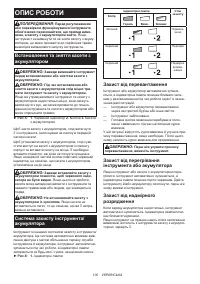
- 111 СОХРАНИТЕ ДАННЫЕ; ОПИСАНИЕ ДЕТАЛЕЙ
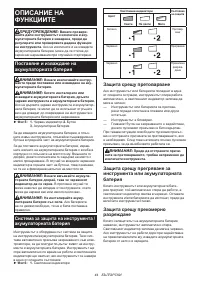
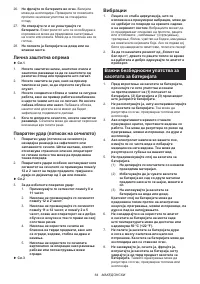
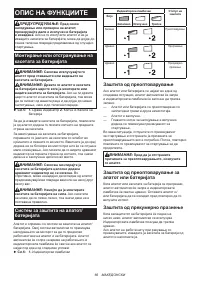
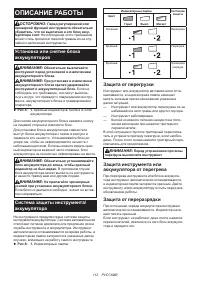
- 112 ОПИСАНИЕ РАБОТЫ; Установка или снятие блока
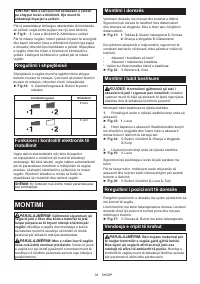
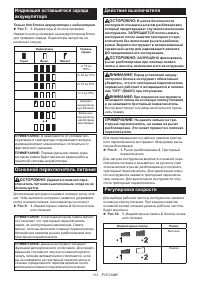
- 113 Индикация оставшегося заряда; Основной переключатель питания
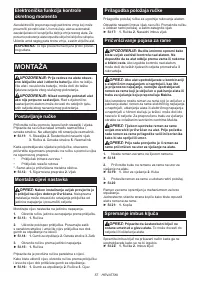
- 114 СБОРКА
- 115 Хранение шестигранного ключа; ОБСЛУЖИВАНИЕ; Очистка инструмента; ПОИСК И УСТРАНЕНИЕ НЕИСПРАВНОСТЕЙ


