
Триммеры Bosch ART 27 06008A5200 - инструкция пользователя по применению, эксплуатации и установке на русском языке. Мы надеемся, она поможет вам решить возникшие у вас вопросы при эксплуатации техники.
Если остались вопросы, задайте их в комментариях после инструкции.
"Загружаем инструкцию", означает, что нужно подождать пока файл загрузится и можно будет его читать онлайн. Некоторые инструкции очень большие и время их появления зависит от вашей скорости интернета.


English |
21
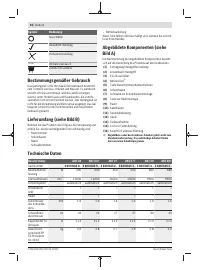
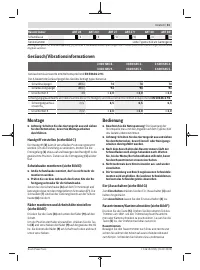
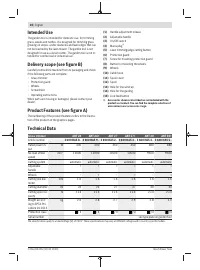
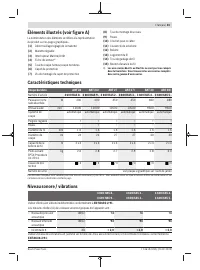
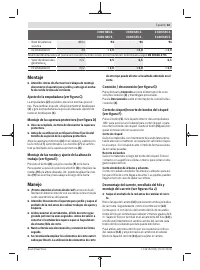
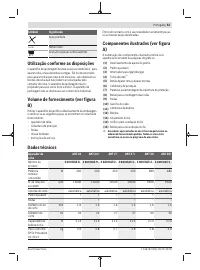
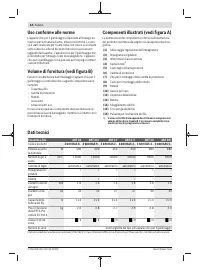
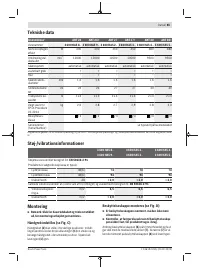
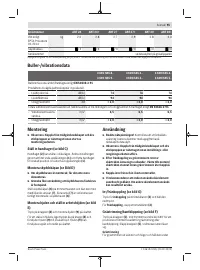
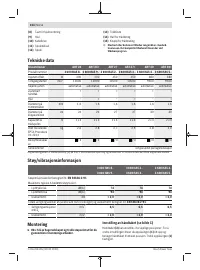
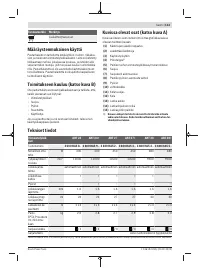
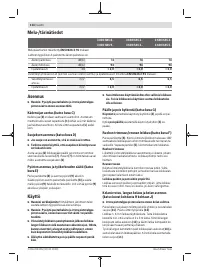
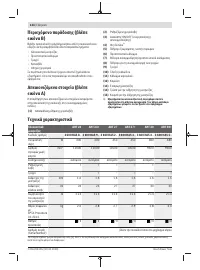
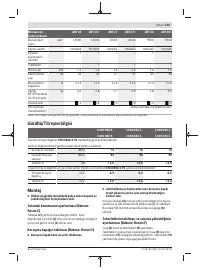
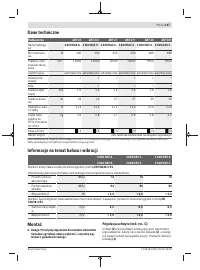
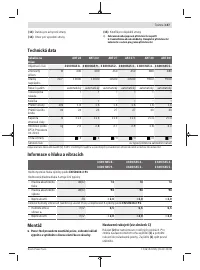
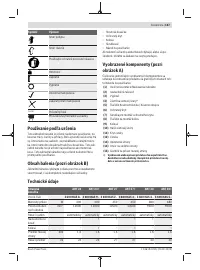
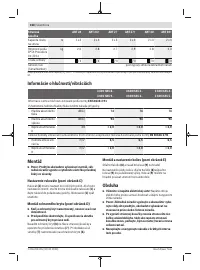
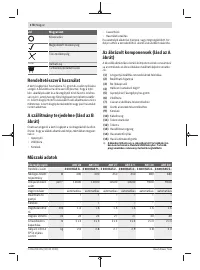
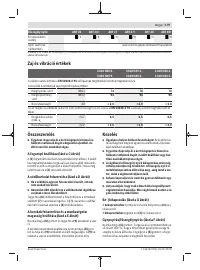
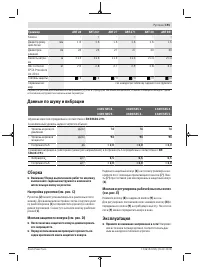
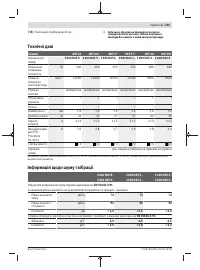
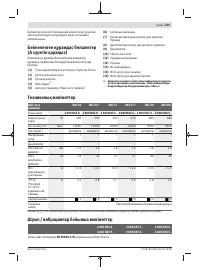
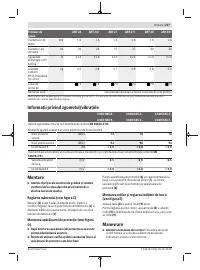
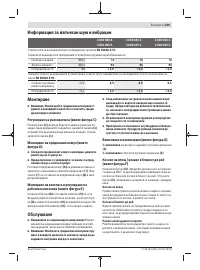
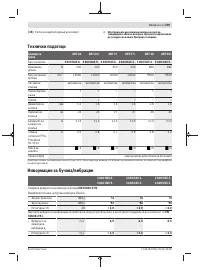
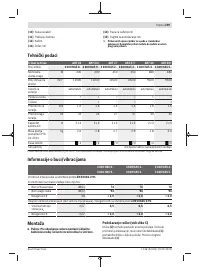
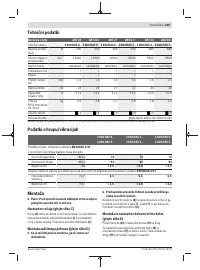
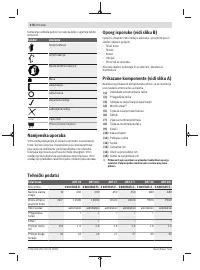
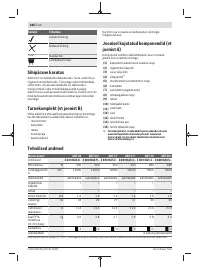
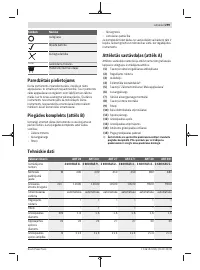
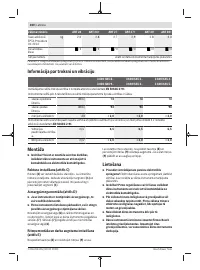
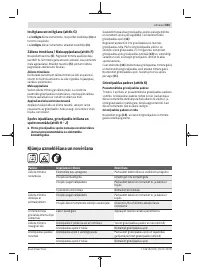
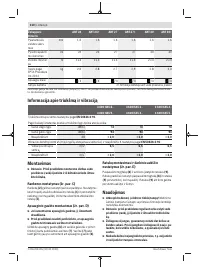
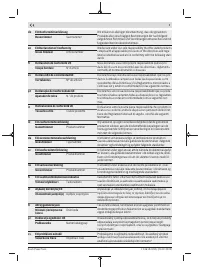
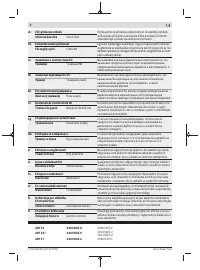
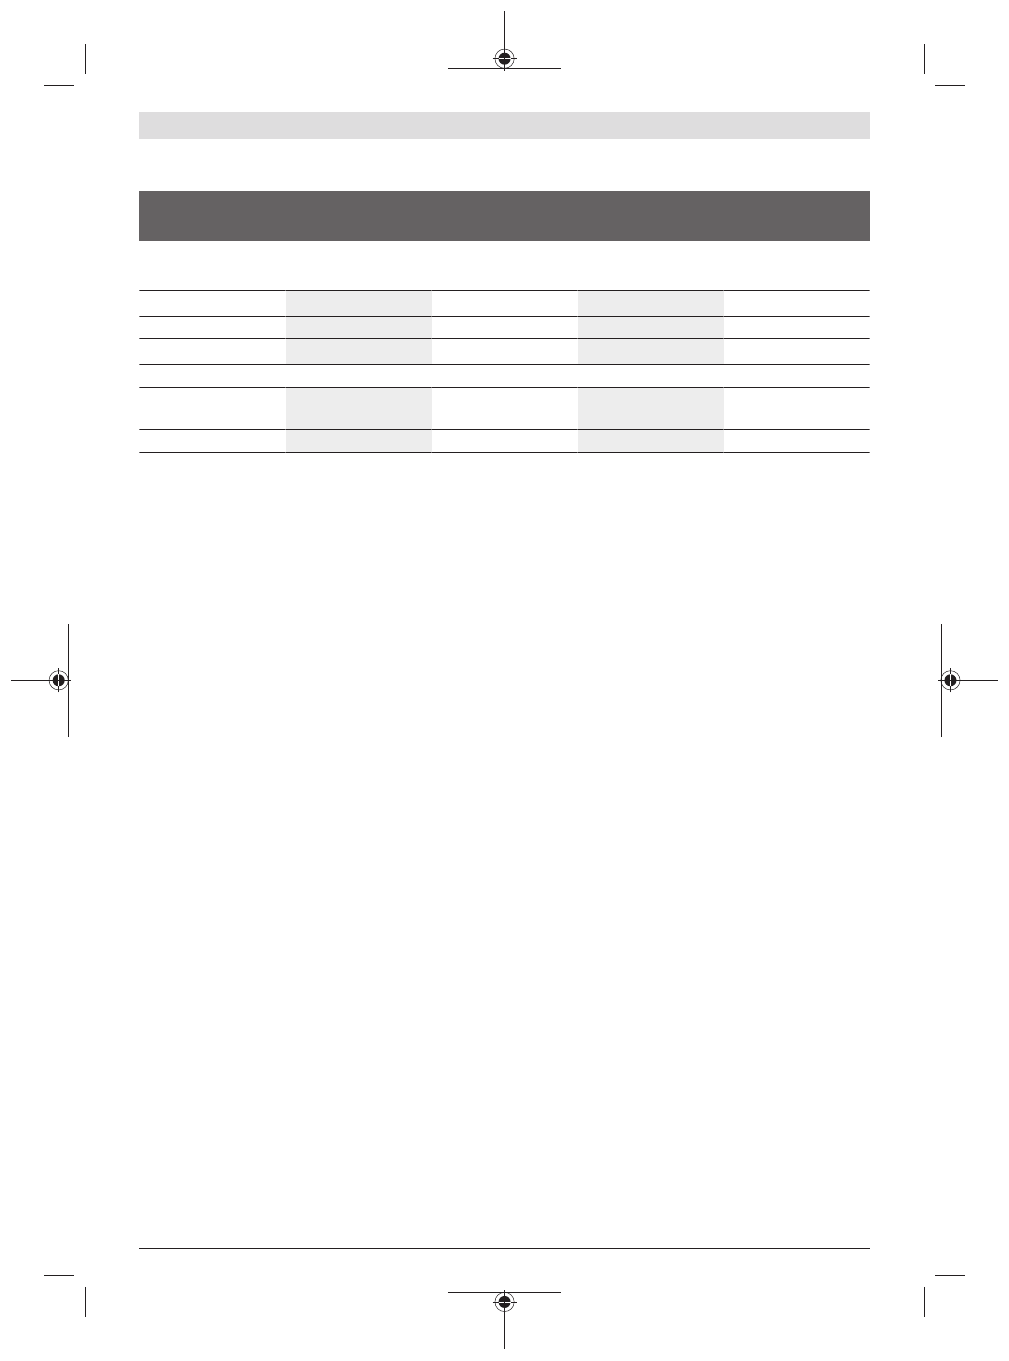
Noise/Vibration Information
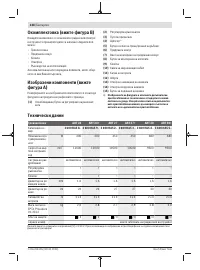
3 600 HA5 8..
3 600 HA5 9..
3 600 HA5 2..
3 600 HA5 3..
3 600 HA5 4..
3 600 HA5 5..
Noise emission values determined according to
EN 50636-2-91
.
Typically the A-weighted noise levels of the product are:
– Sound pressure level
dB(A)
74
74
74
– Sound power level
dB(A)
94
94
94
– Uncertainty K
dB
= 2.0
= 2.0
= 2.0
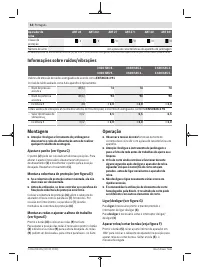
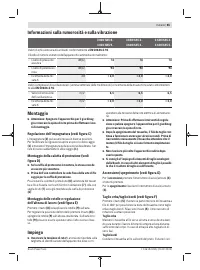
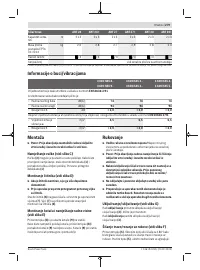
Vibration total values ah (triax vector sum) and uncertainty K determined according to
EN 50636-2-91
– Vibration emission
value a
h
m/s
2
6.5
6.5
6.5
– Uncertainty K
m/s
2
= 2.0
= 2.0
= 2.0
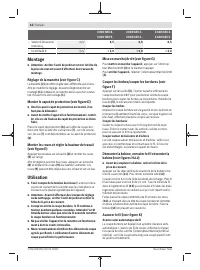
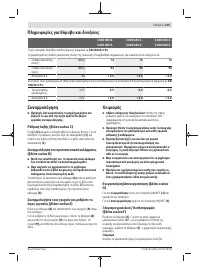
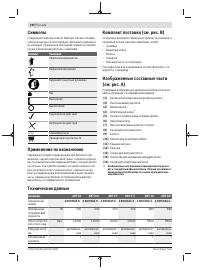
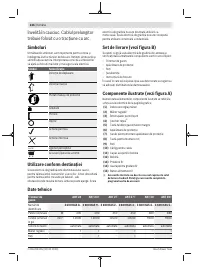
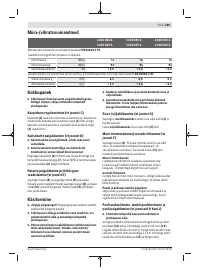
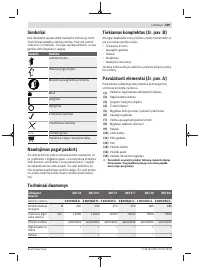
Assembly
u
Caution: Switch the garden tool off and pull the mains
plug before performing any maintenance.
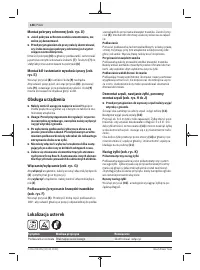
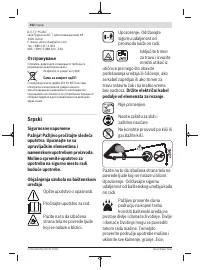
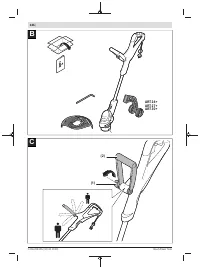
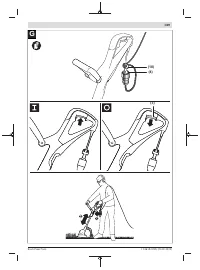
Adjusting the handle (see figure C)
The handle
(2)
can be set to different positions. To change
the adjustment, loosen the handle-adjustment release
(1)
a
little and move the handle to the desired position. Retighten
the handle-adjustment release
(1)
again.
Mounting the protection guard (see figure D)
u
Do not disassemble guard once connected.
u
Before using, check tight seating of guard screw.
Position the protection guard
(6)
on the trimmer head and
fasten it with the provided screws
(7)
. The screws
(7)
are
already fitted to the protection guard
(6)
upon delivery.
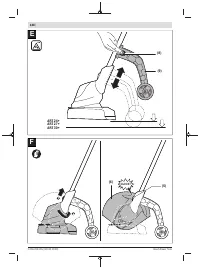
Mounting the Wheels and Adjusting the Working
Height (see Fig. E)
Press button
(8)
and mount the wheels
(9)
onto the shaft.
To adjust the position of the wheels, press button
(8)
and
slide the wheels
(9)
to the desired height. The wheels
(9)
can be moved up and down along the shaft.
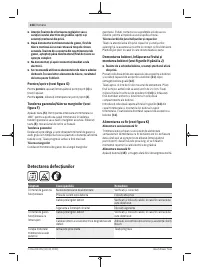
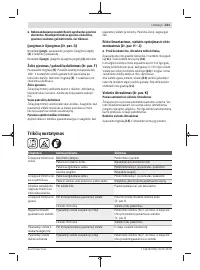
Operation
u
Pay attention to the mains voltage.
The voltage of the
power source must match the voltage specified on the
rating plate of the machine.
u
Caution: Switch the garden tool off and pull the mains
plug before adjusting or cleaning.
u
The cutting line continues to rotate for a few seconds
after the trimmer is switched off. Allow the motor/cut-
ting line to stop rotating before switching on again.
u
Do not briefly switch off and on again several times in
a row.
u
Only use Bosch approved cutting elements. Cutting
performance will vary with different cutting elements.
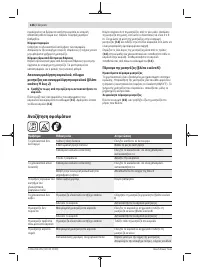
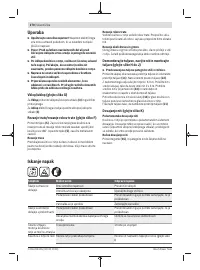
Switching On and Off (see figure G)
To
switch on,
press and hold the On/Off switch
(3)
.
To
switch off,
release the On/Off switch
(3)
.
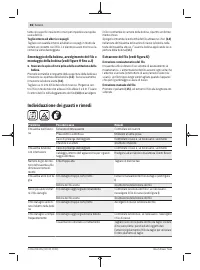
Lawn Trimming/Edge Cutting (see figure F)
Press button
(5)
. Turn the bottom part of the trimmer by
180° to position the trimmer head either for lawn trimming
or edge cutting. Release button
(5)
so that the turning mech-
anism engages.
Lawn trimming
Move the trimmer left and right, keeping it well away from
the body. Cut higher grass in steps.
Edge cutting
Guide the trimmer along the edge of the lawn. Avoid contact
with solid surfaces or walls to prevent rapid wear of the cut-
ting line.
Cutting around trees and bushes
Carefully cut around trees and bushes so that they do not
come into contact with the cutting line. Plants can die if you
damage the bark.
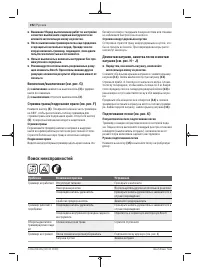
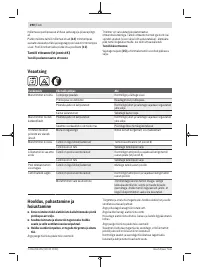
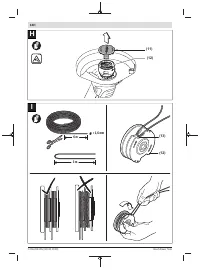
Dismounting the spool, winding up the cutting
line and mounting the spool (see figures H to J)
u
Remove the mains plug before replacing the spool.
Press both latches of the spool cover together and remove
the spool cover
(11)
. Afterwards, remove the empty spool
(12)
.
Cut off approx. 6.0 m line from the refill roll. Fold the line in
half, so that it has a length of 2 x 3 m. Attach the line centre
to the nose on the spool
(13)
and wind up the line - one end
in each spool compartment - uniformly distributed and taut.
Slide both ends of the cutting line through the holes for line
guiding
(14)
in the trimmer head and mount the spool back
into the trimmer head. Affix the spool by mounting the spool
cover
(11)
.
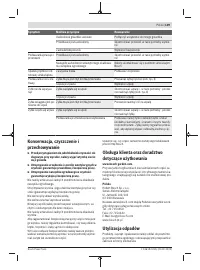
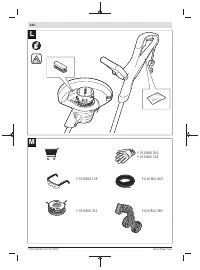
Line Feeding (see figure K)
Semi-automatic Line Feeding
Bosch Power Tools
F 016 L94 055 | (20.02.2020)


