Телевизоры Telefunken TF-LED15S18 - инструкция пользователя по применению, эксплуатации и установке на русском языке. Мы надеемся, она поможет вам решить возникшие у вас вопросы при эксплуатации техники.
Если остались вопросы, задайте их в комментариях после инструкции.
"Загружаем инструкцию", означает, что нужно подождать пока файл загрузится и можно будет его читать онлайн. Некоторые инструкции очень большие и время их появления зависит от вашей скорости интернета.


Operation
8
8
Operation
General operations
• Connect the terminal of the power cord
to the power cord input of the TV (the position
of the input is given in paragraph Control
Elements above). Connect the plug of the
power cord to the power supply outlet and then
set the power switch on the rear panel to the
on position, the power indicator will light up in
red showing that the unit is in standby mode.
To switch on the unit, press POWER button
on the panel or on the RC; when the TV is
on, the power indicator is off. Press POWER
button again to switch the unit to the standby
model, the power indicator will light up in red.
To switch off the unit completely, set the power
switch on the rear panel to the off position and
then disconnect the power cord plug from the
power supply outlet.
• Press VOL- button on the unit or on
the RC repeatedly to decrease the volume;
press VOL+ button on the unit or on the RC
repeatedly to increase the volume.
• Press RETURN button on the RC to select
from the present channel and the previously
displayed channel.
• Press button to cut off sound, press
this button again or adjust volume to resume
sound.
• In TV mode press CH+/CH- buttons on
the RC or on the unit to select previous or next
channel; or press number buttons to enter a
channel number directly.
• Press PICTURE button repeatedly to cycle
through the available video picture modes from
the following types: Standard => Bright => Soft
=> Personal.
• Press SOUND button repeatedly to cycle
through the available sound modes from the
following types: Stereo => Movie => Music =>
News => Personal.
• Press INFO button to display the preset
TV channel information.
• In TV mode press MTS button to switch
NICAM sound mode (not available for some
channels).
• Press SCALE button repeatedly to select
a screen display size from the available list:
4:3/Full/Subtitle/Wide/Zoom/Expand/Original/
Nature. Available aspects may differ for
different signal sources.
• Press FREEZE button to freeze the picture
on or off.
Press SOURCE button, then press cursor
buttons on the RC to select a source from
available source list: TV => YPbPr => PC =>
HDMI => AV1 => AV2. Press OK button to
confirm. You can press USB button to access
Media source mode directly; you can press TV
button to access TV source mode directly.
TELETEXT operations
(option)
• Select the TV source mode. Then press
CH-/CH+ buttons to select TV channel in order
to pick up the picture signal of Teletext.
• Teletext button functions are as follows:
TXT: Press this button to enter into Teletext
mode. Press this button to mix the teletext
and current TV signal image. Press this
button again to return to the channel you are
watching.
HOLD: Press this button to stop the move
to the next page. Press this button again to
cancel operation.
INDEX: Press this button to go to the index
page.
SIZE: Press this button to enlarge the top
part of the page. Press this button again to
enlarge the bottom part of the page. Press this
button third time to normal size text page view.
REV. (Reveal): Press this button to reveal
the cancelled information. Press this button
again to cancel the information.
SUB. (Subpage): Press this button to select
sub-page. Input the number of sub-page and
use numeric buttons in the format 0001 for
sub page 1. The teletext will search for the sub
page. Press SUBPAGE button again to exit the
subpage mode.
Red/Green/Yellow/Cyan buttons: Press
these 4 color buttons to access directly to
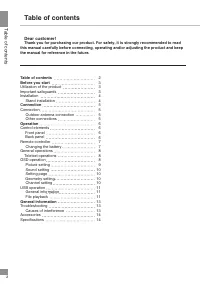
Содержание
- 16 Перед началом эксплуатации; Утилизация изделия
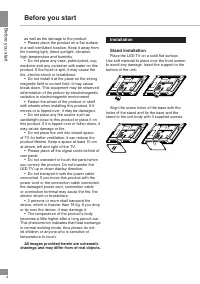
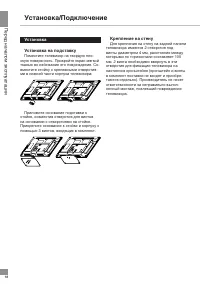
- 18 Установка/Подключение; Установка; Поместите телевизор на твердую пло-; Крепление на стену; Для крепления на стену на задней панели
- 19 Подключение
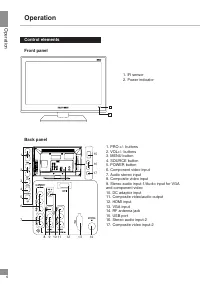
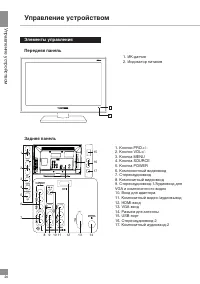
- 20 Управление устройством; Элементы управления
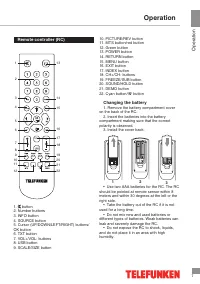
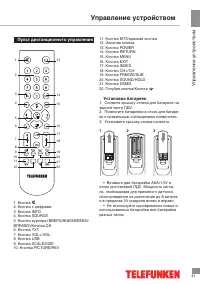
- 21 Пульт дистанционного управления; Установка батареек; • Не используйте одновременно новые и
- 22 Общие операции
- 23 Экранное меню; Режим изображения
- 24 Настройка звука; Общие настройки
- 25 Настройка экрана; Автонастройка; Настройка каналов; Точная настройка; Операции c USB
- 26 Воспроизведение файлов; Показ фильмов
- 27 кнопок курсора ВПРАВО/ВЛЕВО вы
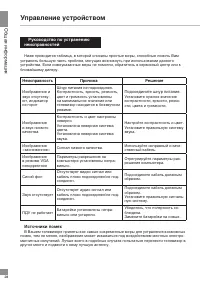
- 28 Общая информация; Руководство по устранению; Неисправность; Подсоедините шнур питания.; Источники помех
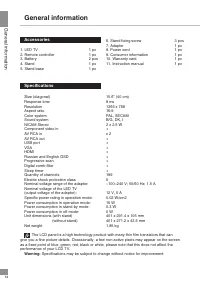
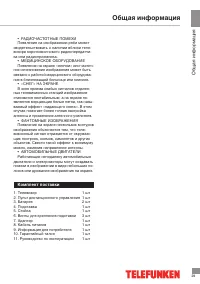
- 29 Комплект поставки; Винты для крепления подставки
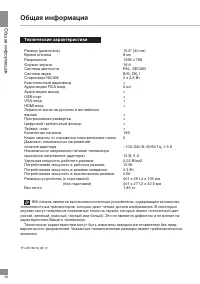
- 30 Технические характеристики


