
Телевизоры Sony KD65X81J - инструкция пользователя по применению, эксплуатации и установке на русском языке. Мы надеемся, она поможет вам решить возникшие у вас вопросы при эксплуатации техники.
Если остались вопросы, задайте их в комментариях после инструкции.
"Загружаем инструкцию", означает, что нужно подождать пока файл загрузится и можно будет его читать онлайн. Некоторые инструкции очень большие и время их появления зависит от вашей скорости интернета.


4
GB
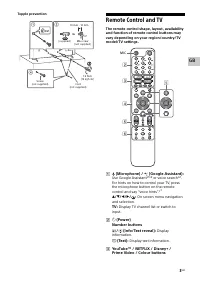
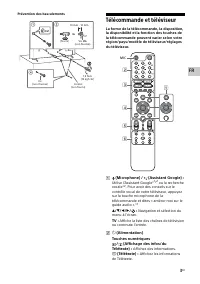
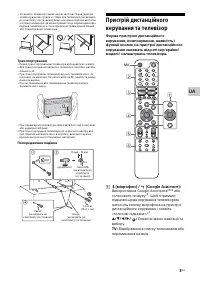
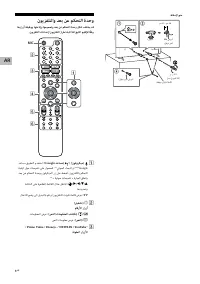
GUIDE/
:
Display the digital programme
guide of TV or TV box*
3
.
REC LIST:
Display the Rec list of USB HDD*
4
/
DVR*
3
.
(Input select):
Display and select the
input source, etc.
(Quick settings):
Display Quick
Settings.
BACK/
HOME
+/– (Volume)
(Jump)
(Mute)*
5
CH +/–/
/
:
Select the channel, or next
(
) / previous (
) page.
AUDIO:
Select the sound of multilingual
source or dual sound (depend on
programme source).
(Subtitle setting)
HELP:
Display the Help menu.
/
/
/
REC:
Record the currently viewed
programme on USB HDD*
4
/DVR*
3
.
EXIT
(Power)
Remote Control sensor / Light sensor /
LED
*1 Only on limited region/country/TV model/
language.
*2 Google Assistant or voice search requires an
Internet connection.
*3 [TV box setup] setting is required.
*4 Not available for Italy.
*5 Accessibility shortcut is available by pressing and
holding
(Mute).
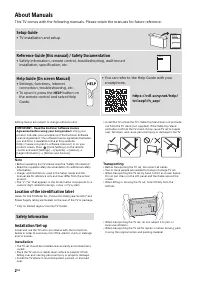
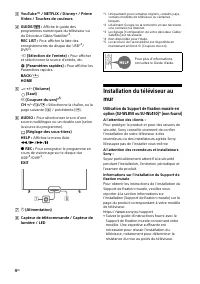
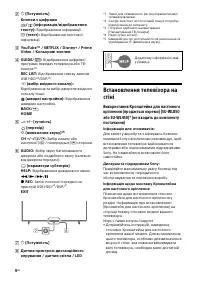
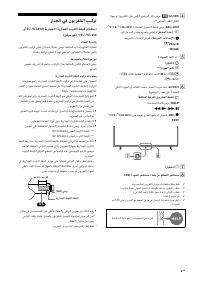
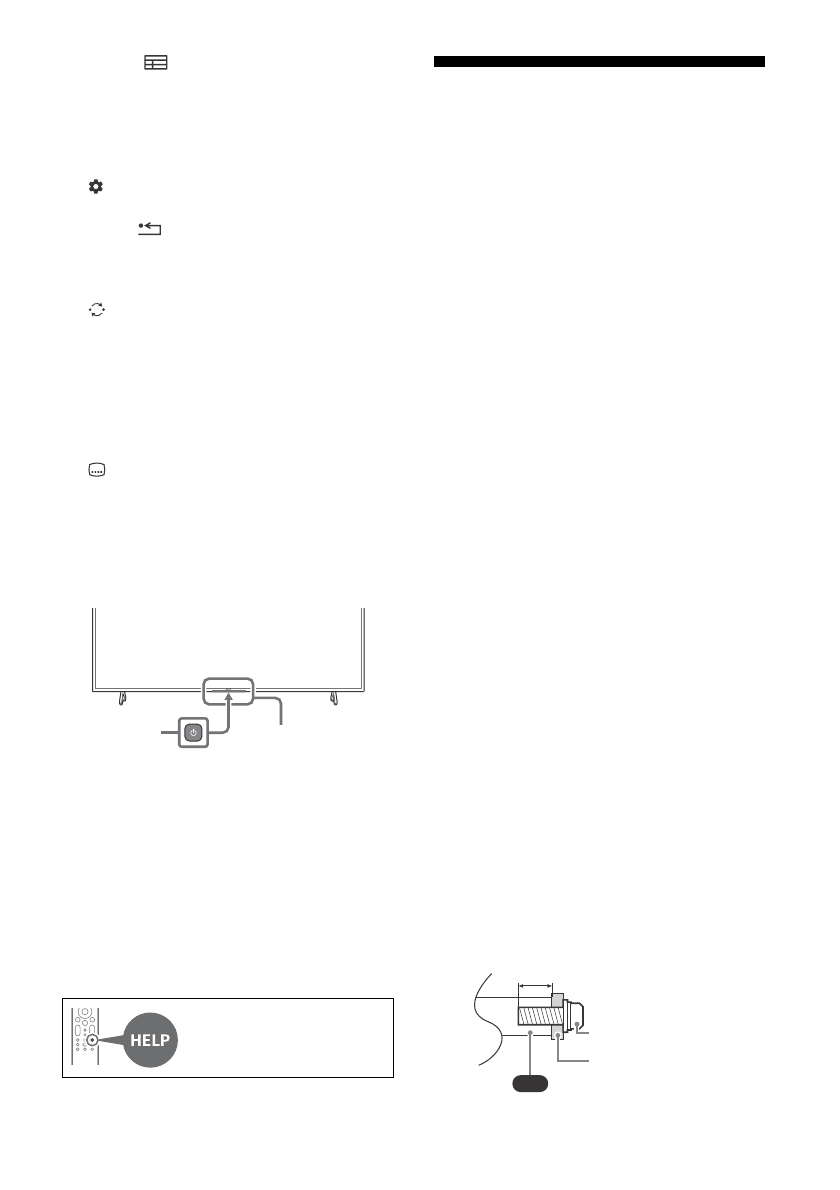
Installing the TV to the Wall
Using the optional Wall-Mount Bracket
(SU-WL850 or SU-WL450)* (not supplied)
To Customers:
For product protection and safety reasons, Sony
strongly recommends that installation of your
TV be performed by Sony dealers or licensed
contractors. Do not attempt to install it yourself.
To Sony Dealers and Contractors:
Provide full attention to safety during the
installation, periodic maintenance and
examination of this product.
Wall-Mount Bracket Installation Information
For instructions on Wall-Mount Bracket
installation, see the Installation Information
(Wall-Mount Bracket) on the product page for
your TV model.
https://www.sony.eu/support
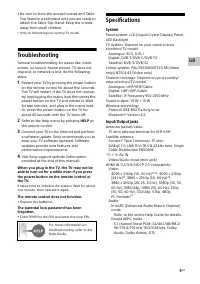
• Follow the instruction guide provided with the
Wall-Mount Bracket for your model. Sufficient
expertise is required in installing this TV,
especially to determine the strength of the
wall for withstanding the TV’s weight.
• Sony is not liable for any damage or injury
caused by mishandling or improper
installation.
• Only qualified service personnel should carry
out wall-mount installations.
• For safety reasons, it is strongly recommended
that you use Sony accessories, including:
—Wall-Mount Bracket SU-WL850
—Wall-Mount Bracket SU-WL450
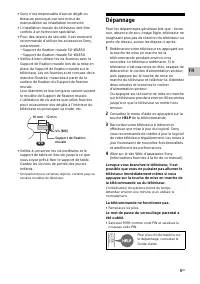
• Be sure to use the screws supplied with the
Wall-Mount Bracket when attaching the Wall-
Mount Bracket to the TV set. The supplied
screws are designed as indicated by
illustration when measured from the attaching
surface of the Wall-Mount Bracket.
The diameter and length of the screws differ
depending on the Wall-Mount Bracket model.
Use of screws other than those supplied may
result in internal damage to the TV set or
cause it to fall, etc.
For more information, refer to
the Help Guide.
̛
̚
VS
Screw (M6)
Wall-Mount Bracket
10 mm - 12 mm


