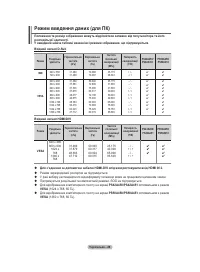
Телевизоры Samsung PS-50 A450P2 - инструкция пользователя по применению, эксплуатации и установке на русском языке. Мы надеемся, она поможет вам решить возникшие у вас вопросы при эксплуатации техники.
Если остались вопросы, задайте их в комментариях после инструкции.
"Загружаем инструкцию", означает, что нужно подождать пока файл загрузится и можно будет его читать онлайн. Некоторые инструкции очень большие и время их появления зависит от вашей скорости интернета.


English -
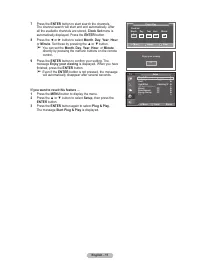
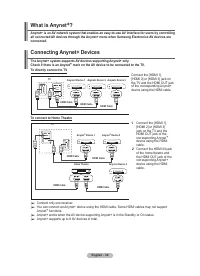
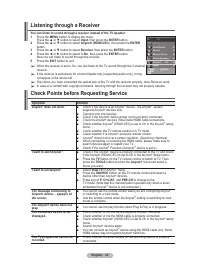
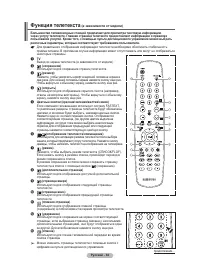
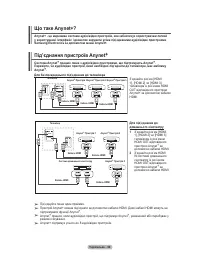
Listening through a Receiver
You can listen to sound through a receiver instead of the TV speaker.
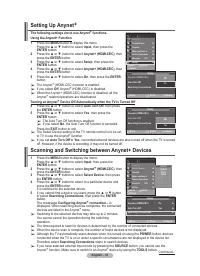
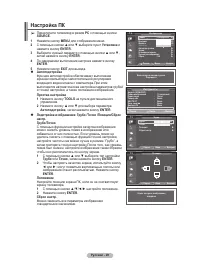
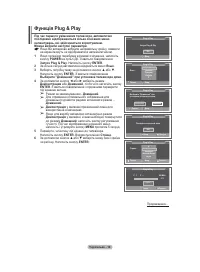
1
Press the
MENU
button to display the menu.
Press the ▲ or ▼ button to select
Input
, then press the
ENTER
button.
Press the ▲ or ▼ button to select
Anynet+ (HDMI-CEC)
, then press the
ENTER
button.
Press the ▲ or ▼ button to select
Receiver
, then press the
ENTER
button.
4
Press the ◄ or ► button to select to
On
, then press the
ENTER
button.
Now you can listen to sound through the receiver.
5
Press the
EXIT
button to exit.
➢
When the receiver is set to On, you can listen to the TV sound through the 2-channel
receiver.
➢
If the receiver is exclusively for a home theater only (supporting audio only), it may
not appear in the device list.
➢
Only when you have connected the optical jack of the TV and the receiver properly, does Receiver work.
➢
In case of a content with copyright problems, listening through the receiver may not properly operate.
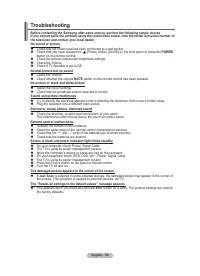
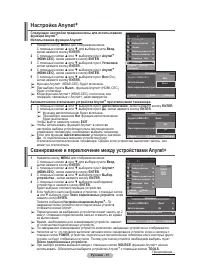
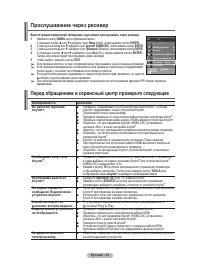
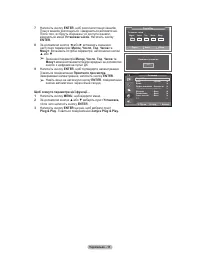
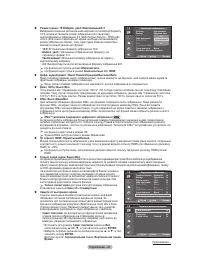
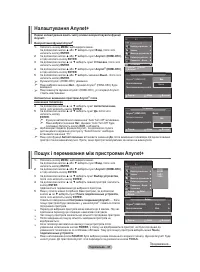
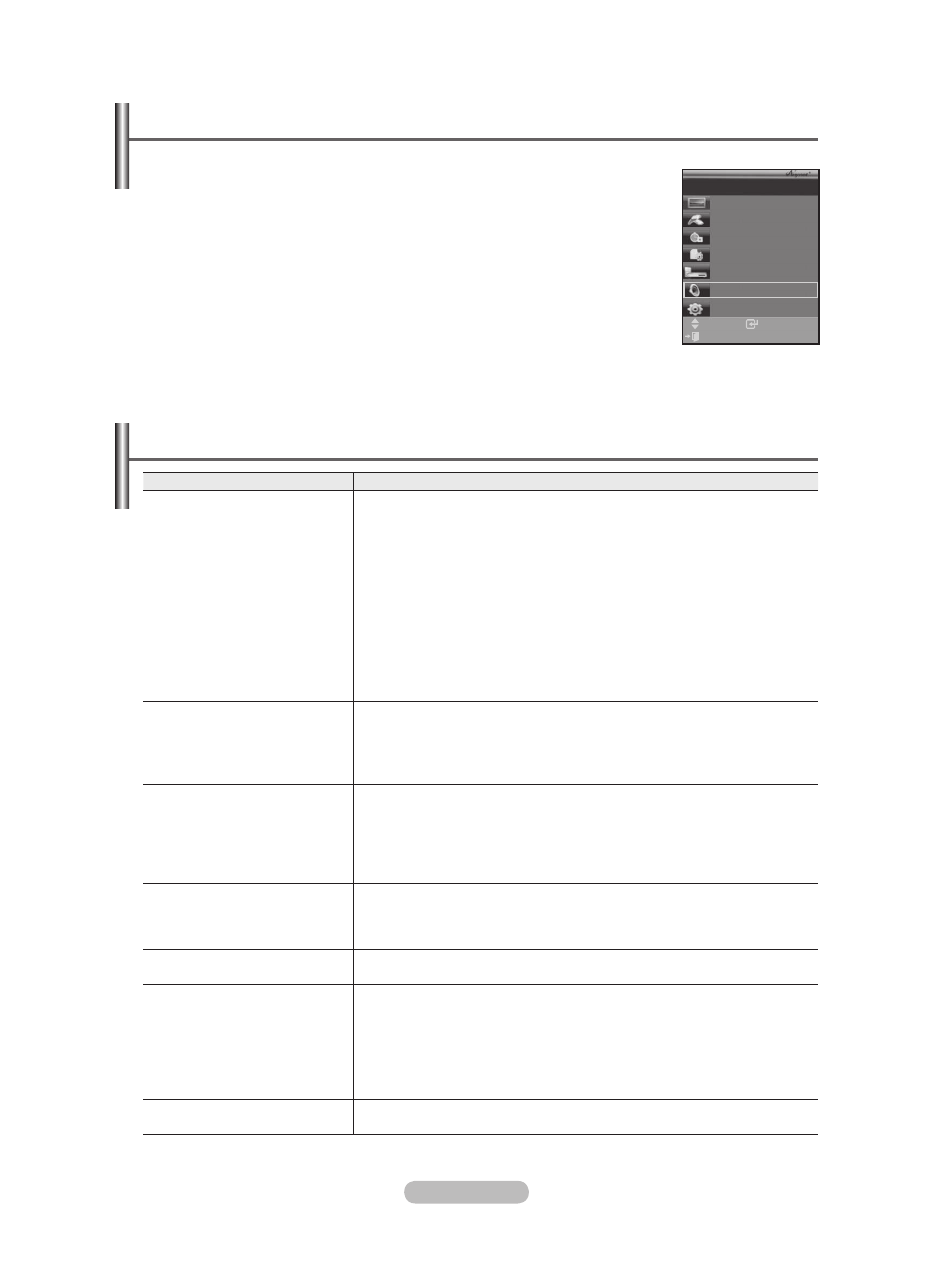
Check Points before Requesting Service
Symptom
Solution
Anynet+ does not work.
■ Check if the device is an Anynet
+ device. The Anynet+ system
supports Anynet+ devices only.
■ Connect only one receiver.
■ Check if the Anynet
+ device power cord is properly connected.
■
Check the Anynet+ device’s Video/Audio/HDMI cable connections.
■ Check whether Anynet
+ (HDMI-CEC) is set to On in the Anynet+ setup
menu.
■ Check whether the TV remote control is in TV mode.
■ Check whether it is Anynet
+ exclusive remote control.
■ Anynet
+ doesn’t work at a certain condition. (Searching channels)
■ When connecting or removing the HDMI cable, please make sure to
search devices again or restart your TV.
■ Check if the Anynet
+ Function of Anynet+ device is set on.
I want to start Anynet+.
■ Check if the Anynet
+ device is properly connected to the TV and check
if the Anynet+ (HDMI-CEC) is set to On in the Anynet+ Setup menu.
■ Press the
TV
button on the TV remote control to switch to TV. Then
press the
TOOLS
button to show the
Anynet+
menu and select a
menu you want.
I want to exit Anynet+.
■ Select
View TV
in Anynet+ menu.
■ Press the
SOURCE
button on the TV remote control and select a
device other than Anynet+ devices.
■ Press any of
P
,
CH LIST
, and
PRE-CH
to change to the
TV mode. (Note that the channel button operates only when a tuner-
embedded Anynet+ device is not connected.)
The message Connecting to
Anynet+ device… appears on
the screen.
■ You cannot use the remote control when you are configuring Anynet
+
or switching to a view mode.
■ Use the remote control when the Anynet
+ setting or switching to view
mode is complete.
The Anynet+ device does not
play.
■ You cannot use the play function when Plug & Play is in progress.
The connected device is not
displayed.
■ Check whether or not the device supports Anynet
+ functions.
■ Check whether or not the HDMI cable is properly connected.
■ Check whether Anynet
+ (HDMI-CEC) is set to On in the Anynet+ setup
menu.
■ Search Anynet
+ devices again.
■ You can connect an Anynet
+ device using the HDMI cable only. Some
HDMI cables may not support Anynet+ functions.
The TV programme cannot be
recorded.
■ Check whether the antenna jack on the recording device is properly
connected.
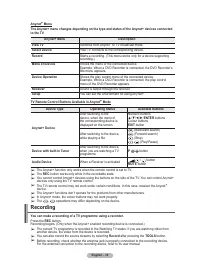
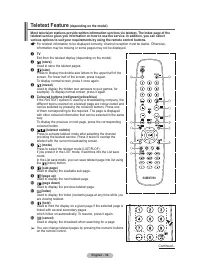
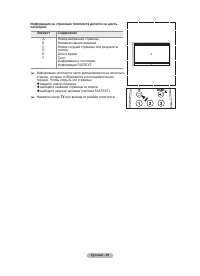
Enter
Move
View TV
Select Device
Record
Menu on Device
Device Operation
Receiver
:On
Setup
TV P 1
Exit
BN68-01417F-00.indb 33
2008-04-07 오후 7:11:19
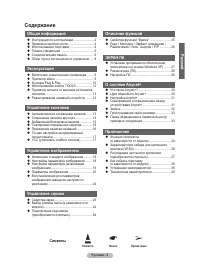
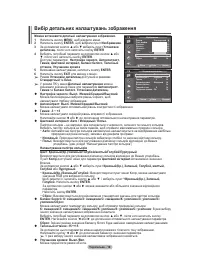
Содержание
- 43 Инструкции по эксплуатации
- 44 Символы; Содержание; Ру
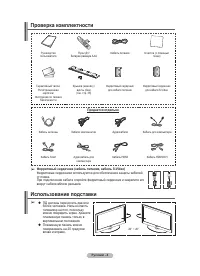
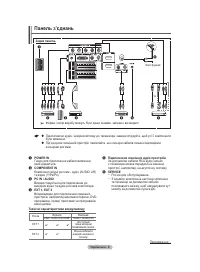
- 45 Проверка комплектности; Продается отдельно; Использование подставки
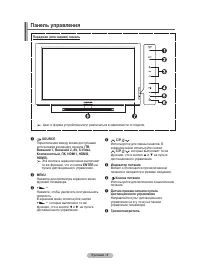
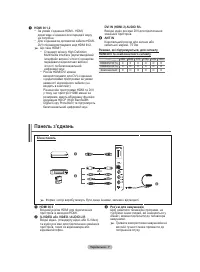
- 46 Панель управления
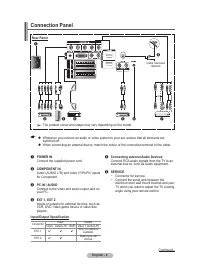
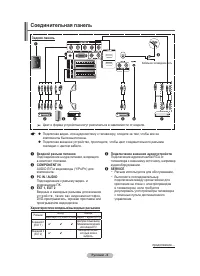
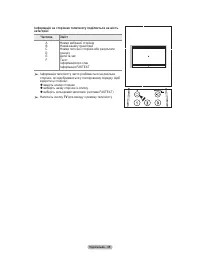
- 47 Соединительная панель
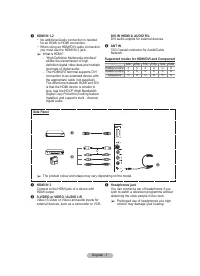
- 48 Боковая панель
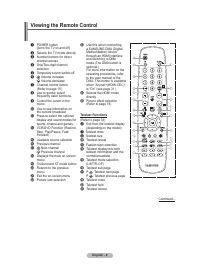
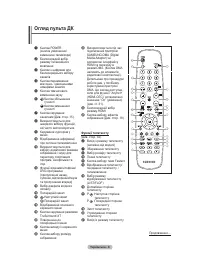
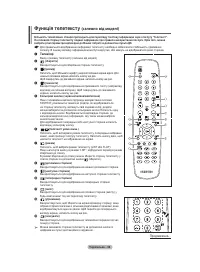
- 49 Обзор пульта дистанционного управления; Функции телетекста
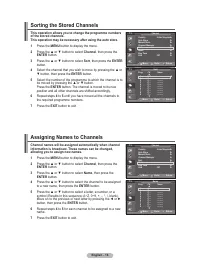
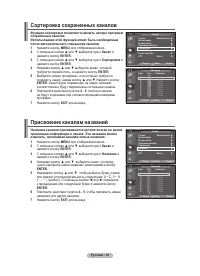
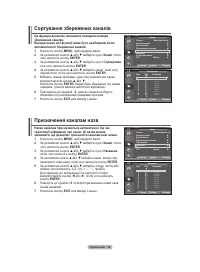
- 55 Сохранение каналов вручную
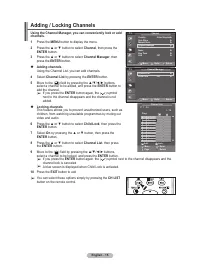
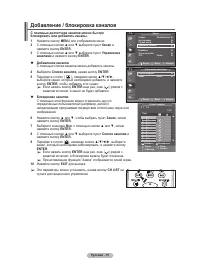
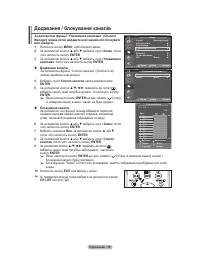
- 56 Добавление / блокировка каналов
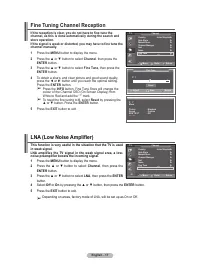
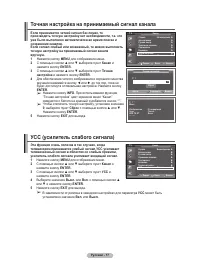
- 58 Точная настройка на принимаемый сигнал канала
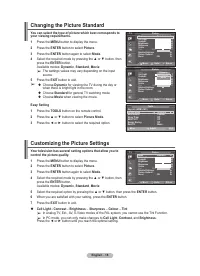
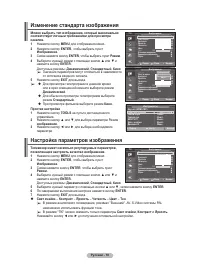
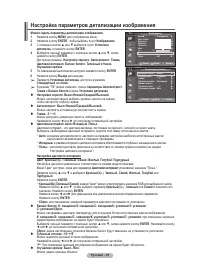
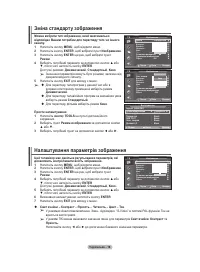
- 60 Настройка параметров детализации изображения
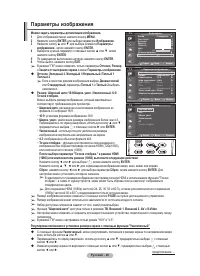
- 61 Параметры изображения
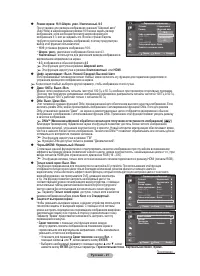
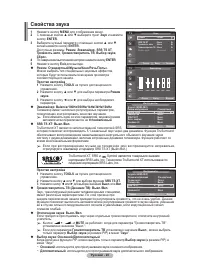
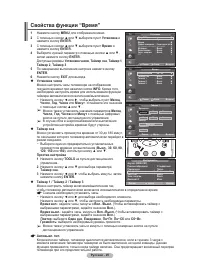
- 64 Свойства звука
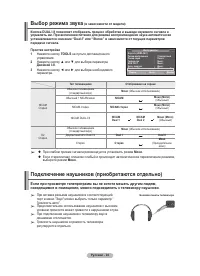
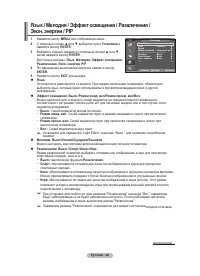
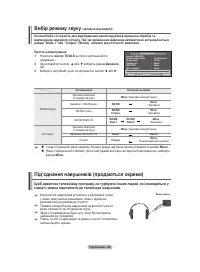
- 65 Выбор режима звука; Простая настройка; Подключение наушников (приобретаются отдельно); Если при просмотре телепрограмм вы не хотите мешать другим людям,
- 66 Свойства функции “Время”
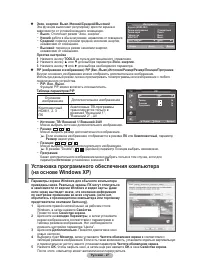
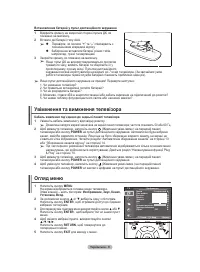
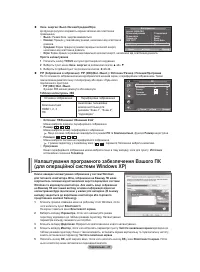
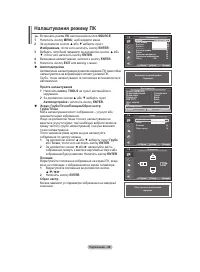
- 68 Установка программного обеспечения компьютера
- 70 Настройка ПК
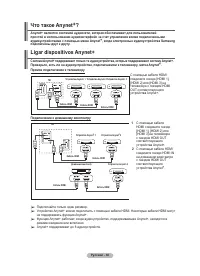
- 71 Ligar dispositivos Anynet+; Прямое подключение к телевизору
- 72 Сканирование и переключение между устройствами Anynet+
- 73 Запись
- 75 Функция телетекста
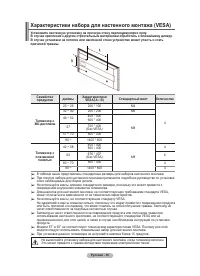
- 77 Характеристики набора для настенного монтажа (VESA)
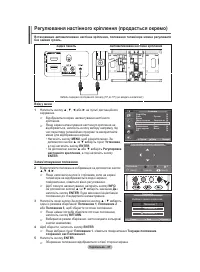
- 78 Регулировка настенного крепления (приобретается отдельно)
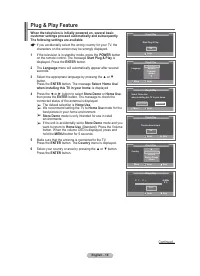
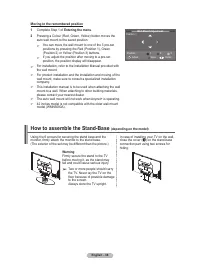
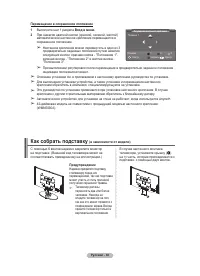
- 79 Как собрать подставку; Предупреждение; Вход в меню
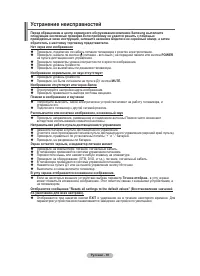
- 80 Устранение неисправностей
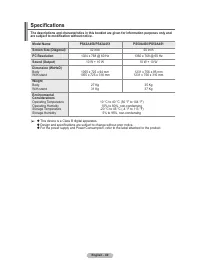
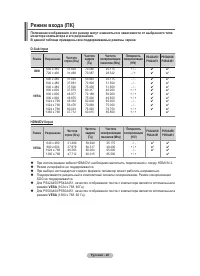
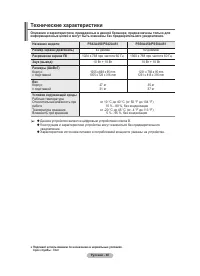
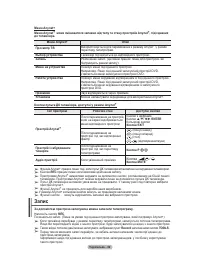
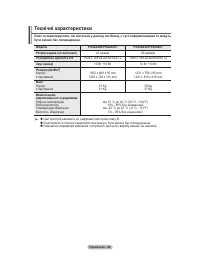
- 81 Технические характеристики; Название модели
- 96 Додавання / блокування каналів
- 98 Точне налаштування каналів
- 100 Вибір детальних налаштувань зображення


