Телевизоры Samsung PS-42 B451B2 - инструкция пользователя по применению, эксплуатации и установке на русском языке. Мы надеемся, она поможет вам решить возникшие у вас вопросы при эксплуатации техники.
Если остались вопросы, задайте их в комментариях после инструкции.
"Загружаем инструкцию", означает, что нужно подождать пока файл загрузится и можно будет его читать онлайн. Некоторые инструкции очень большие и время их появления зависит от вашей скорости интернета.


English - 1
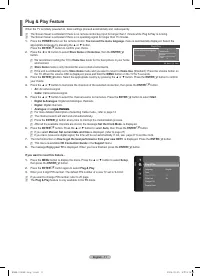
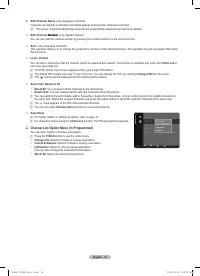
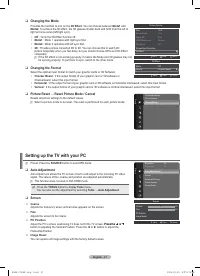
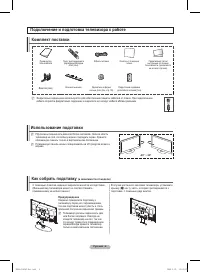
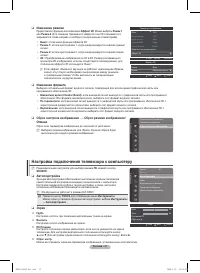
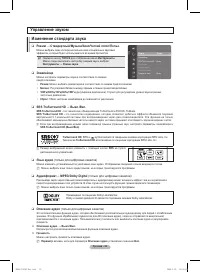
Setting up the TV with your PC
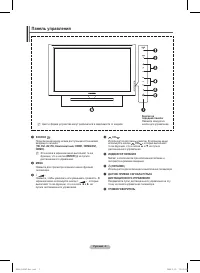
Preset: Press the
SOURCE
button to select
PC
mode.
Auto Adjustment
Auto Adjustment allows the PC screen of set to self-adjust to the incoming PC video
signal. The values of ine, coarse and position are adjusted automatically.
This function does not work in DVI-HDMI mode.
Press the
TOOLS
button to display
Tools
menu.
You can also set the adjustment by selecting
Tools → Auto Adjustment
.
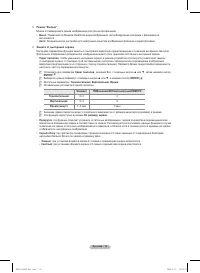
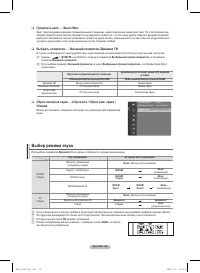
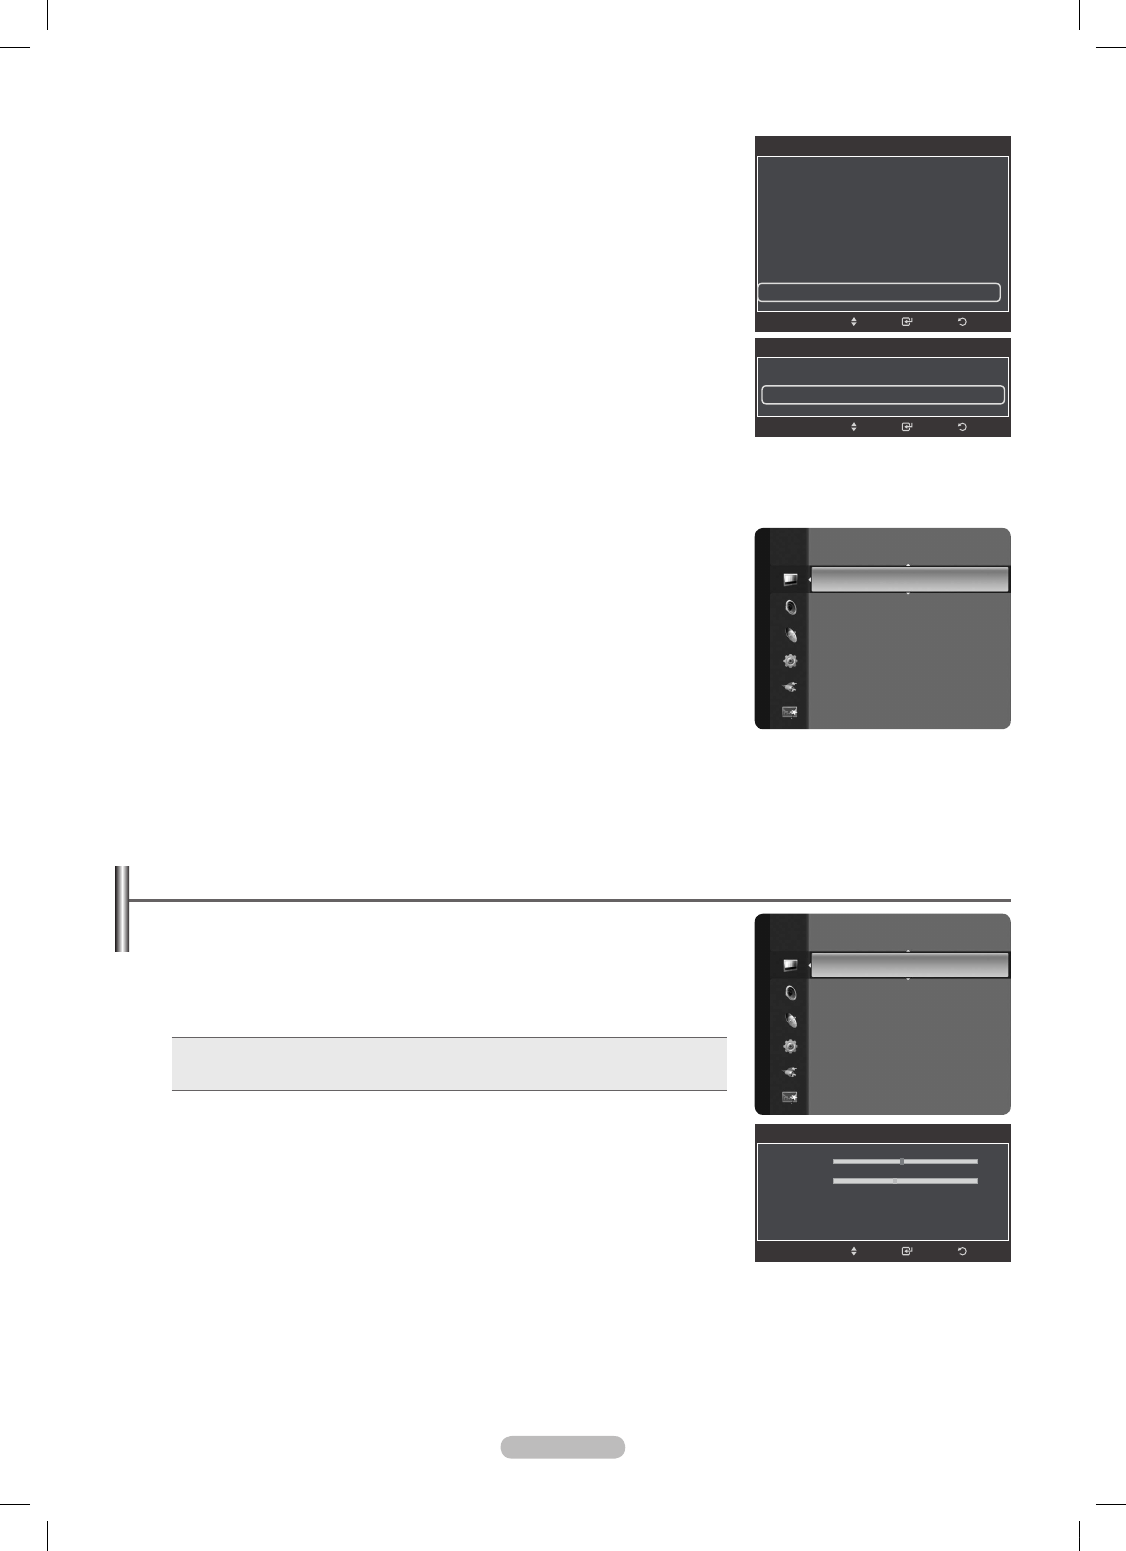
T
Screen
Coarse
Adjusts the frequency when vertical noise appears on the screen.
Fine
Adjusts the screen to be clearer.
PC Position
Adjust the PC’s screen positioning if it does not it the TV screen. Press the ▲ or ▼
Press the ▲ or ▼
button to adjusting the Vertical-Position. Press the ◄ or ► button to adjust the
Horizontal-Position.
Image Reset
You can replace all image settings with the factory default values.
N
❑
N
❑
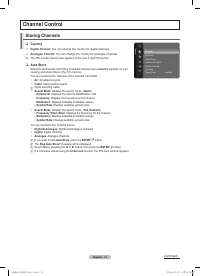
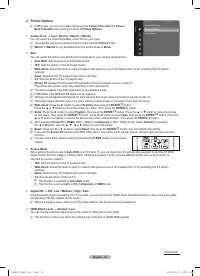
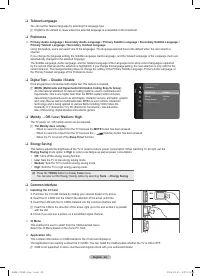
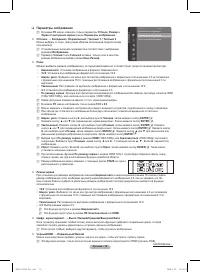
Changing the Mode
Provides the function to turn on the
3D Effect
. You can choose between
Mode1
and
Mode
. To achieve the 3D effect, the 3D glasses shutter back and forth from the left to
right and vice versa (left/right sync).
Off
: Turns the 3D Effect function off.
Mode1
: Mode 1 operates with right sync irst.
Mode
: Mode 2 operates with left sync irst.
D
: Provides picture converted 3D to 2D. You can choose this to watch 2D
picture temporally when you feel dizzy, but you should choose Off to end 3D Effect
completely.
If the 3D effect is not working properly, it means the Mode and 3D glasses may not
be syncing properly. To put them in sync, switch to the other mode.
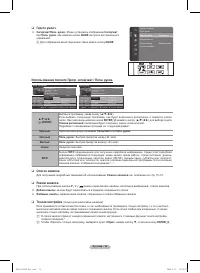
Changing the Format
Select the optimal input format to match your graphic cards or 3D Software.
Checker Board
: If the output format of your graphic card or 3D software is
Checkerboard, select this input format.
Horizontal
: If the output format of your graphic card or 3D software is Horizontal interleaved, select this input format.
Vertical
: If the output format of your graphic card or 3D software is Vertical interleaved, select this input format.
Picture Reset → Reset Picture Mode / Cancel
Resets all picture settings to the default values.
Select a picture mode to be reset. The reset is performed for each picture mode.
❑
•
•
•
•
N
❑
•
•
•
❑
N
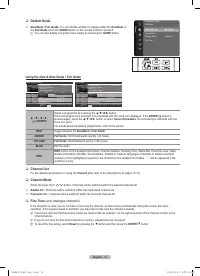
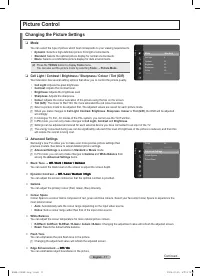
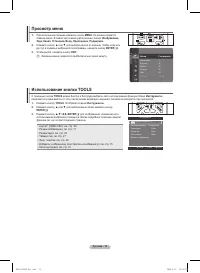
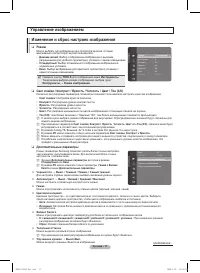
Picture Options
Size
: 16:9
Screen Mode
: 16:9
Digital NR
: Auto
HDMI Black Level
: Normal
Film Mode
: Off
Screen Burn Protection
3D Effect
▶
Return
Enter
Move
▲
3D Effect
Mode
: Off
Format
: Checker Board
▶
Return
Enter
Move
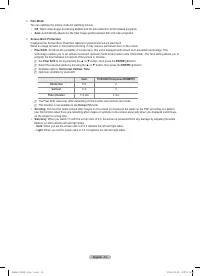
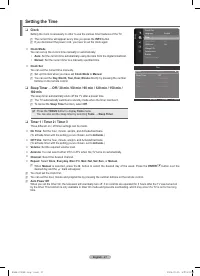
Screen
Coarse
50
Fine
44
PC Position
Image Reset
Return
Enter
Move
Brightness
: 45
Sharpness
: 50
Auto Adjustment
►
Screen
Advanced Settings
Picture Options
Picture Reset
Pi
ct
u
re
Pi
ct
u
re
Advanced Settings
Picture Options
Picture Reset
►
Pi
ct
u
re
BN68-01936F-Eng-1.indd 21
2009-02-25 오후 9:19:58
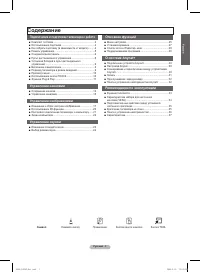
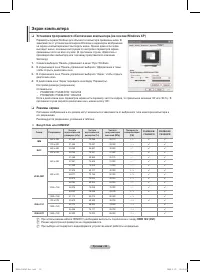
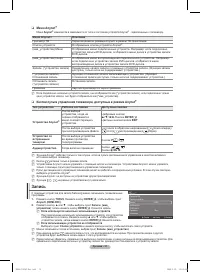
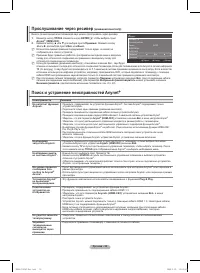
Содержание
- 38 Инструкции по эксплуатации; функционировать неправильно.
- 39 Содержание; Символ
- 40 Предупреждение
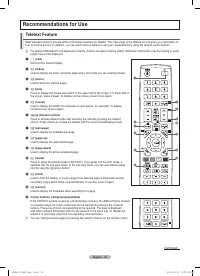
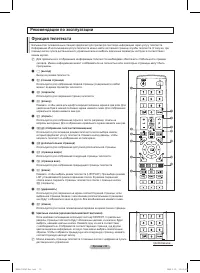
- 41 Панель управления
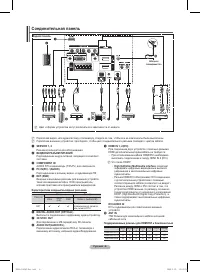
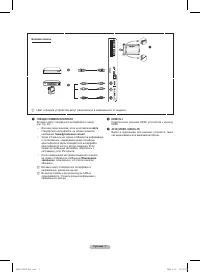
- 42 Соединительная панель
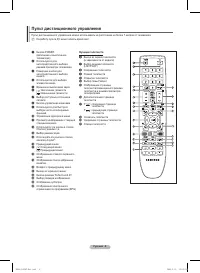
- 44 Пульт дистанционного управления; Функции телетекста
- 48 продолжение...
- 51 Управление каналами; Меню инструментов списка каналов (в меню Все каналы/
- 52 Меню параметров списка каналов (в меню
- 56 Использование 3D-функции; Подключения; звуковой карте компьютера.; Настроить разрешение компьютера; ) и сохраняется значение; Формат; трехмерных изображений, или программное обеспечение 3D.
- 57 Настройка подключения телевизора к компьютеру
- 58 Экран компьютера; Режимы экрана
- 59 Изменение стандарта звука; Эквалайзер; Управление звуком
- 60 Выбор режима звука
- 61 Меню настройки; Изменение PIN; Описание функций
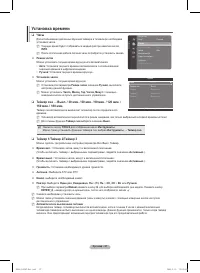
- 63 Установка времени; Часы
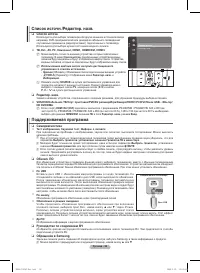
- 64 Поддерживаемая программа; Самодиагностика
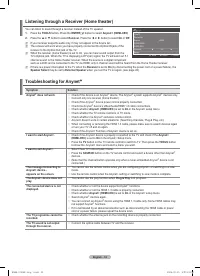
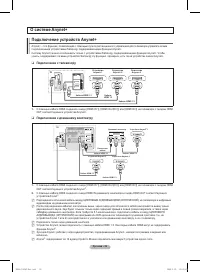
- 65 Подключение устройств Anynet+; Подключение к телевизору; Подключение к домашнему кинотеатру; OUT соответствующего устройства Anynet+
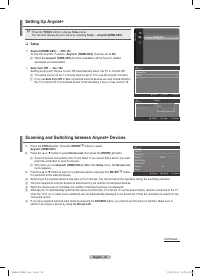
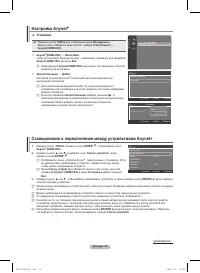
- 66 Сканирование и переключение между устройствами Anynet+; Установка
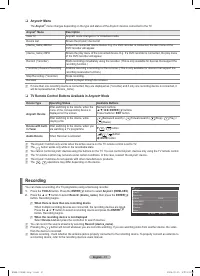
- 67 Кнопки пульта управления телевизора, доступные в режиме Anynet+; Запись
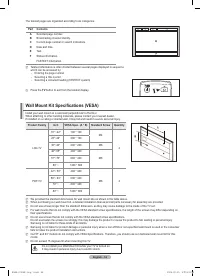
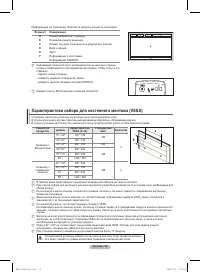
- 70 Характеристики набора для настенного монтажа (VESA)
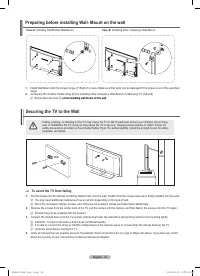
- 71 Крепление телевизора на стене; Вариант A; Вариант B
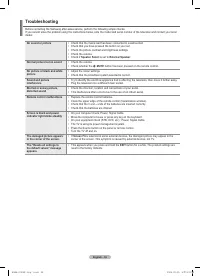
- 72 Поиск и устранение неисправностей
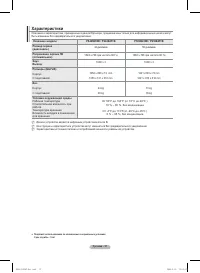
- 73 Характеристики


