Телевизоры Samsung PS-42 B451B2 - инструкция пользователя по применению, эксплуатации и установке на русском языке. Мы надеемся, она поможет вам решить возникшие у вас вопросы при эксплуатации техники.
Если остались вопросы, задайте их в комментариях после инструкции.
"Загружаем инструкцию", означает, что нужно подождать пока файл загрузится и можно будет его читать онлайн. Некоторые инструкции очень большие и время их появления зависит от вашей скорости интернета.


English - 11
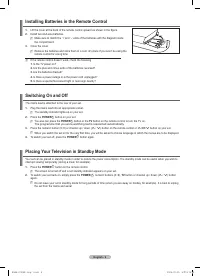
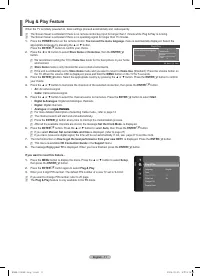
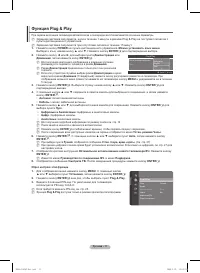
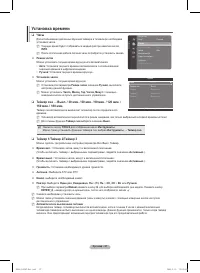
Plug & Play Feature
When the TV is initially powered on, basic settings proceed automatically and subsequently.
The Screen Saver is activated if there is no remote control key input for longer than 1 minute while Plug & Play is running.
The Screen Saver is activated if there is no operating signal for longer than 15 minutes.
1.
Press the
POWER
button on the remote control.
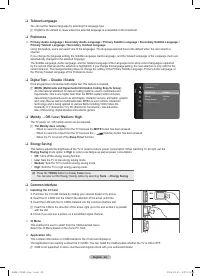
You can set the menu language.
menu is automatically displayed. Select the
appropriate language by pressing the ▲ or ▼ button.
Press the
ENTER
E
button to conirm your choice.
.
Press the ◄ or ► button to select
Store Demo
or
Home Use
, then the
ENTER
E
button.
We recommend setting the TV to
Home Use
mode for the best picture in your home
environment.
Store Demo
mode is only intended for use in retail environments.
If the unit is accidentally set to
Store Demo
mode and you want to return to
Home Use
(Standard): Press the Volume button on
the TV. When the volume OSD is displayed, press and hold the
MENU
button on the TV for 5 seconds.
3.
Press the
ENTER
E
button. Select the appropriate country by pressing the ▲ or ▼ button. Press the
ENTER
E
button to conirm
your choice.
4.
Press the ▲ or ▼ button to memorize the channels of the selected connection, then press the
ENTER
E
button.
Air:
Air antenna signal.
Cable:
Cable antenna signal.
5.
Press the ▲ or ▼ button to select the channel source to memorize. Press the
ENTER
E
button to select
Start
.
Digital & Analogue
: Digital and Analogue channels.
Digital
: Digital channels.
Analogue
: Analogue channels.
ogue channels.
e channels.
For more detailed description of selecting Cable mode,, refer to page 12.
The channel search will start and end automatically.
Press the
ENTER
E
button at any time to interrupt the memorization process.
After all the available channels are stored, the message
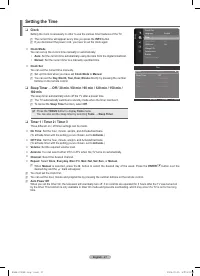
Set the Clock Mode.
is displayed.
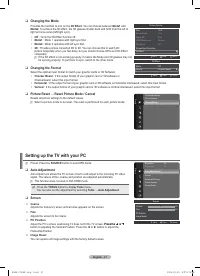
6.
Press the
ENTER
E
button. Press the ▲ or ▼ button to select
Auto
, then Press the
ENTER
E
button.
If you select
Manual
,
Set current date and time
is displayed. (refer to page 27)
If you have received a digital signal, the time will be set automatically. If not, see page 27 to set the clock.
.
The brief instruction on
How to get the best performance from your new HDTV
.
is displayed. Press the
ENTER
E
button.
This menu is available
HD Connection Guide
in the
Support
menu.
.
The message
Enjoy your TV
is displayed. When you have inished, press the
ENTER
E
button.
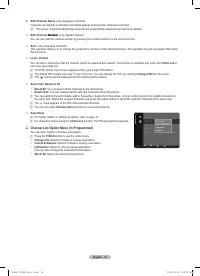
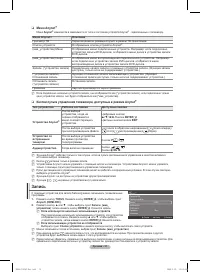
If you want to reset this feature...
1.
Press the
MENU
button to display the menu. Press the ▲ or ▼ button to select
Setup
,
then press the
ENTER
E
button.
.
Press the
ENTER
E
button again to select
Plug & Play
.
3.
Enter your 4 digit PIN number. The default PIN number of a new TV set is ‘0-0-0-0’.
If you want to change PIN number, refer to 25 page.
The
Plug & Play
feature is only available in the
TV
mode.
N
N
N
N
N
•
•
•
•
•
N
N
N
N
N
N
N
N
N
Se
tup
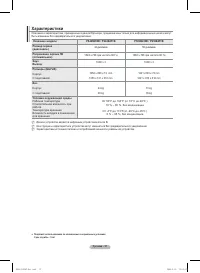
Plug & Play
►
Language
: English
Time
Game Mode
: Off
Child Lock
: On
Change PIN
Parental Lock
Plug & Play
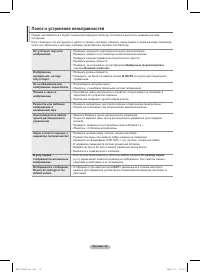
You can set the menu language.
U
Move
E
Enter
▲
Nederlands
English
Eesti
▼
Menu Language
:
BN68-01936F-Eng-1.indd 11
2009-02-25 오후 9:19:55
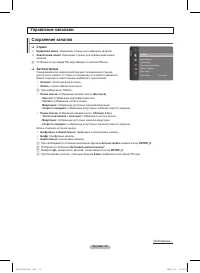
Содержание
- 38 Инструкции по эксплуатации; функционировать неправильно.
- 39 Содержание; Символ
- 40 Предупреждение
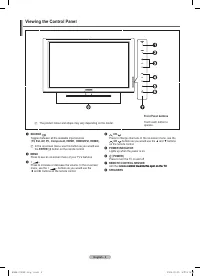
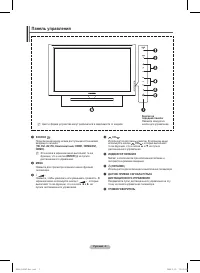
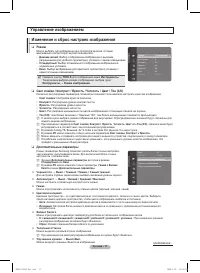
- 41 Панель управления
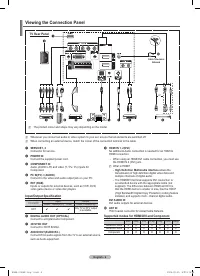
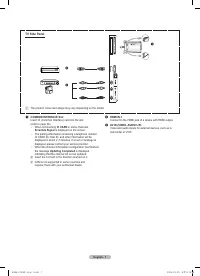
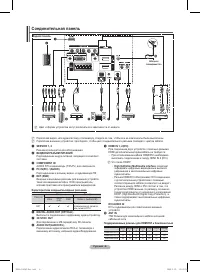
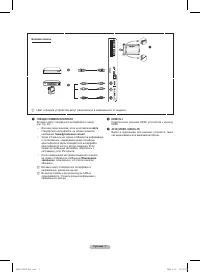
- 42 Соединительная панель
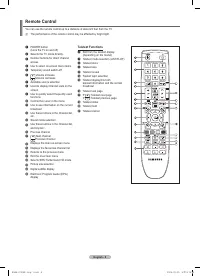
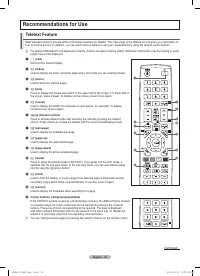
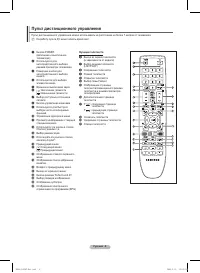
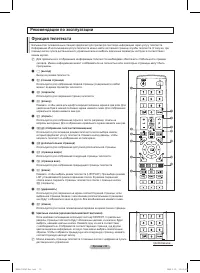
- 44 Пульт дистанционного управления; Функции телетекста
- 48 продолжение...
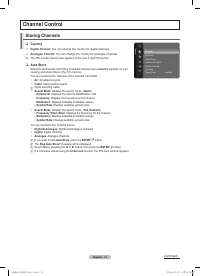
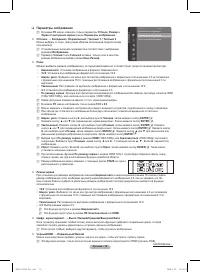
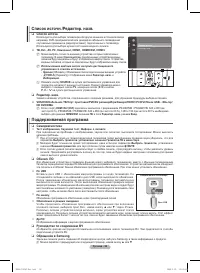
- 51 Управление каналами; Меню инструментов списка каналов (в меню Все каналы/
- 52 Меню параметров списка каналов (в меню
- 56 Использование 3D-функции; Подключения; звуковой карте компьютера.; Настроить разрешение компьютера; ) и сохраняется значение; Формат; трехмерных изображений, или программное обеспечение 3D.
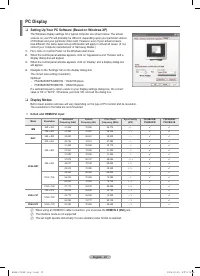
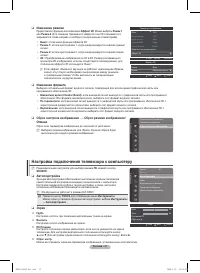
- 57 Настройка подключения телевизора к компьютеру
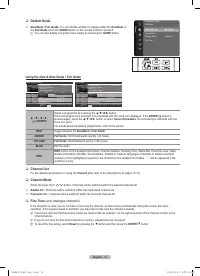
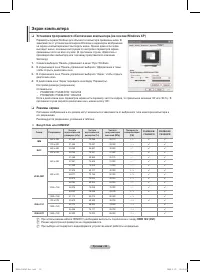
- 58 Экран компьютера; Режимы экрана
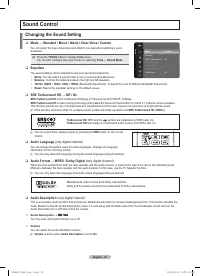
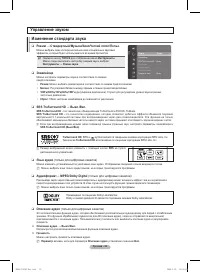
- 59 Изменение стандарта звука; Эквалайзер; Управление звуком
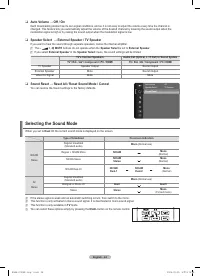
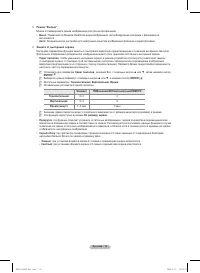
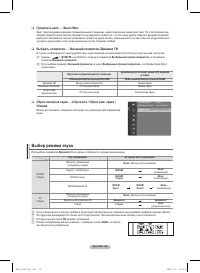
- 60 Выбор режима звука
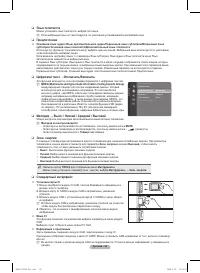
- 61 Меню настройки; Изменение PIN; Описание функций
- 63 Установка времени; Часы
- 64 Поддерживаемая программа; Самодиагностика
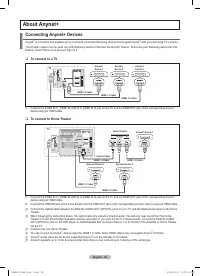
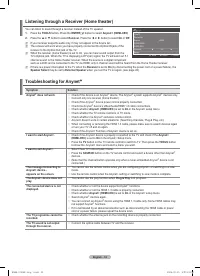
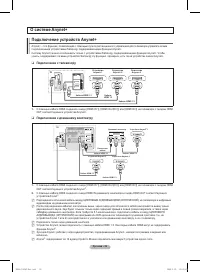
- 65 Подключение устройств Anynet+; Подключение к телевизору; Подключение к домашнему кинотеатру; OUT соответствующего устройства Anynet+
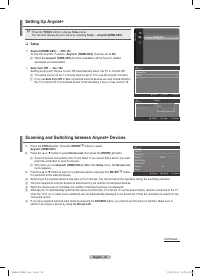
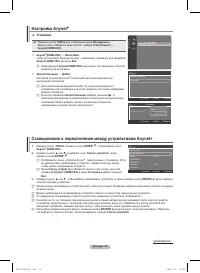
- 66 Сканирование и переключение между устройствами Anynet+; Установка
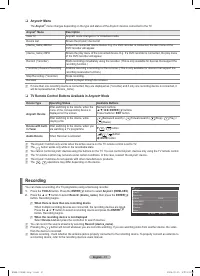
- 67 Кнопки пульта управления телевизора, доступные в режиме Anynet+; Запись
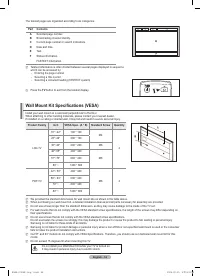
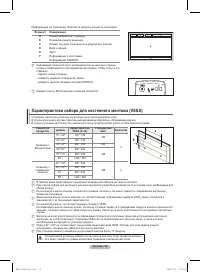
- 70 Характеристики набора для настенного монтажа (VESA)
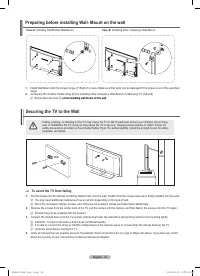
- 71 Крепление телевизора на стене; Вариант A; Вариант B
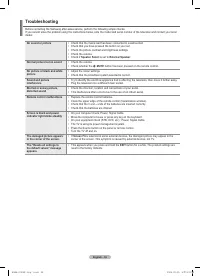
- 72 Поиск и устранение неисправностей
- 73 Характеристики


