Телевизоры Samsung LE-40 B531 P7W - инструкция пользователя по применению, эксплуатации и установке на русском языке. Мы надеемся, она поможет вам решить возникшие у вас вопросы при эксплуатации техники.
Если остались вопросы, задайте их в комментариях после инструкции.
"Загружаем инструкцию", означает, что нужно подождать пока файл загрузится и можно будет его читать онлайн. Некоторые инструкции очень большие и время их появления зависит от вашей скорости интернета.


English - 4
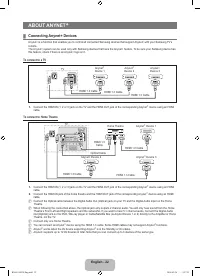
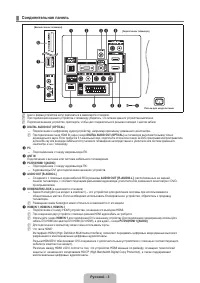
The TV may not output sound and pictures may be displayed with abnormal colour when DVD / Blu-ray player / Cable
Boxes / Satellite receivers supporting HDMI versions older than 1.3 are connected. When connecting an older HDMI
cable and there is no sound, connect the HDMI cable to the
HDMI IN 1
jack and the audio cables to the
PC/DVI(HDMI
1)[AUDIO]
jacks on the back of the TV. If this happens, contact the company that provided the DVD / Blu-ray player /
Cable Box / Satellite receiver to conirm the HDMI version, then request a irmware update. HDMI cables that are not 1.3
may cause annoying licker or no screen display.
8
COMPONENT IN
Connect component video cables (optional) to component connector (P
R
, P
B
, Y) on the rear of your set and the other ends
to corresponding component video out connectors on the DTV or DVD.
If you wish to connect both the Set-Top Box and DTV (or DVD), you should connect the Set-Top Box to the DTV (or DVD)
and connect the DTV (or DVD) to component connector (P
R
, P
B
, Y) on your set.
The P
R
, P
B
and Y connectors on your component devices (DTV or DVD) are sometimes labelled Y, B-Y and R-Y or Y, Cb
and Cr.
Connect RCA audio cables (optional) to
[R-AUDIO-L]
on the rear of your set and the other ends to corresponding audio
out connectors on the DTV or DVD.
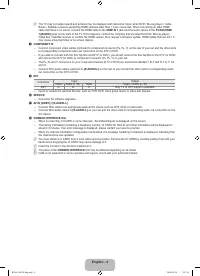
9
EXT
Connector
Input
Output
Video
Audio (L / R)
RGB
Video + Audio (L / R)
EXT
O
O
O
Only TV or DTV output is available.
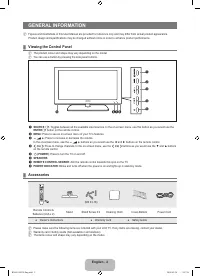
Inputs or outputs for external devices, such as VCR, DVD, video game device or video disc players.
0
SERVICE
Connector for software upgrades.
!
AV IN [VIDEO] / [R-AUDIO-L]
Connect RCA cable to an appropriate external A/V device such as VCR, DVD or Camcorder.
Connect RCA audio cables to
[R-AUDIO-L]
on your set and the other ends to corresponding audio out connectors on the
A/V device.
@
COMMON INTERFACE Slot
When not inserting ‘CI CARD’ in some channels, ‘Scrambled Signal’ is displayed on the screen.
The pairing information containing a telephone number, CI CARD ID, Host ID and other information will be displayed in
about 2~3 minutes. If an error message is displayed, please contact your service provider.
When the channel information coniguration has inished, the message ‘Updating Completed’ is displayed, indicating that
the channel list is now updated.
You must obtain a CI CARD from a local cable service provider. Remove the CI CARD by carefully pulling it out with your
hands since dropping the CI CARD may cause damage to it.
Insert the CI-Card in the direction marked on it.
The place of the
COMMON INTERFACE
Slot may be different depending on its model.
CAM is not supported in some countries and regions, check with your authorized dealer.
N
–
–
–
–
–
–
–
–
–
–
–
N
N
N
N
BN68-01893F-Eng.indd 4
2009-02-24 2:57:19
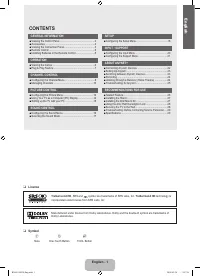
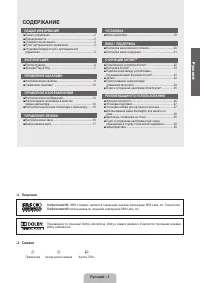
Содержание
- 33 Лицензия; Символ; СОДЕРЖАНИЕ; Ру
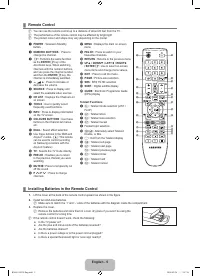
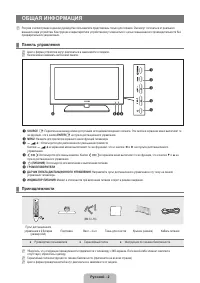
- 34 ОБЩАЯ ИНФОРМАЦИЯ; Панель управления
- 35 Соединительная панель
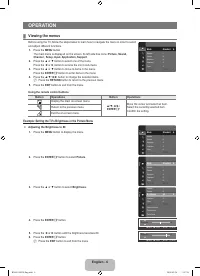
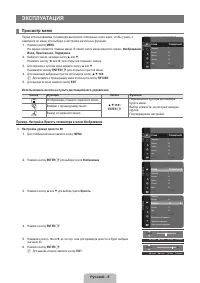
- 38 ЭКСПЛУАТАЦИЯ; Просмотр меню; Пример. Настройка Яркость телевизора в меню Изображение
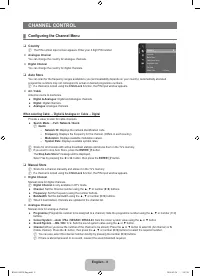
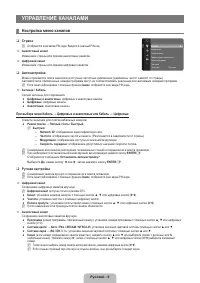
- 40 УПРАВЛЕНИЕ КАНАЛАМИ; Настройка меню каналов
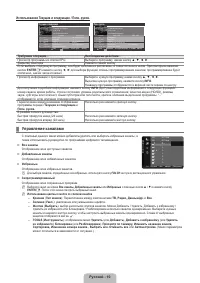
- 42 Управление каналами
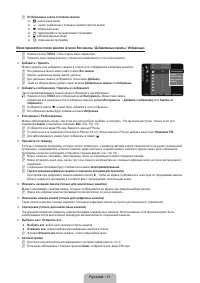
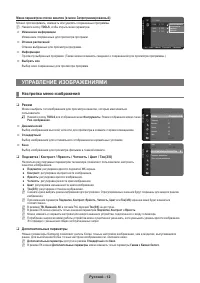
- 44 Меню параметров списка каналов (в меню Запрограммированный); УПРАВЛЕНИЕ ИЗОБРАЖЕНИЯМИ; Настройка меню изображений
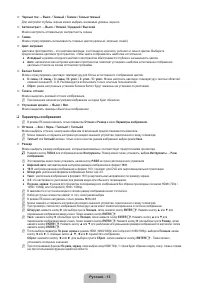
- 45 Параметры изображения
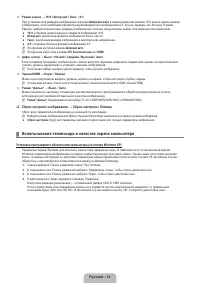
- 46 Сброс настроек изображения → Сброс настроек / Отмена; Использование телевизора в качестве экрана компьютера
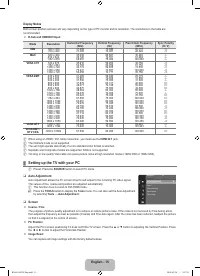
- 47 Режимы экрана; Настройка подключения телевизора к компьютеру
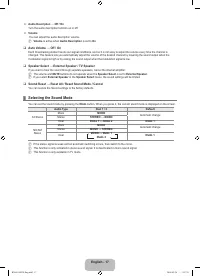
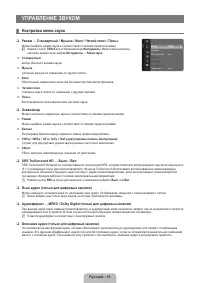
- 48 УПРАВЛЕНИЕ ЗВУКОМ; Настройка меню звука; Эквалайзер
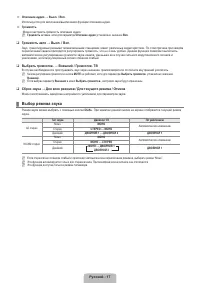
- 49 Сброс звука → Для всех режимов / Для текущего режима / Отмена; Выбор режима звука
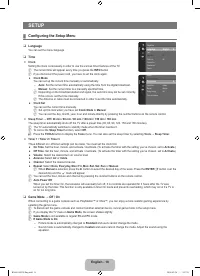
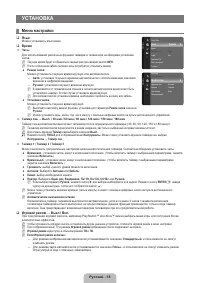
- 50 УСТАНОВКА; Меню настройки
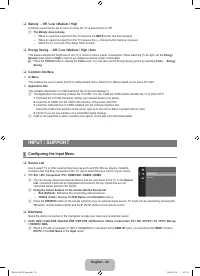
- 52 Общий интерфейc; Настройка меню входного сигнала
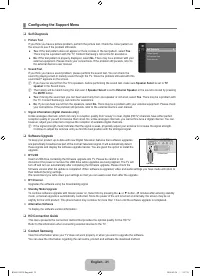
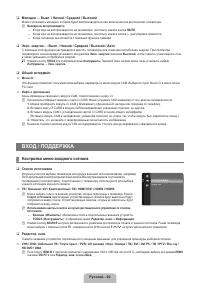
- 53 Настройка меню поддержки
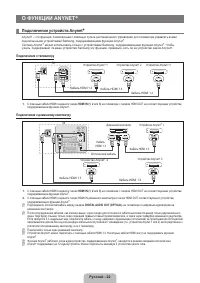
- 54 О ФУНКЦИИ ANYNET; Подключение устройств Anynet; Подключение к телевизору
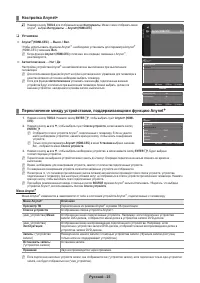
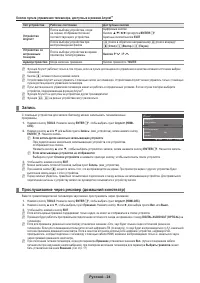
- 55 Настройка Anynet; Установка
- 56 Кнопки пульта управления телевизора, доступные в режиме Anynet
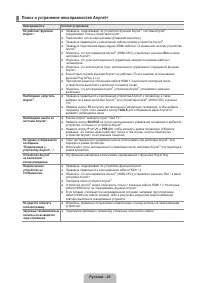
- 57 Поиск и устранение неисправностей Anynet
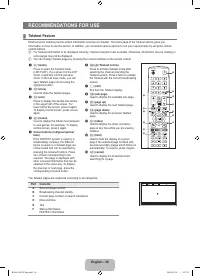
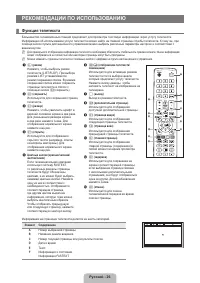
- 58 РЕКОМЕНДАЦИИ ПО ИСПОЛЬЗОВАНИЮ; Функция телетекста; Элемент Содержание
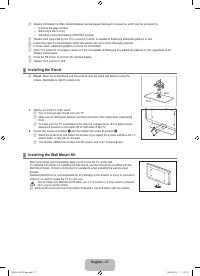
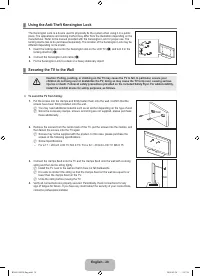
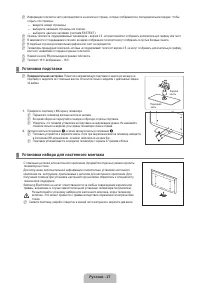
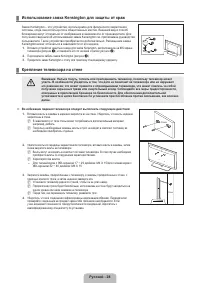
- 59 Установка подставки; Предварительная настройка; Установка набора для настенного монтажа
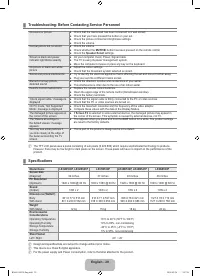
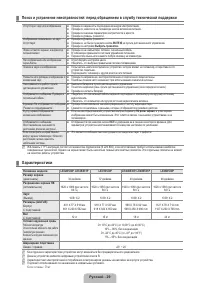
- 61 Характеристики


