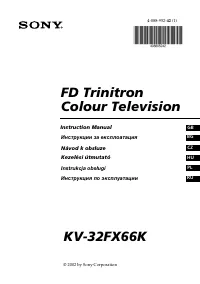
Телевизоры кинескопные Sony KV-32FX66K - инструкция пользователя по применению, эксплуатации и установке на русском языке. Мы надеемся, она поможет вам решить возникшие у вас вопросы при эксплуатации техники.
Если остались вопросы, задайте их в комментариях после инструкции.
"Загружаем инструкцию", означает, что нужно подождать пока файл загрузится и можно будет его читать онлайн. Некоторые инструкции очень большие и время их появления зависит от вашей скорости интернета.


8
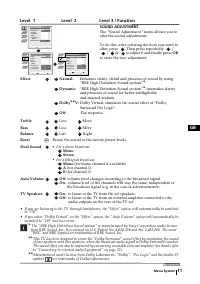
Programme:
Channel:
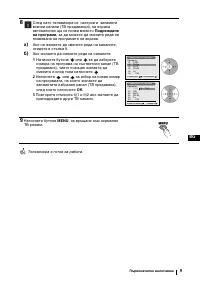
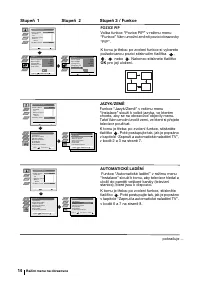
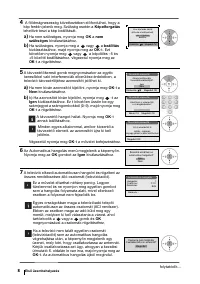
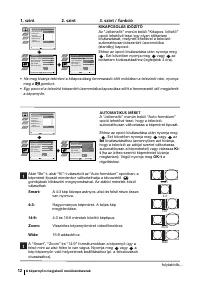
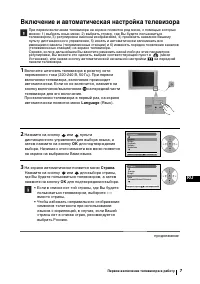
System
Searching...
1
C 01
B/G
Auto Tuning
Do you want to start
automatic tuning?
Yes
No
No channel found
Please connect aerial
Confirm
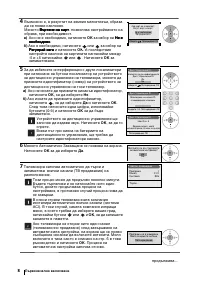
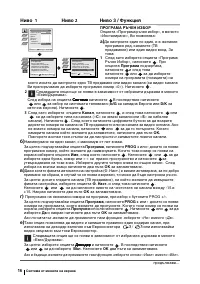
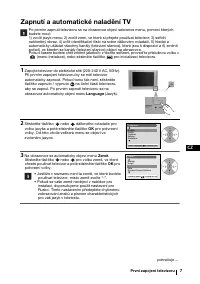
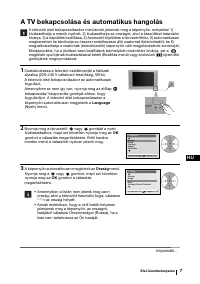
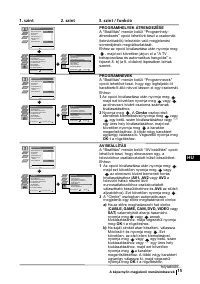
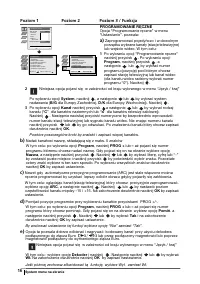
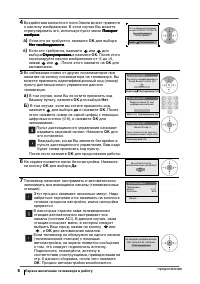
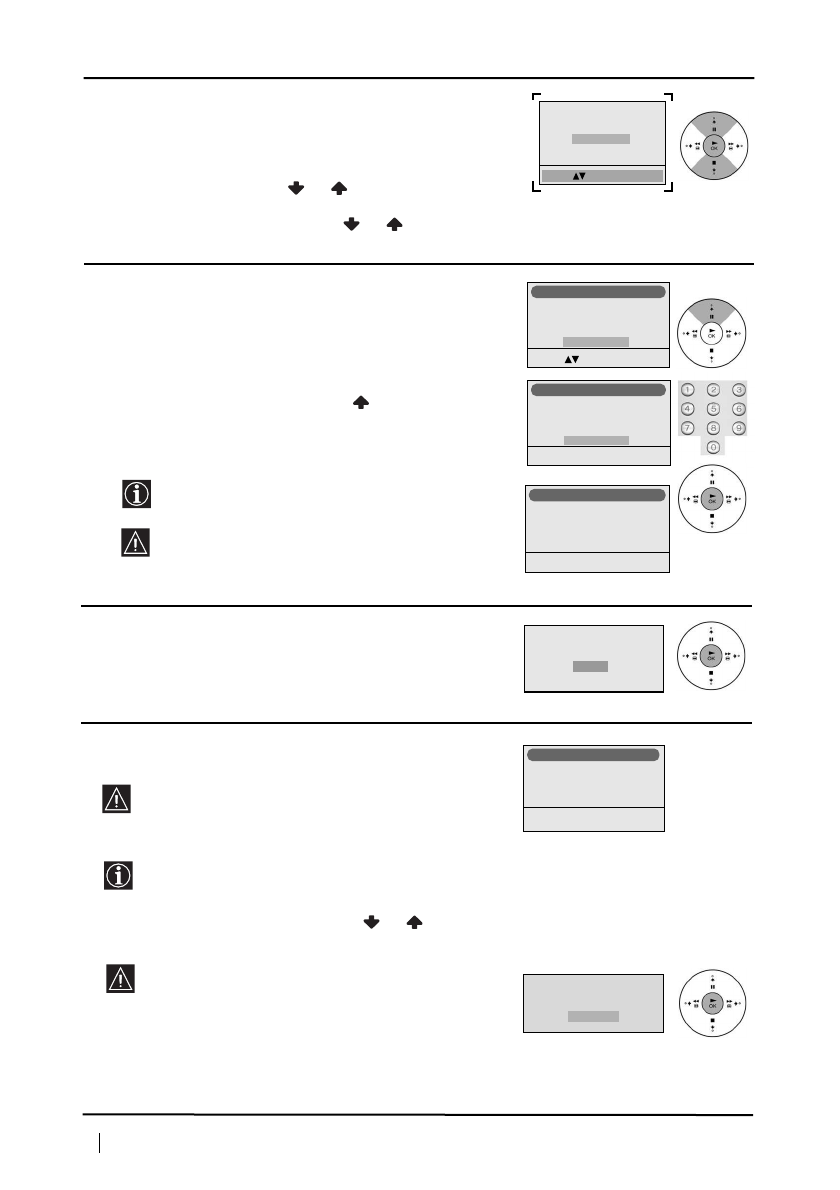
First Time Operation
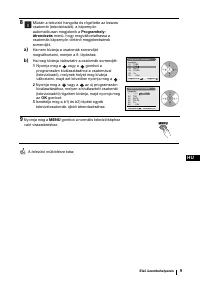
4
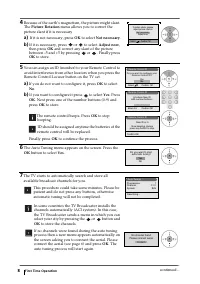
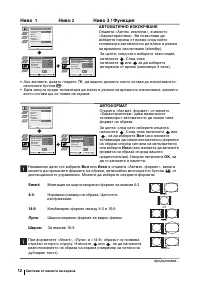
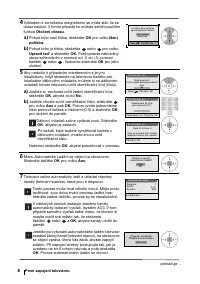
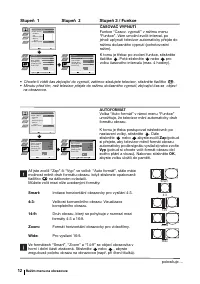
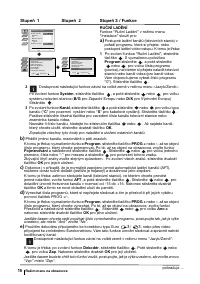
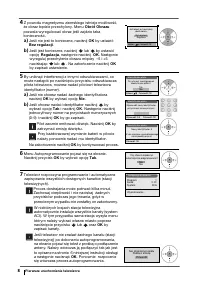
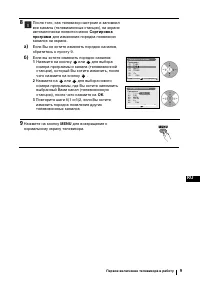
Because of the earth’s magnetism, the picture might slant.
The
Picture Rotation
menu allows you to correct the
picture slant if it is necessary.
a)
If it is not necessary, press
OK
to select
Not necessary
.
b)
If it is necessary, press
or
to select
Adjust now
,
then press
OK
and correct any slant of the picture
between –5 and +5 by pressing
or
. Finally press
OK
to store.
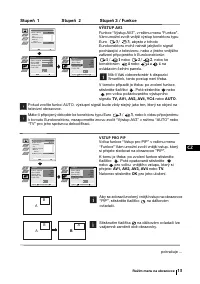
5
You can assign an ID (number) to your Remote Control to
avoid interference from other locators when you press the
Remote Control Locator button on the TV set.
a)
If you do not want to configure it, press
OK
to select
No
.
b)
If you want to configure it press
to select
Yes
. Press
OK
. Next press one of the number buttons (0-9) and
press
OK
to store.
The remote control beeps. Press
OK
to stop
beeping.
ID should be assigned anytime the batteries of the
remote control will be replaced.
Finally press
OK
to continue the process.
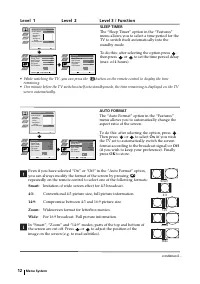
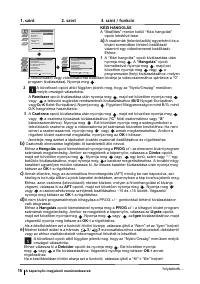
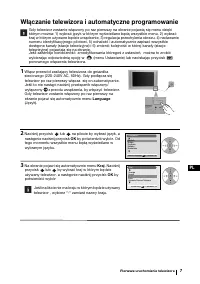
6
The Auto Tuning menu appears on the screen. Press the
OK
button to select
Yes
.
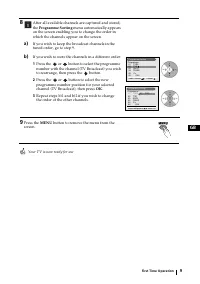
7
The TV starts to automatically search and store all
available broadcast channels for you.
This procedure could take some minutes. Please be
patient and do not press any buttons, otherwise
automatic tuning will not be completed.
In some countries the TV Broadcaster installs the
channels automatically (ACI system). In this case,
the TV Broadcaster sends a menu in which you can
select your city by pressing the
or
button and
OK
to store the channels.
If no channels were found during the auto tuning
process then a new menu appears automatically on
the screen asking you to connect the aerial. Please
connect the aerial (see page 6) and press
OK
. The
auto tuning process will start again.
Do you want to configure your
Remote Control ID?
Yes
No
Select:
Confirm: OK
Remote Control ID
Introduce New ID
with number buttons:
-
Enter: 0-9
Confirm: OK
Remote Control ID
New ID is: 5
Now beeping, please
press any button to stop.
Confirm: OK
Remote Control ID
If picture slants, please
adjust picture rotation
Not necessary
Adjust now
Select:
Confirm: OK
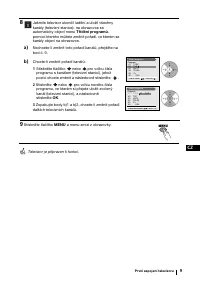
continued...
Содержание
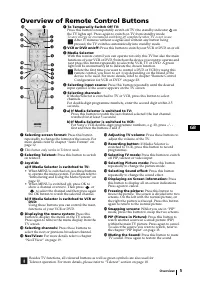
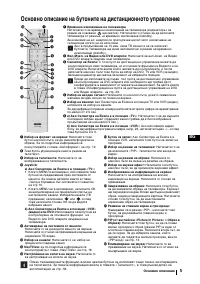
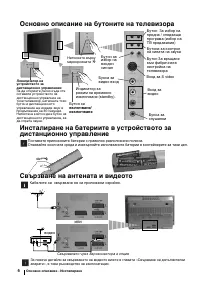
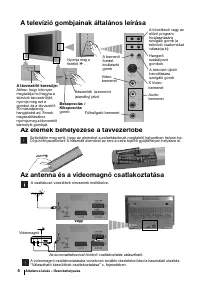
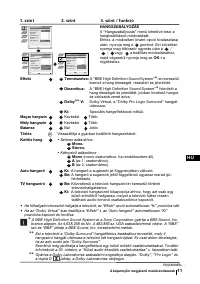
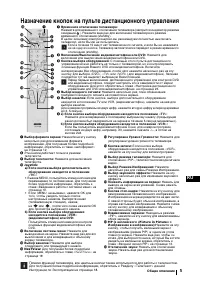
- 125 Назначение кнопок на пульте дистанционного управления; Общее описание
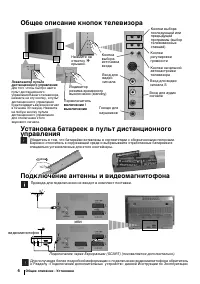
- 126 Подключение антенны и видеомагнитофона; Общее описание - Установка; выключение; выключение; Локализатор пульта; видеомагнитофон
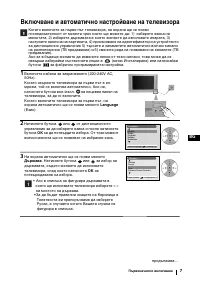
- 127 Включение и автоматическая настройка телевизора; Установка), или нажав кнопку aвтoмaтичecкoй нaчaльнoй нacтpoйки
- 128 Первое включение телевизора в работу
- 129 Сортировка
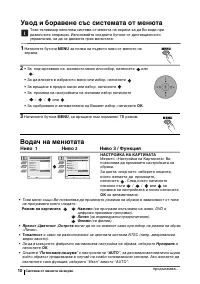
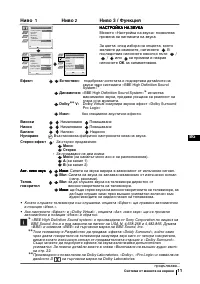
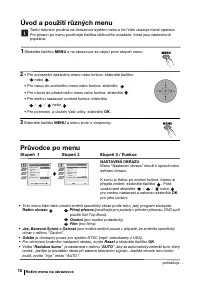
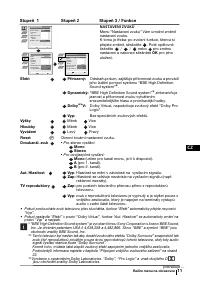
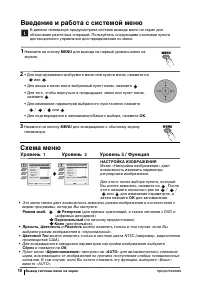
- 130 Введение и работа с системой меню; Вывод системы меню на экран; Схема меню; Уровень
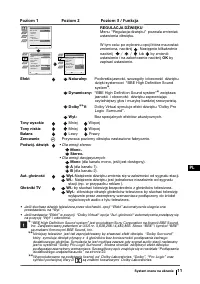
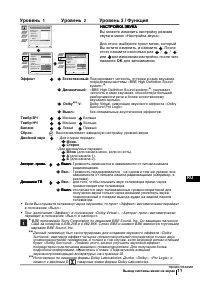
- 131 Dolby
- 132 отключения, нажмите на кнопку; ABTOФOPMAT
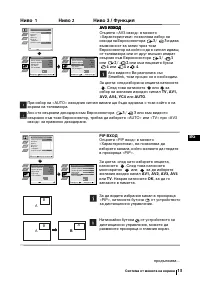
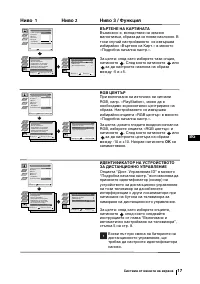
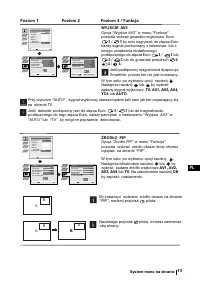
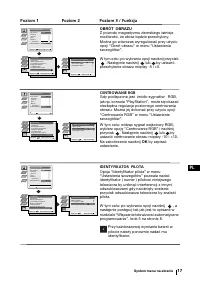
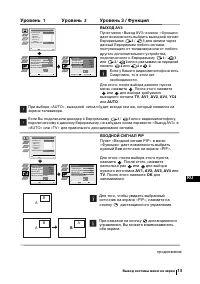
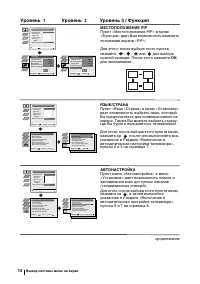
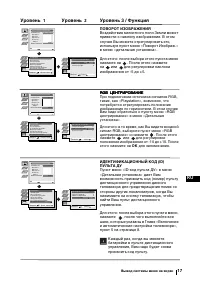
- 133 BЫXOД AV3; TV; BêxoÀ AV3; BXOДHOЙ CИГНАЛ РIР
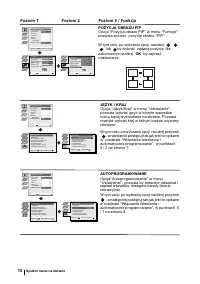
- 134 продолжeниe; МЕCTOПОЛОЖЕНИЕ РIР
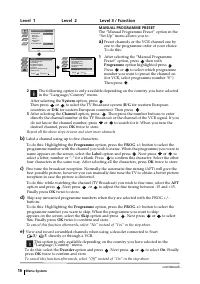
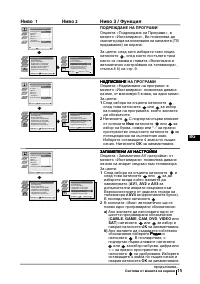
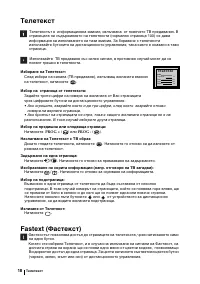
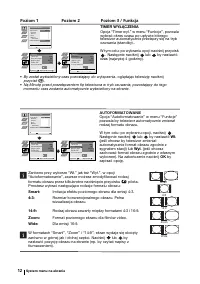
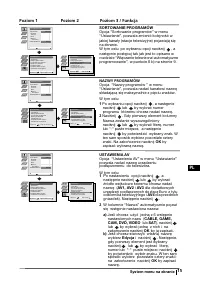
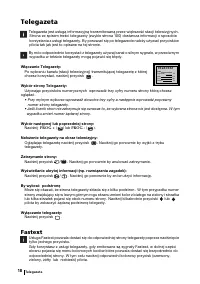
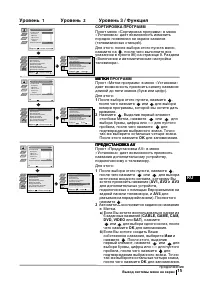
- 136 РУЧНАЯ НАСТРОЙКА ПРОГРАММ; Программа
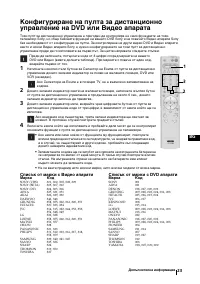
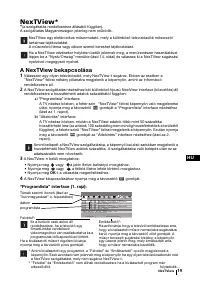
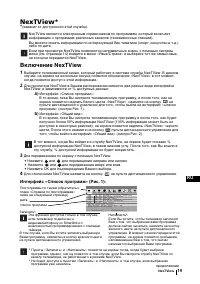
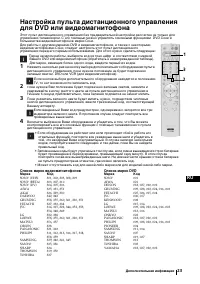
- 137 ПОBОPОT ИЗОБРАЖЕНИЯ; ÀeÚaÎëÌaÓ ycÚaÌoÇÍa; » в меню «Д; ПУЛЬТА ДУ; , после чего выполняйте все
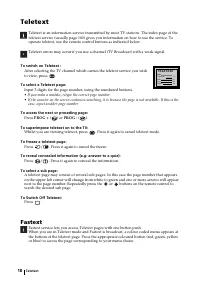
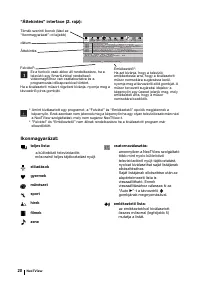
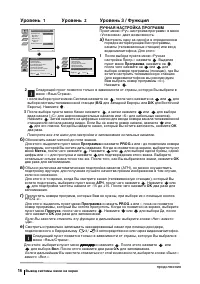
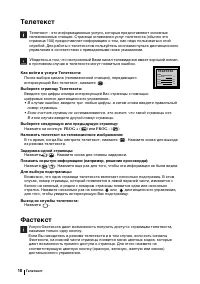
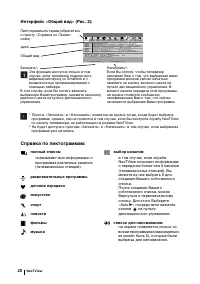
- 138 В этом случае введите другой номер страницы.; Фастекст
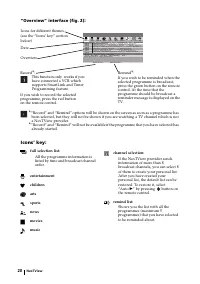
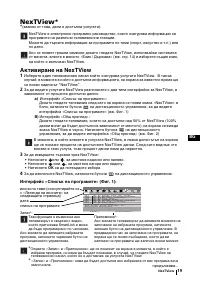
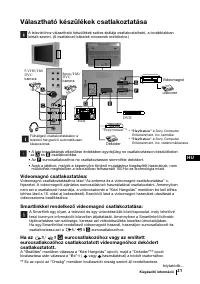
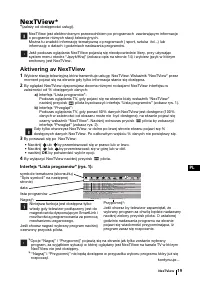
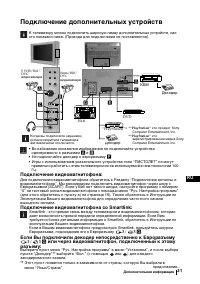
- 139 Bключение NexTView
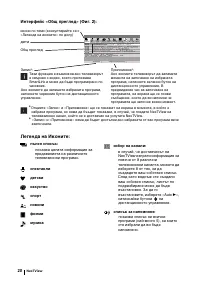
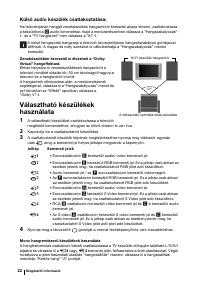
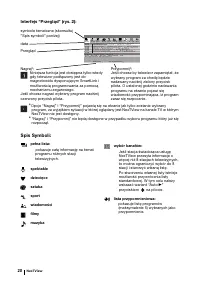
- 140 Справка по пиктoгpaммaм:
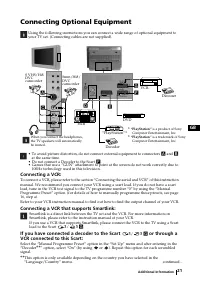
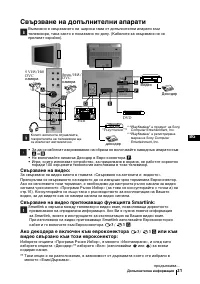
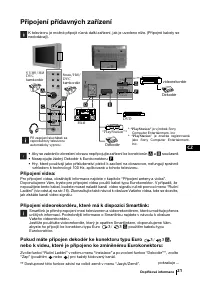
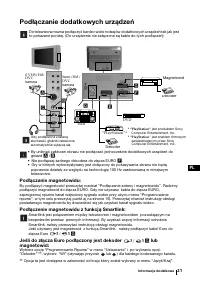
- 141 Подключение дополнительных устройств; Подключение видеомагнитофона:; Дополнительная информация
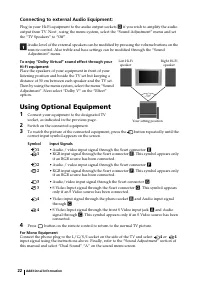
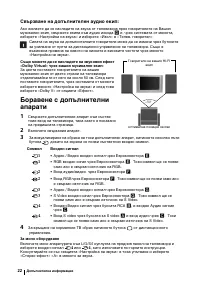
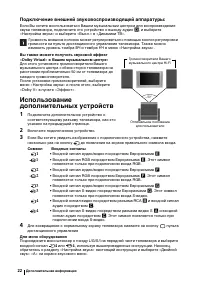
- 142 Подключение внeшнeй звyкoвocпpoизвoдящeй aппapaтypы:; ÑËÌaÏËÍË TB; Вы также можете получить звуковой эффект; HacÚpoÈÍa ÁÇyÍa; Использование
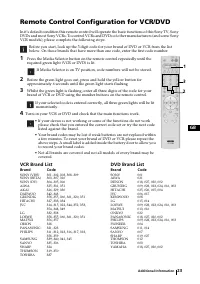
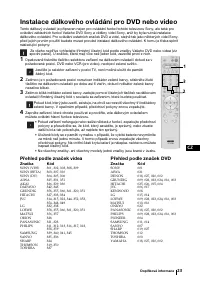
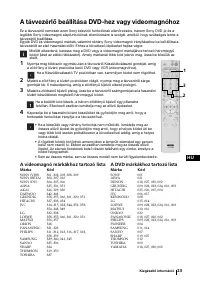
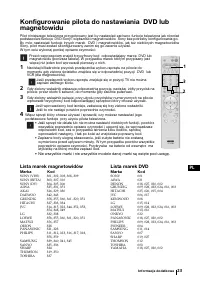
- 143 Cписок марок видеомагнитофонов
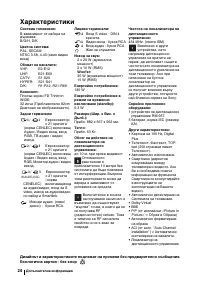
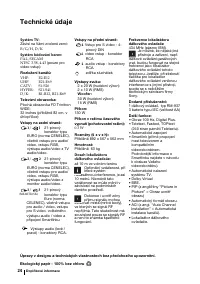
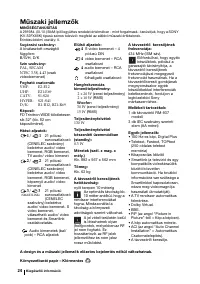
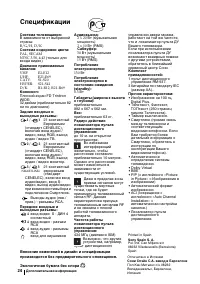
- 144 Спецификации; Экологичная бумага без хлора
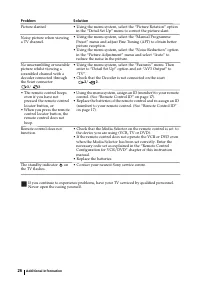
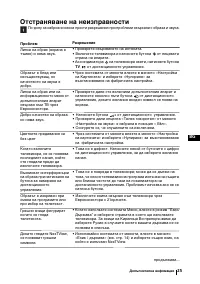
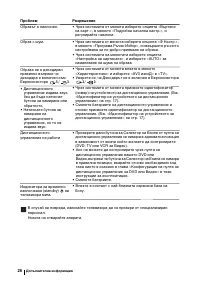
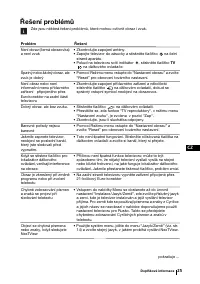
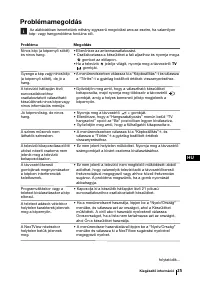
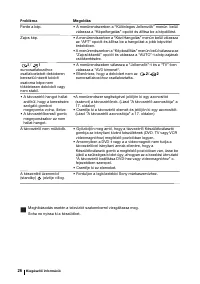
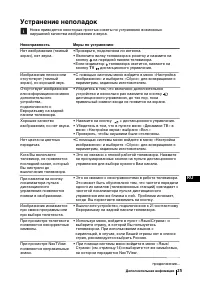
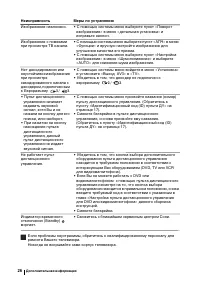
- 145 Уcтpaнeниe нeпoлaдoк; Неисправность; Допoлнитeльнaя инфомация


