Телевизоры кинескопные Sony KV-32FQ70K - инструкция пользователя по применению, эксплуатации и установке на русском языке. Мы надеемся, она поможет вам решить возникшие у вас вопросы при эксплуатации техники.
Если остались вопросы, задайте их в комментариях после инструкции.
"Загружаем инструкцию", означает, что нужно подождать пока файл загрузится и можно будет его читать онлайн. Некоторые инструкции очень большие и время их появления зависит от вашей скорости интернета.


14
continued...
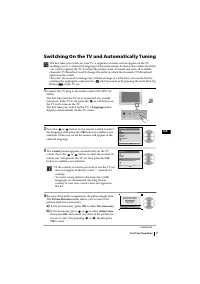
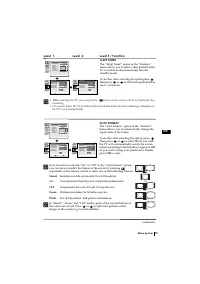
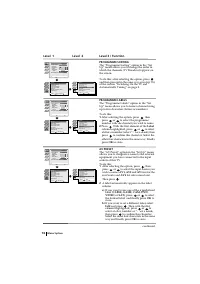
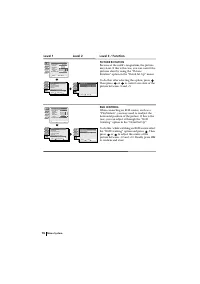
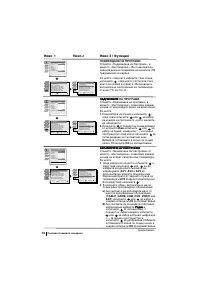
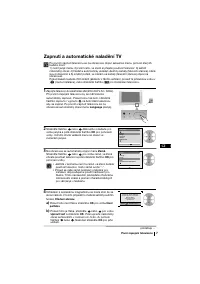
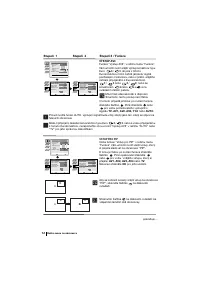
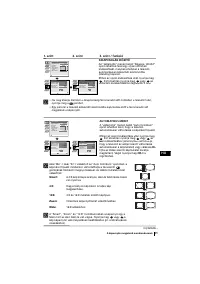
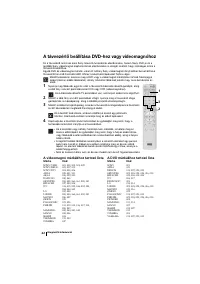
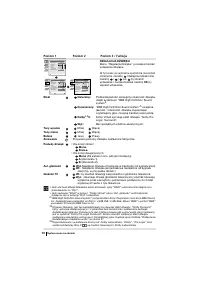
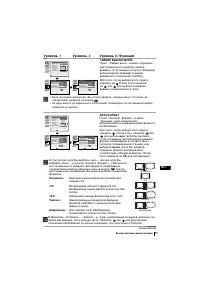
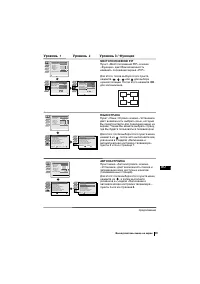
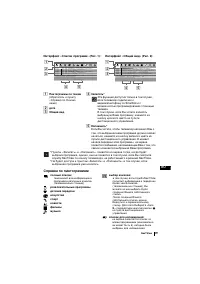
PROGRAMME SORTING
The “Programme Sorting” option in the “Set
Up” menu allows you to change the order in
which the channels (TV Broadcast) appear on
the screen.
To do this: after selecting the option, press
and then proceed in the same way as in step 7 b)
of the section “Switching On the TV and
Automatically Tuning” on page 8.
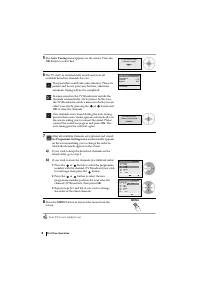
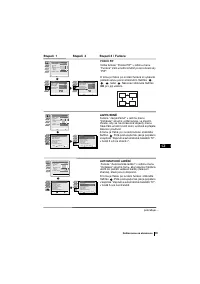
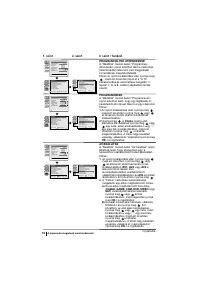
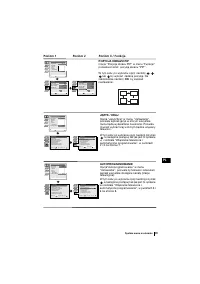
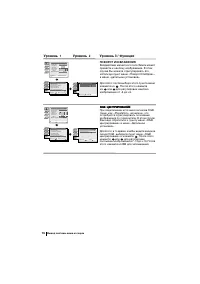
PROGRAMME LABELS
The “Programme Labels” option in the “Set
Up” menu allows you to name a channel using
up to five characters (letters or numbers).
To do this:
1
After selecting the option, press
, then
press
or
to select the programme
number with the channel you wish to name.
2
Press
. With the first element of the
Label
column highlighted, press
or
to select
a letter or number (select “-“ for a blank), then
press
to confirm this character. Select the
other four characters in the same way. Finally
press
OK
to store.
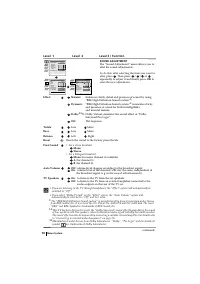
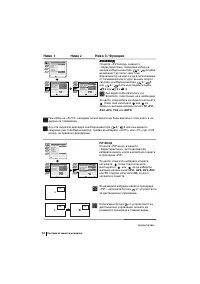
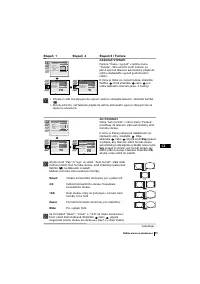
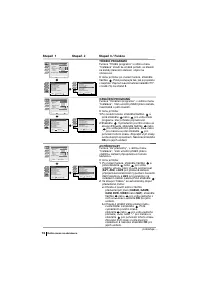
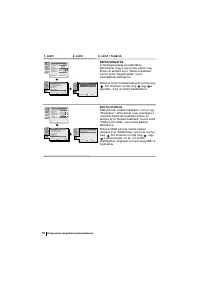
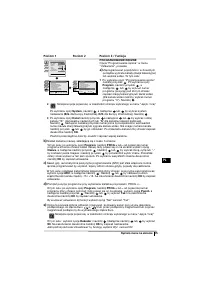
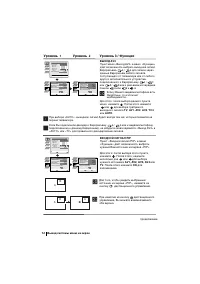
AV PRESET
The “AV Preset” option in the “Set Up” menu
allows you to designate a name to the external
equipment you have connected to the input
sockets of this TV.
To do this:
1
After selecting the option, press
, then
press
or
to select the input source you
wish to name (
AV1, AV2
and
AV3
are for the
rear Scarts and
AV4
for side connectors).
Then press
.
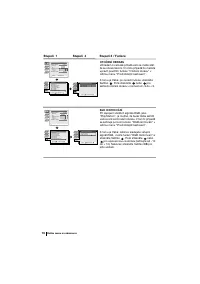
2
A label automatically appears in the label
column:
a)
If you want to use one of the 6 predefined
label (
CABLE, GAME, CAM, DVD,
VIDEO
or
SAT
), press
or
to select
the desired label and finally press
OK
to
store.
b)
If you want to set a different label, select
Edit
and press
. Then with the first
element highlighted, press
or
to
select a letter, number or “-“ for a blank,
then press
to confirm this character.
Select the other four characters in the same
way and finally press
OK
to store.
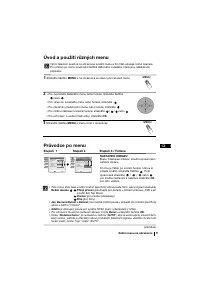
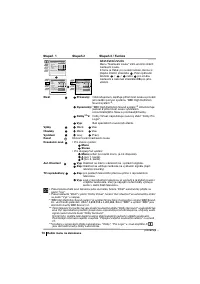
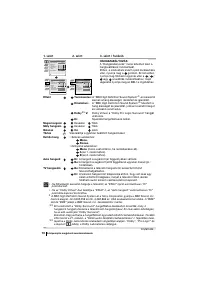
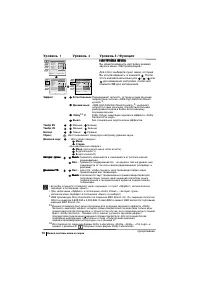
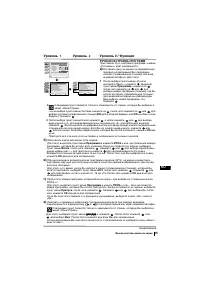
Level 1
Level 2
Level 3 / Function
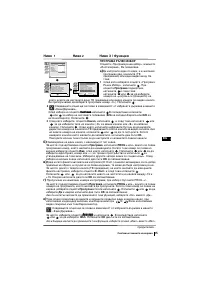
Picture Adjustment
Select:
Enter Menu:
Picture Mode
Contrast
Brightness
Colour
Sharpness
Reset
Noise Reduction
Personal
AUTO
Set Up
Auto Tuning
Programme Sorting
Select NexTView
AV Preset
Manual Set Up
Select:
Enter Menu:
Set Up
Auto Tuning
Programme Sorting
Select NexTView
AV Preset
Manual Set Up
Select:
Enter Menu:
Set Up
Language/Country
Auto Tuning
Programme Sorting
Programme Labels
AV Preset
Manual Programme Preset
Detail Set Up
Select:
Enter Menu:
Enter:
Set Up
Select:
Language/Country
Auto Tuning
Programme Sorting
Programme Labels
AV Preset
Manual Programme Preset
Detail Set Up
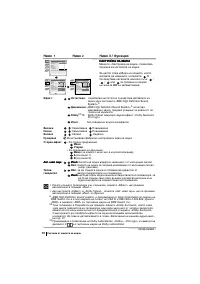
Menu System
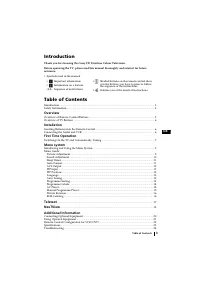
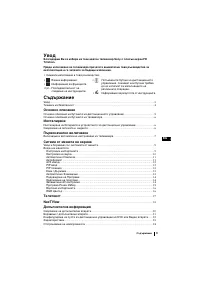
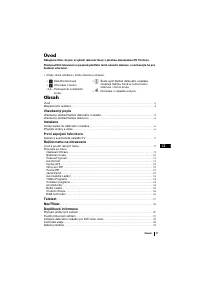
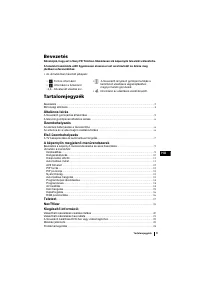
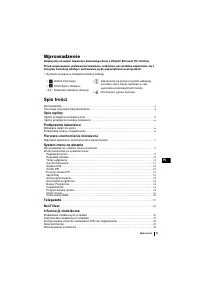
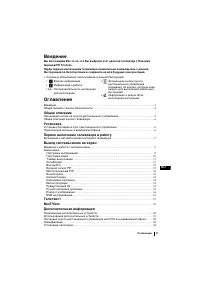
Содержание
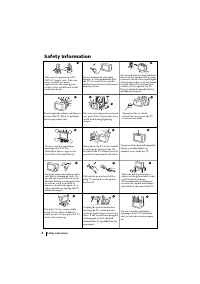
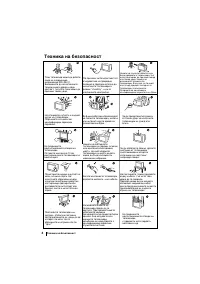
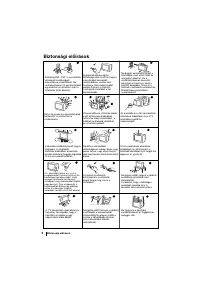
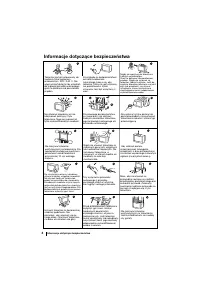
- 124 Общие правила техники безопасности
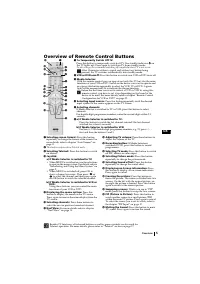
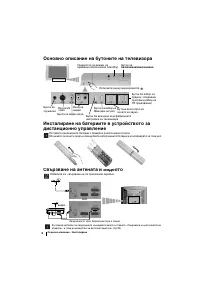
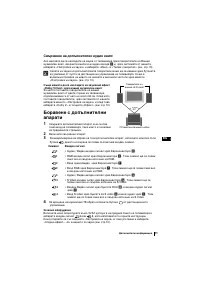
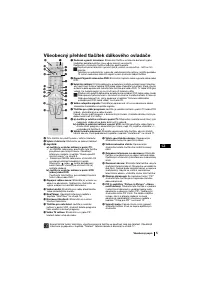
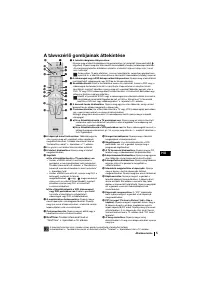
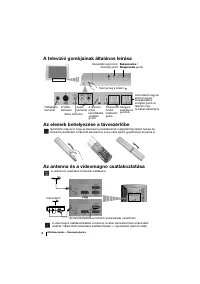
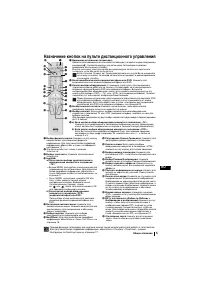
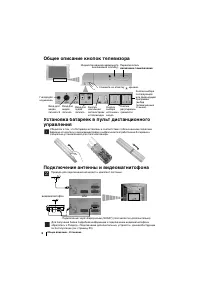
- 125 Назначение кнопок на пульте дистанционного управления; Общее описание
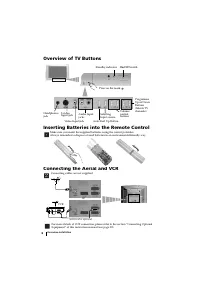
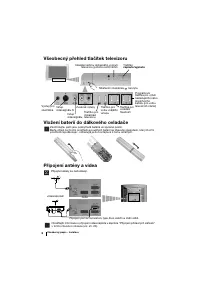
- 126 Подключение антенны и видеомагнитофона; Общее описание - Установка; включение / выключение; Нажмите на отметку; видеомагнитофон
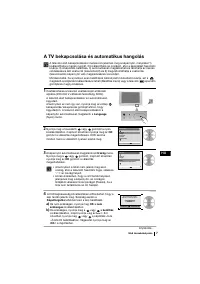
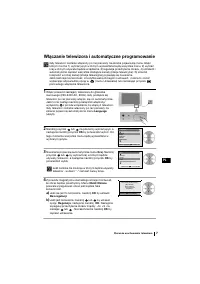
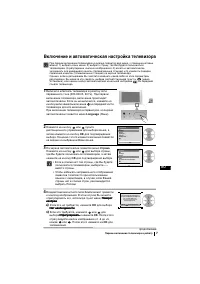
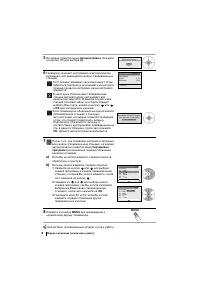
- 127 Включение и автоматическая настройка телевизора; Установка), или нажав кнопку aвтoмaтичecкoй нaчaльнoй нacтpoйки
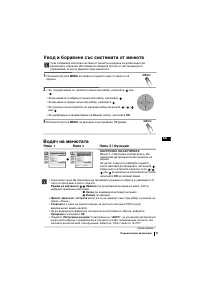
- 128 Первое включение телевизора в работу; Сейчас Ваш телевизионный аппарат готов к работу.
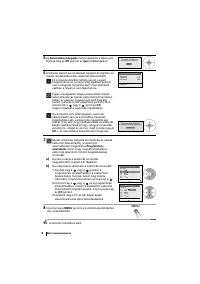
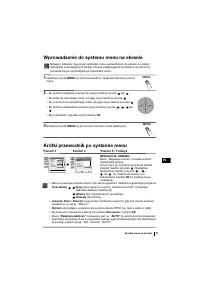
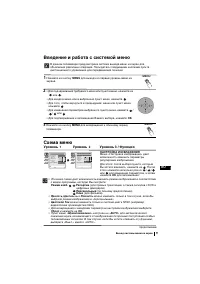
- 129 Уровень; Вывод системы меню на экран
- 130 Dolby
- 131 ТАЙМЕР ВЫКЛЮЧЕНИЯ; отключения, нажмите на кнопку; ABTOФOPMAT
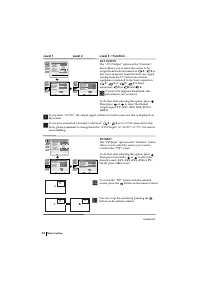
- 132 BЫXOД AV3; TV; BêxoÀ AV3; BXOДHOЙ CИГНАЛ РIР
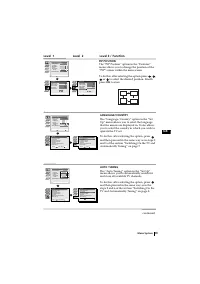
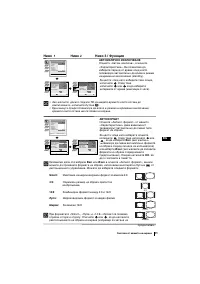
- 133 продолжeниe; МЕCTOПОЛОЖЕНИЕ РIР
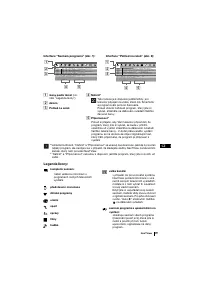
- 134 СОРТИРОВКА ПРОГРАММ; MeÚÍË ÔpoÖpaÏÏ; èpeÀycÚaÌoÇÍa AV; SAT; Изм
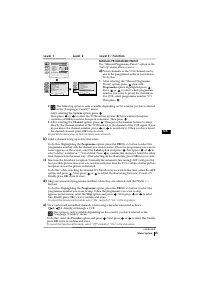
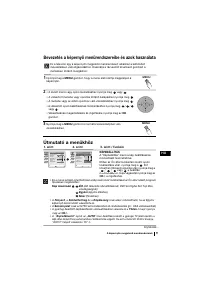
- 135 РУЧНАЯ НАСТРОЙКА ПРОГРАММ; Программа
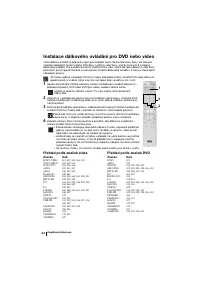
- 136 ПОBОPОT ИЗОБРАЖЕНИЯ; ÀeÚaÎëÌaÓ ycÚaÌoÇÍa; » в меню «Д
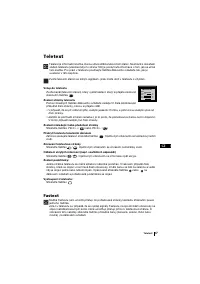
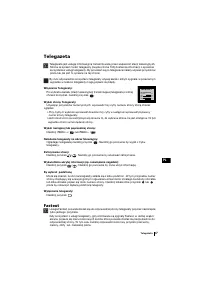
- 137 В этом случае введите другой номер страницы.; Фастекст
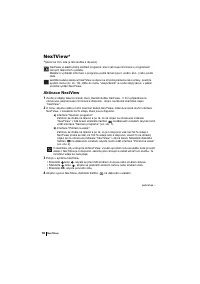
- 138 Bключение NexTView
- 139 Справка по пиктoгpaммaм:; Пункты «Записать» и «Нaпoмнить» появятся на экране тогда, когда будет; показывает всю информацию о
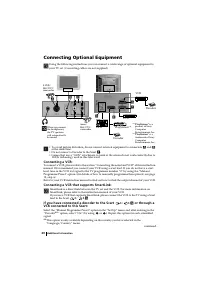
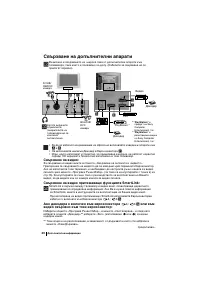
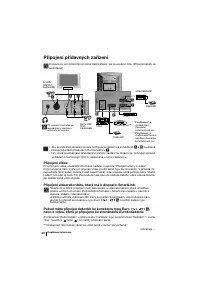
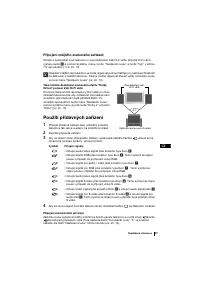
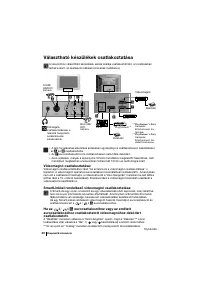
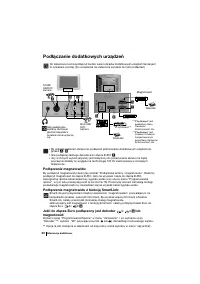
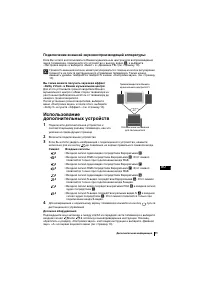
- 140 Подключение дополнительных устройств; Подключение видеомагнитофона:; Дополнительная информация
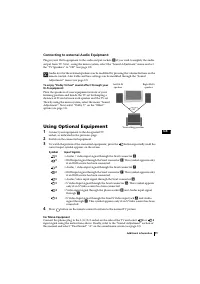
- 141 Подключение внeшнeй звyкoвocпpoизвoдящeй aппapaтypы:; ÑËÌaÏËÍË TB; Вы также можете получить звуковой эффект; HacÚpoÈÍa ÁÇyÍa; Использование
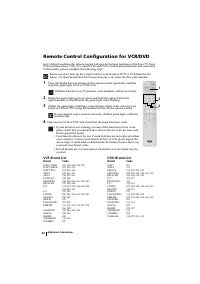
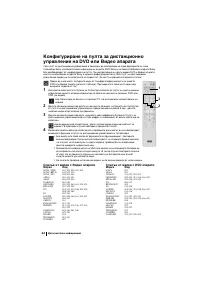
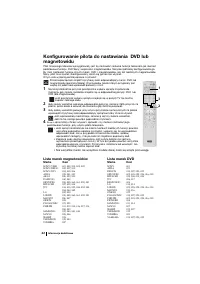
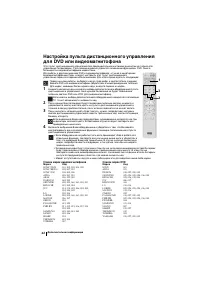
- 142 Cписок марок видеомагнитофонов
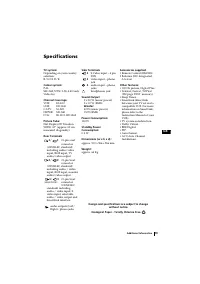
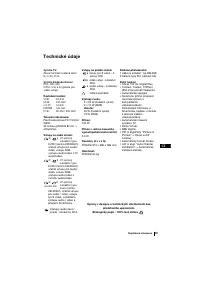
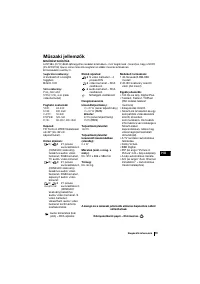
- 143 Спецификации; Экологичная бумага без хлора; Система кодировки цвета:; Допoлнитeльнaя инфомация
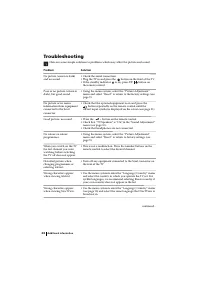
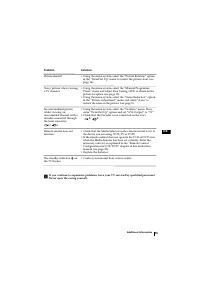
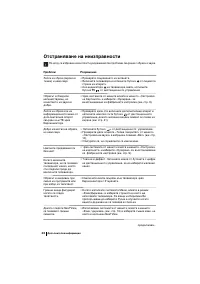
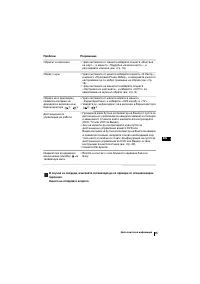
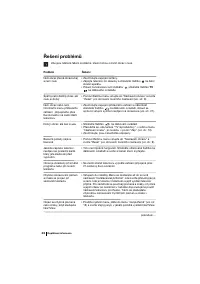
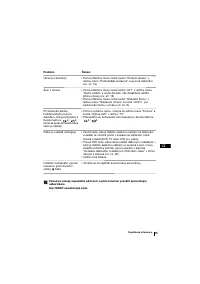
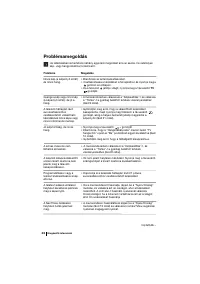
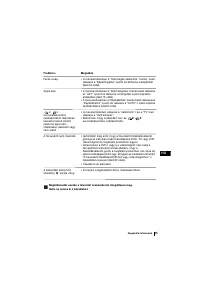
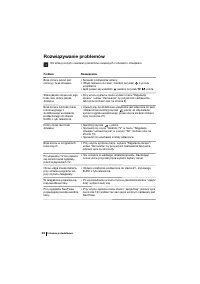
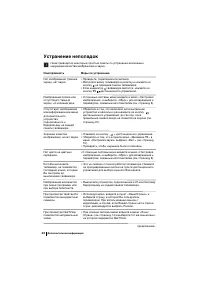
- 144 Уcтpaнeниe нeпoлaдoк; Неисправность


