
Строительные пылесосы Makita DCL180Z - инструкция пользователя по применению, эксплуатации и установке на русском языке. Мы надеемся, она поможет вам решить возникшие у вас вопросы при эксплуатации техники.
Если остались вопросы, задайте их в комментариях после инструкции.
"Загружаем инструкцию", означает, что нужно подождать пока файл загрузится и можно будет его читать онлайн. Некоторые инструкции очень большие и время их появления зависит от вашей скорости интернета.


5
(3)
Do not expose battery cartridge to water
or rain.
A battery short can cause a large current
flow, overheating, possible burns and
even a breakdown.
6.
Do not store the tool and battery cartridge in
locations where the temperature may reach or
exceed 50
゚
C (122
゚
F).
7.
Do not incinerate the battery cartridge even if
it is severely damaged or is completely worn
out. The battery cartridge can explode in a fire.
8.
Be careful not to drop or strike battery.
9.
Do not use drop or strike battery.
SAVE THESE INSTRUCTIONS.
Tips for maintaining maximum battery life
1.
Charge the battery cartridge before completely
discharged.
Always stop tool operation and charge the
battery cartridge when you notice less tool
power.
2.
Never recharge a fully charged battery
cartridge.
Overcharging shortens the battery service life.
3.
Charge the battery cartridge with room
temperature at 10
゚
C - 40
゚
C (50
゚
F - 104
゚
F).
Let a hot battery cartridge cool down before
charging it.
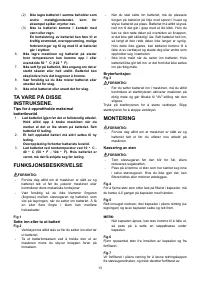
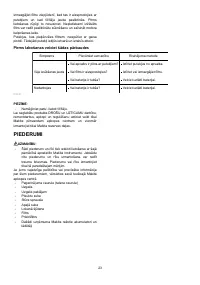
FUNCTIONAL DESCRIPTION
CAUTION:
•
Always be sure that the tool is switched off and the
battery cartridge is removed before adjusting or
checking function on the tool.
•
Take care not to trap finger(s) between cleaner and
battery as shown in diagram when loading
battery.Trapping finger(s) may cause injury.
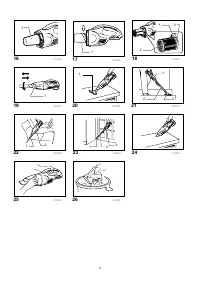
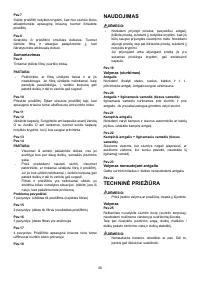
Fig.1
Installing or removing battery cartridge
Fig.2
•
Always switch off the tool before insertion or
removal of the battery cartridge.
•
To remove the battery cartridge, withdraw it from
the tool while sliding the button on the front of the
cartridge.
•
To insert the battery cartridge, align the tongue on
the battery cartridge with the groove in the housing
and slip it into place. Always insert it all the way
until it locks in place with a little click. If you can
see the red part on the upper side of the button, it
is not locked completely. Insert it fully until the red
part cannot be seen. If not, it may accidentally fall
out of the tool, causing injury to you or someone
around you.
•
Do not use force when inserting the battery
cartridge. If the cartridge does not slide in easily, it
is not being inserted correctly.
Switch action
Fig.3
CAUTION:
•
Before inserting the battery cartridge into the tool,
always check to see that the switch trigger
actuates properly and returns to the "OFF" position
when released.
To start the tool, simply pull the switch trigger. Release
the switch trigger to stop.
ASSEMBLY
CAUTION:
•
Always be sure that the tool is switched off and the
battery cartridge is removed before carrying out
any work on the tool.
Disposing of Dust
CAUTION:
•
Empty the cleaner before it becomes too full, or the
suction force weakens.
•
Be sure to empty out the dust inside the cleaner
itself. Failure to do so may cause the filter to be
clogged or the motor to be damaged.
Fig.4
In order to drop dust stlicking on the filter in the capsule,
tap the capsule 4 or 5 times with your hand.
Fig.5
Now point suction inlet downwards, turn capsule in
direction of arrow in diagram, and disconnect capsule
slowly and straight.
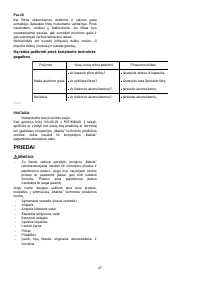
NOTE:
•
Dust may spill out when capsule is opened, so be
sure to set a garbage bag beneath capsule.
Fig.6
Remove accumulated dust from inside of capsule and
off of prefilter.
Fig.7
Twist prefilter in direction of arrow to unfasten securing
lip from cleaner unit and then pull off prefilter.
Fig.8
Clean out fine dust from prefilter. Next, remove filter, and
lightly tap to dislodge dust.
Reassembly
Fig.9
Put on filter until it is fully in position on the cleaner unit.
Характеристики

Остались вопросы?Не нашли свой ответ в руководстве или возникли другие проблемы? Задайте свой вопрос в форме ниже с подробным описанием вашей ситуации, чтобы другие люди и специалисты смогли дать на него ответ. Если вы знаете как решить проблему другого человека, пожалуйста, подскажите ему :)


