Синтезаторы Elenberg MS-4920 - инструкция пользователя по применению, эксплуатации и установке на русском языке. Мы надеемся, она поможет вам решить возникшие у вас вопросы при эксплуатации техники.
Если остались вопросы, задайте их в комментариях после инструкции.
"Загружаем инструкцию", означает, что нужно подождать пока файл загрузится и можно будет его читать онлайн. Некоторые инструкции очень большие и время их появления зависит от вашей скорости интернета.
15
2) In accordance with your desire, you can change the voice by pressing
key for “VIBRATO” or key for “SUSTAIN” in the selection of timbres to
exchange the performance effect.
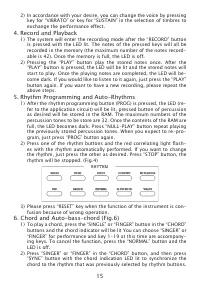
4. Record and Playback
1) The system will enter the recording mode after the “RECORD” button
is pressed with the LED lit. The notes of the pressed keys will all be
recorded in the memory (the maximum number of the notes record-
able is 42). Once the memory is full, the LED is off.
2) Pressing the “PLAY” button play the stored notes once. After the
“PLAY” button is pressed, the LED will be lit and the stored notes will
start to play. Once the playing notes are completed, the LED will be-
come dark. If you would like to listen to it again, just press the “PLAY”
button again. If you want to have a new recording, please repeat the
above steps.
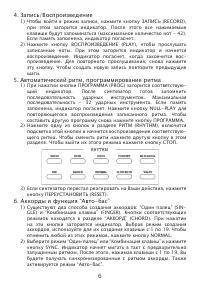
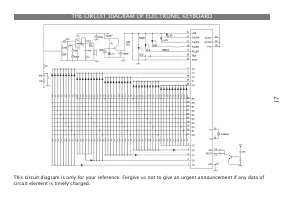
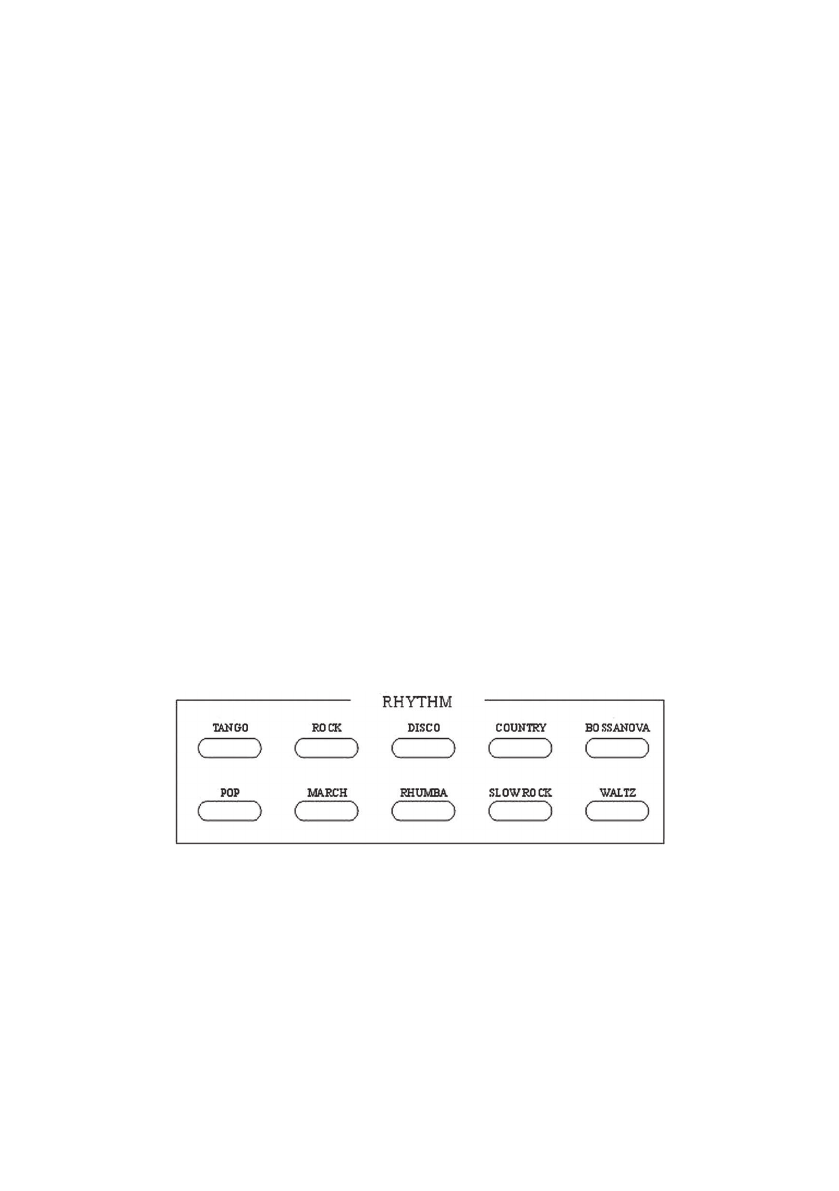
5. Rhythm Programming and Auto-Rhythms
1) After the rhythm programming button (PROG) is pressed, the LED (re-
fer to the application circuit) will be lit, pressed button of percussion
as desired will be stored in the RAM. The maximum numbers of the
percussion tones to be store are 32. Once the contents of the RAM are
full, the LED becomes dark. Press “NULL-PLAY” button repeat playing
the previously stored percussion tones. When you expect to re-pro-
gram, just press “PROG” button again.
2) Press one of the rhythm buttons and the red correlating light flash-
es with the rhythm automatically performed. If you want to change
the rhythm, just press the other as desired. Press “STOP” button, the
rhythm will be stopped. (Fig.4)
3) Please press “RESET” key when the function of the instrument is con-
fusion because of wrong operation.
6. Chord and Auto-bass-chord (Fig.6)
1) To play a chord, press the “SINGLE” or “FINGER” button in the “CHORD”
buttons and the chord indicator will be lit You can choose “SINGER” or
“FINGER” for performance and key 1-19 at this time are accompany-
ing keys. To cancel the function, press the “NORMAL” button and the
LED is off.
2) Press “SINGER” or “FINGER” in the “CHORD” button, and then press
“SYNC” button with the chord indication LED lit to synchronize the
chord to the rhythm that was previously selected by rhythm buttons.

