Швейная машина Janome SE 7522 - инструкция пользователя по применению, эксплуатации и установке на русском языке. Мы надеемся, она поможет вам решить возникшие у вас вопросы при эксплуатации техники.
Если остались вопросы, задайте их в комментариях после инструкции.
"Загружаем инструкцию", означает, что нужно подождать пока файл загрузится и можно будет его читать онлайн. Некоторые инструкции очень большие и время их появления зависит от вашей скорости интернета.


8
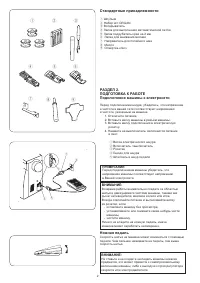
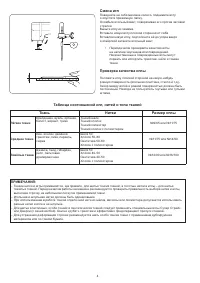
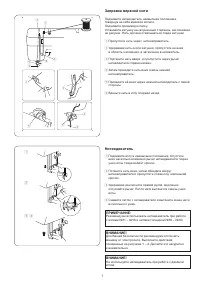
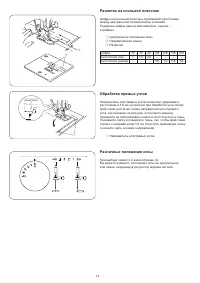
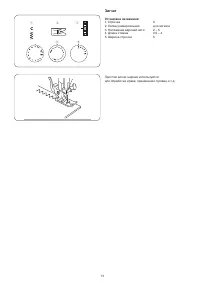
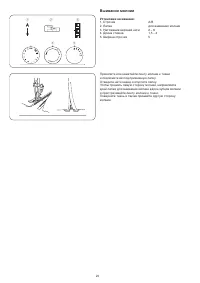
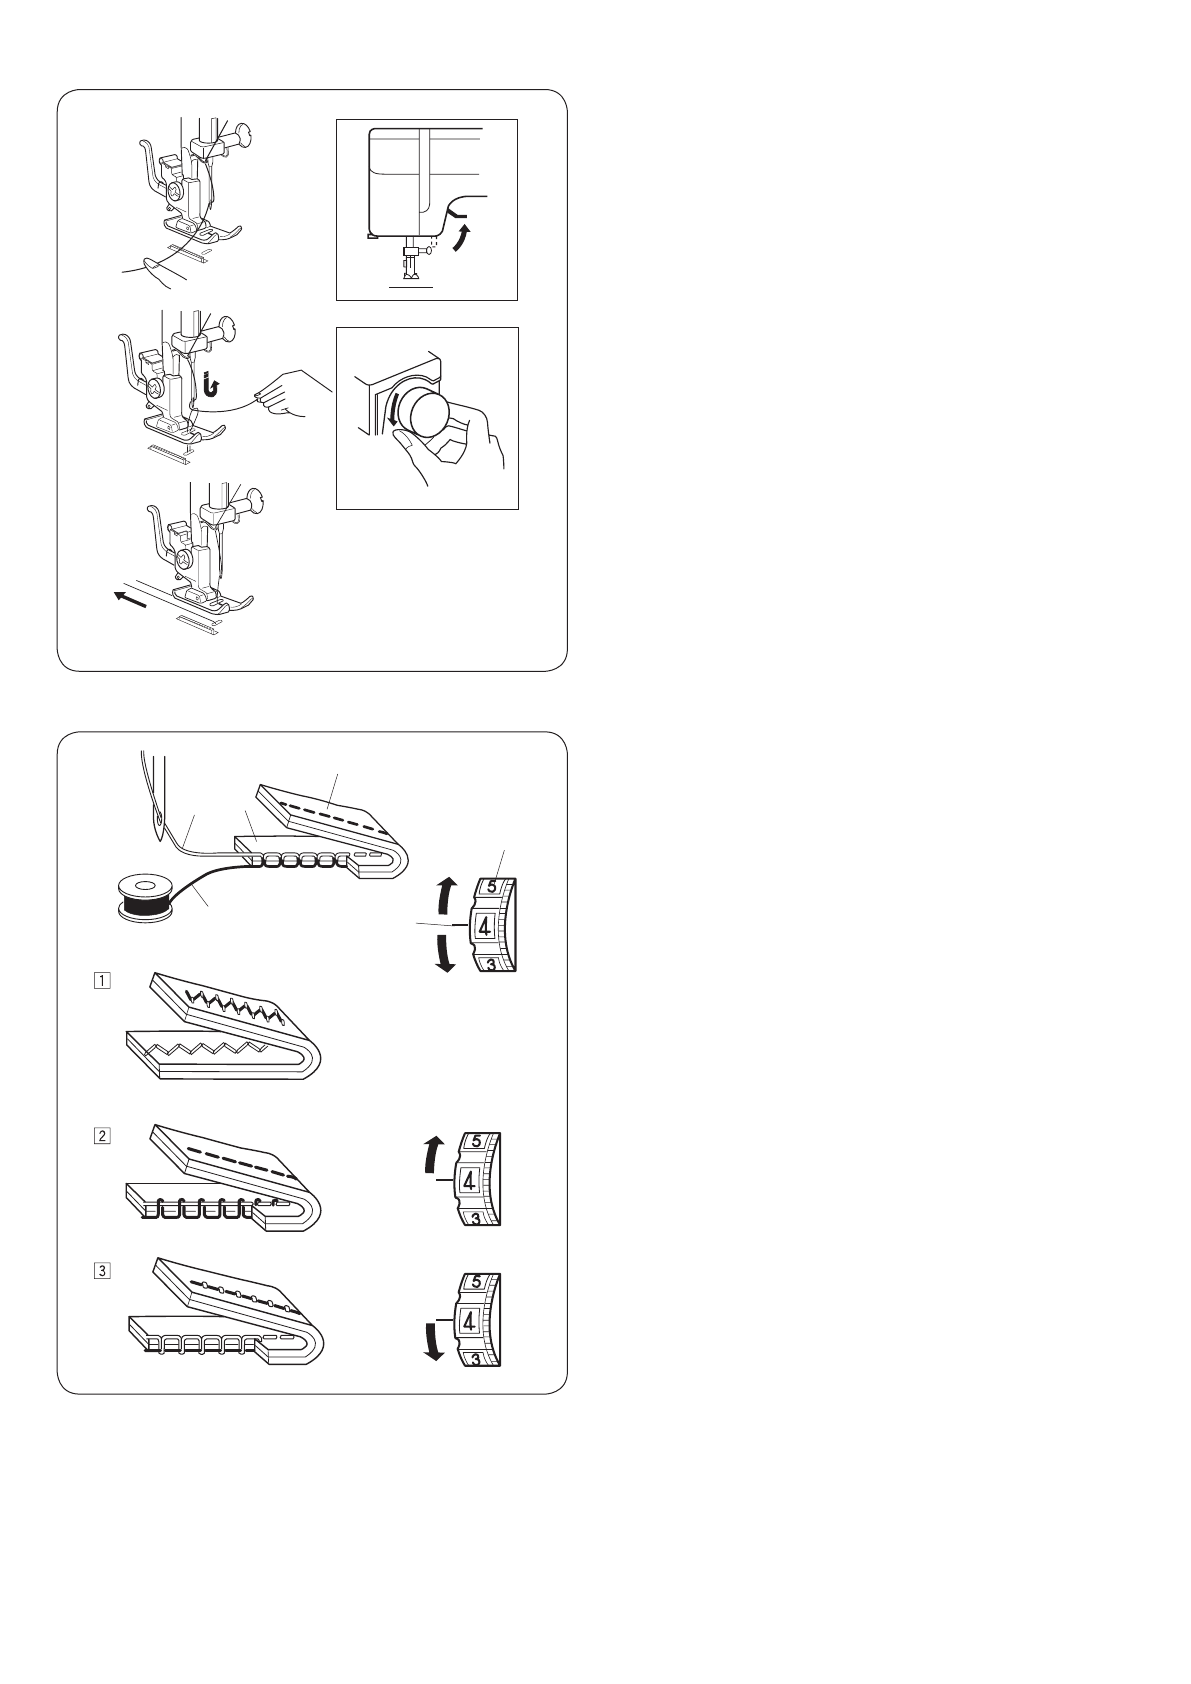
Вытягивание нижней нити
z
Поднимите прижимную лапку, левой рукой слегка
удерживайте игольную нить.
x
Правой рукой поверните на себя маховое колесо
и поднимите иглу и игловодитель в наивысшее
положение. Слегка потяните за игольную нить,
сформируйте петлю из нижней нити.
c
Вытяните по 10 см каждой нити и отведите их назад
под прижимную лапку.
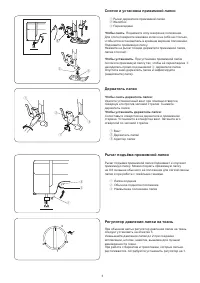
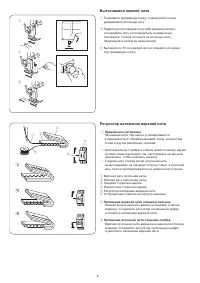
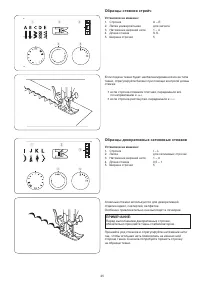
Регулятор натяжения верхней нити
z
Правильное натяжение.
Натяжение нити при шитье устанавливается
в зависимости от обрабатываемой ткани, количества
слоёв и других различных условий.
• Нити идеального прямого стежка ложатся между двумя
слоями ткани и выглядят так, как показано на рисунке
(увеличено, чтобы показать детали).
• У идеального стежка зигзаг шпульная нить
не выглядывает на лицевую сторону ткани, а игольная
нить слегка просматривается на изнаночной стороне.
q
Верхняя нить (игольная нить).
w
Нижняя нить (шпульная нить).
e
Лицевая сторона изделия.
r
Изнаночная сторона изделия.
t
Регулятор натяжения верхней нити.
y
Установочная отметка на корпусе машины.
x
Натяжение верхней нити слишком сильное.
Нижняя (шпульная) нить видна на лицевой стороне
изделия. Установите регулятор на меньшую цифру
и ослабьте натяжение верхней нити.
c
Натяжение игольной нити слишком слабое.
Верхняя (игольная) нить видна на изнаночной стороне
изделия. Установите регулятор на большую цифру
и увеличьте натяжение верхней нити.
11
q
e
r
w
t
y
z
Correct tension
The thread tension is adjusted depending on
the sewing materials, layers of fabric and
sewing method.
For an ideal zigzag stitch, the bobbin thread
does not show on the right side (top side) of
the fabric, and the needle thread shows
slightly on the wrong side (bottom side) of the
fabric.
q
Needle thread (Top thread)
w
Bobbin thread (Bottom thread)
e
Right side (Top side) of fabric
r
Wrong side (Bottom side) of fabric
t
Thread tension dial
y
Setting mark
x
Needle thread tension is too tight
When the bobbin thread (bottom thread)
appears on the right side (top side) of the
fabric, loosen the needle thread tension by
moving the dial to a lower number.
c
Needle thread tension is too loose
When the needle thread (top thread) appears
on the wrong side (bottom side) of the
fabric, tighten the needle thread tension by
moving the dial to a higher number.
Thread Tension Dial
z
x
c
Drawing Up Bobbin Thread
z
Raise the presser foot and hold the needle
thread lightly with your left hand.
x
Turn the handwheel slowly toward you with
your right hand until the needle goes down
and continue turning the handwheel until the
take-up lever is at its highest position.
Lightly draw up the needle thread forming a
loop of the bobbin thread.
c
Pull 10 cm (6˝) of both threads back and
under the presser foot.
Содержание
- 4 СОДЕРЖАНИЕ
- 5 ОСНОВНЫЕ ЧАСТИ; Наименование частей; SECTION 1. ESSENTIAL PARTS; Names of Parts; Stitch selector dial
- 6 SECTION 2. GETTING READY TO; SECTION 2. GETTING READY TO
- 7 Рычаг подъёма прижимной лапки; Reduce the pressure to 2 for applique, cutwork,
- 8 Changing Needle; the flat side away from you.; To check the needle; Fabric, Thread and Needle Chart; Fabric
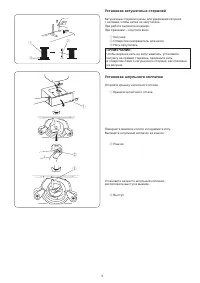
- 9 Removing or Inserting the Bobbin Case; Spool
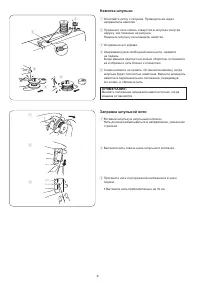
- 10 Winding the Bobbin; Threading Bobbin Case; Threading Bobbin Case
- 11 Needle Threader; Needle Threader
- 12 Thread Tension Dial
- 13 CAUTION; Setting mark
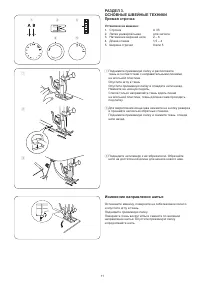
- 15 Изменение направления шитья; SECTION 3. BASIC SEWING
- 17 Зигзаг; Zigzag foot; Zigzag foot
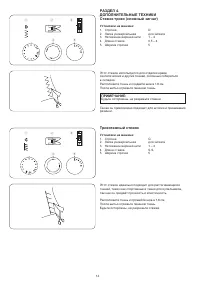
- 18 ДОПОЛНИТЕЛЬНЫЕ ТЕХНИКИ; Трикотажный стежок; SECTION 4. UTILITY STITCHING; SECTION 4. UTILITY STITCHING; This stitch is used to finish the raw edge on; SECTION 4. UTILITY STITCHING; This stitch is used to finish the raw edge on; SECTION 4. UTILITY STITCHING
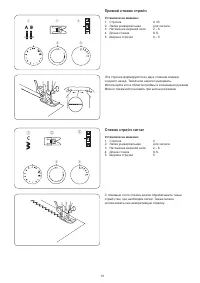
- 19 Прямой стежок стрейч; Стежок стрейч зигзаг; Straight Stretch
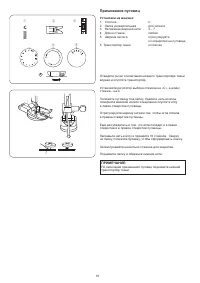
- 20 Пришивание пуговиц; Sewing Buttons
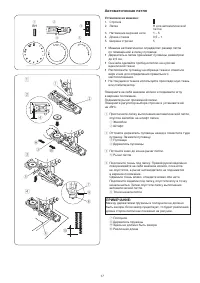
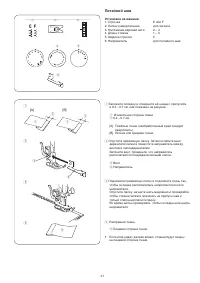
- 21 Автоматическая петля
- 22 n m
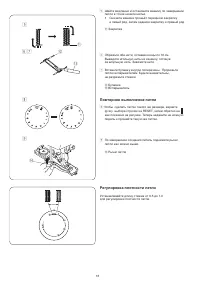
- 23 Зажгутованная петля; Corded Buttonhole
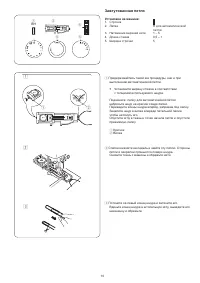
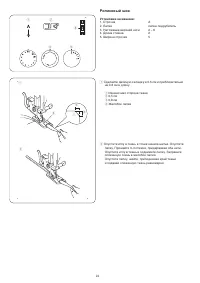
- 24 Вшивание молнии; Smooth the threads toward the back and lower; Smooth the threads toward the back and lower
- 25 Blind Hem Stitch; Screw
- 26 Роликовый шов
- 27 ДЕКОРАТИВНЫЕ СТРОЧКИ; Мережка; SECTION 5. DECORATIVE STITCHING
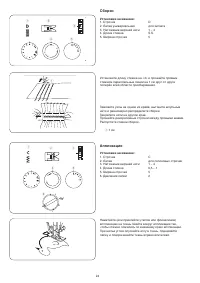
- 28 Сборки; Аппликация
- 29 Образцы стежков стрейч; Образцы декоративных сатиновых стежков
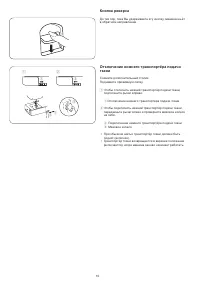
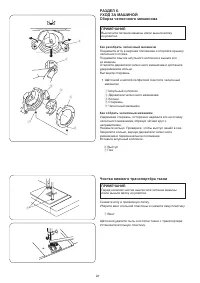
- 30 Чистка нижнего транспортёра ткани
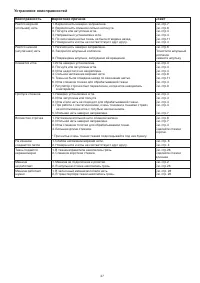
- 31 Устранение неисправностей; Неисправность


