
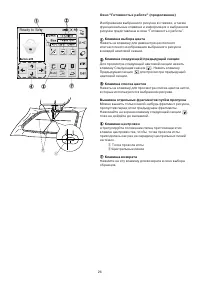
Швейная машина Janome Memory Craft 350Е - инструкция пользователя по применению, эксплуатации и установке на русском языке. Мы надеемся, она поможет вам решить возникшие у вас вопросы при эксплуатации техники.
Если остались вопросы, задайте их в комментариях после инструкции.
"Загружаем инструкцию", означает, что нужно подождать пока файл загрузится и можно будет его читать онлайн. Некоторые инструкции очень большие и время их появления зависит от вашей скорости интернета.


48
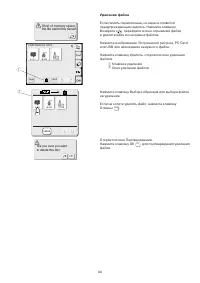
NOTE:
Do not store the machine in a high humidity area, near
a heat radiator or in direct sunlight.
Store the power supply cable in the extension table.
q
w
e
r
t
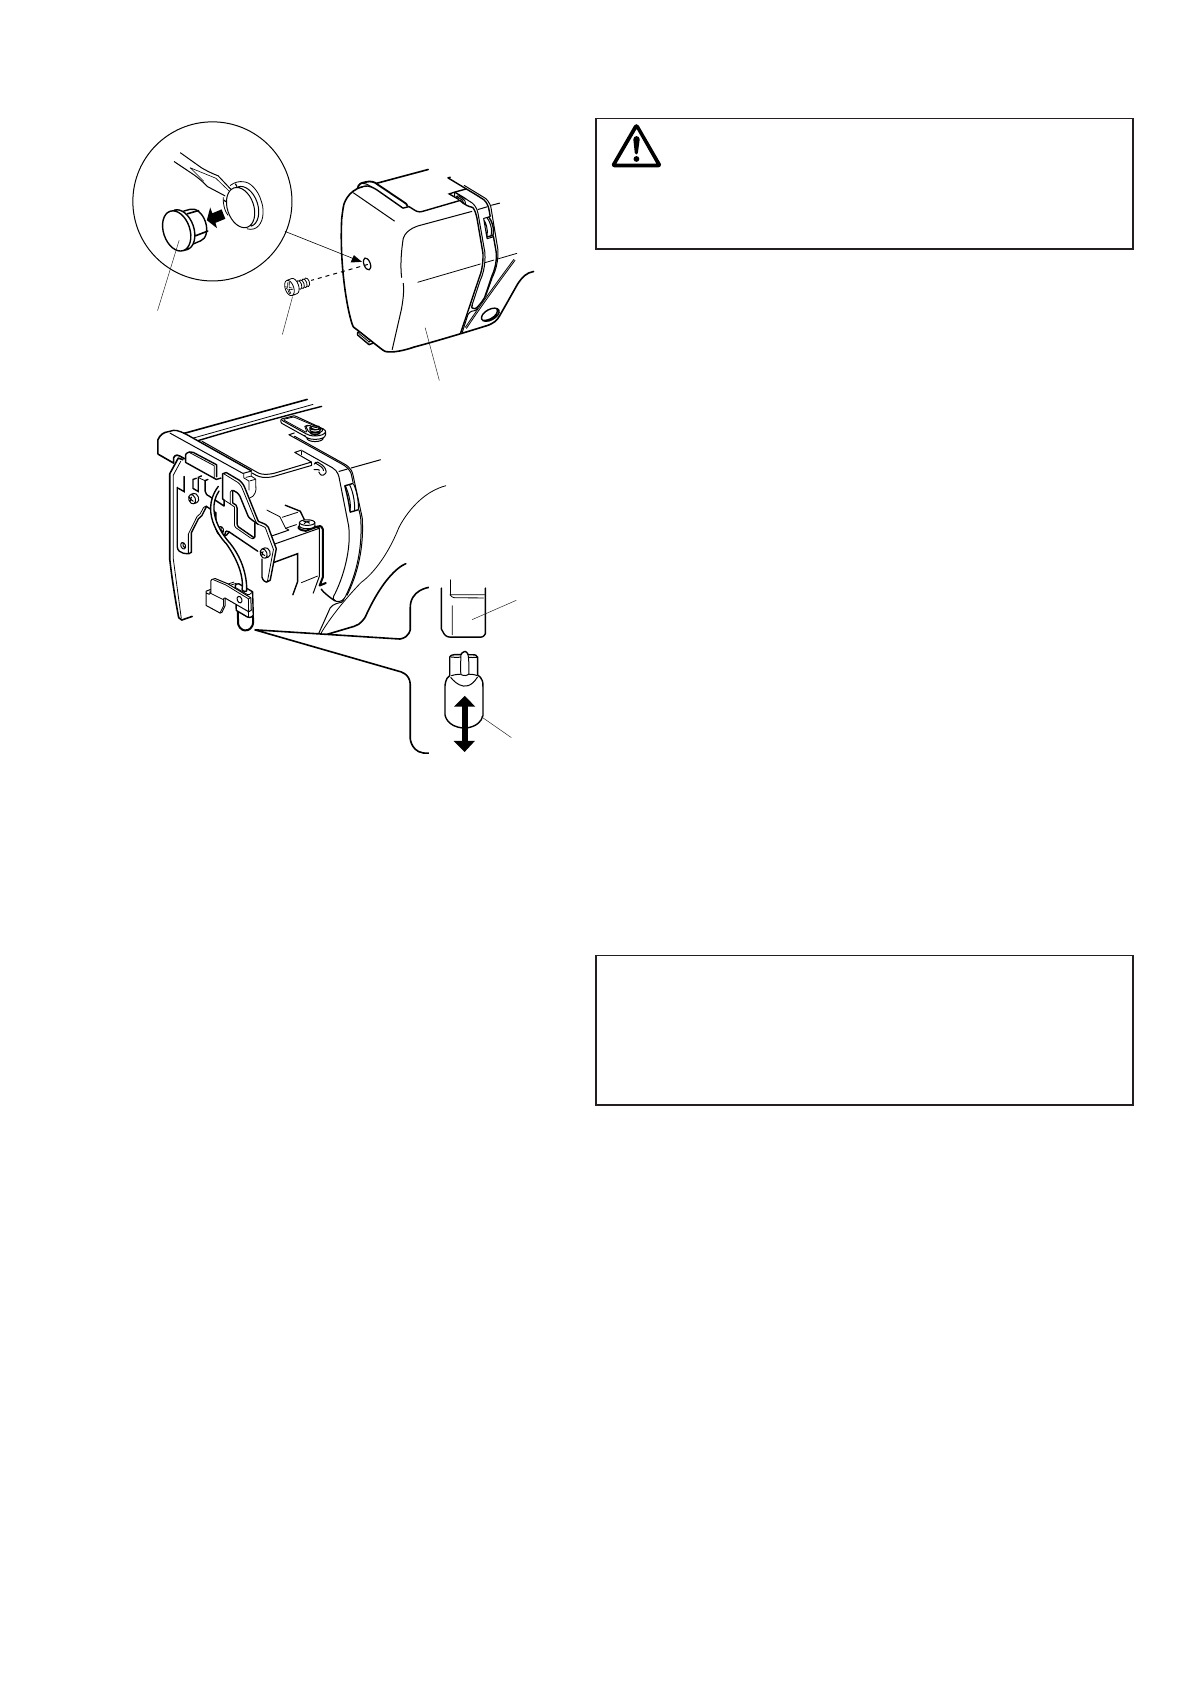
Replacing the Light Bulb
WARNINGS:
Turn off the power before replacing the light bulb.
The bulb could be
HOT
, wait until it has cooled down
before touching it.
To remove:
Remove the cap and setscrew. Remove the faceplate.
Pull out the bulb from the socket.
To replace:
Insert a new bulb into the opening of the socket.
Attach the faceplate with the setscrew, and attach the
cap.
q
Cap
w
Setscrew
e
Faceplate
r
Lamp Socket
t
Light bulb
48
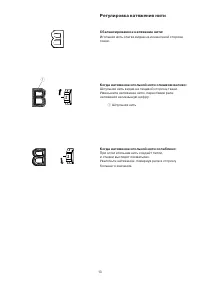
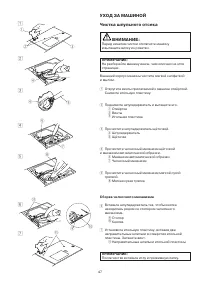
Замена лампочки
ВНИМАНИЕ:
Перед заменой лампочки отключите питание
машины. Лампочка может быть ГОРЯЧЕЙ,
подождите, пока она остынет.
Чтобы вытащить:
Снимите заглушку и винт. Снимите переднюю панель.
Вытащите лампочку.
Чтобы установить:
Вставьте лампочку в патрон. Установите на место
переднюю панель с винтами и заглушку.
Заглушка
Винт
Передняя панель
Патрон
Лампочка
ПРИМЕЧАНИЕ:
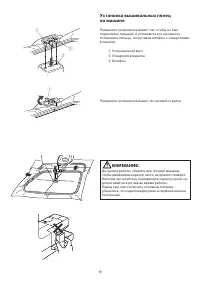
Не храните машину в помещениях с повышенной
влажностью, около тепловых радиаторов или под
прямыми солнечными лучами.
Храните электрический кабель в дополнительном
столике.
35
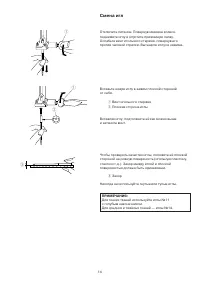
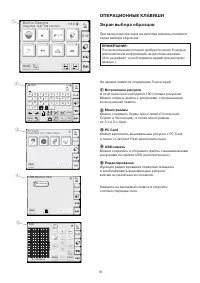
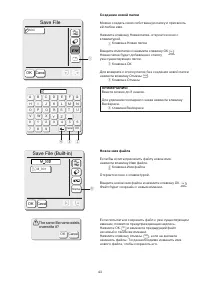
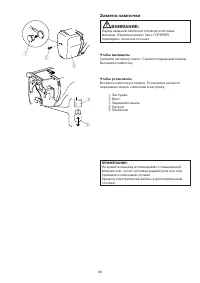
OPTIONAL ITEMS
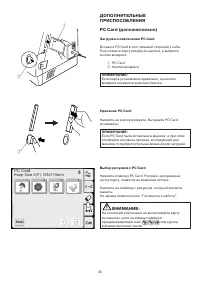
PC Cards (optional item)
Inserting and ejecting a PC card
Insert the PC card into the slot with the front side facing
toward you.
Push the card in until it clicks, the eject button will pop
out.
q
PC card
w
Eject button
NOTE:
When the card is properly set, the red bar on the eject
button will show.
Ejecting the PC card
Press the Eject Button to eject the PC card.
Take out the PC card from the machine.
NOTE:
When the power is turned on with a PC card inserted in
the machine, it will take a few moments to get the
machine booted up.
Selecting the PC card designs
Press the
PC card
tab. The designs contained in the
card are displayed on the pattern selection keys.
Press the
Pattern selection
key to select the design
you wish to sew.
The
Ready to Sew
screen will appear.
CAUTION:
Do not turn the power off or eject the card while the
warning sign or hourglass is displayed.
A Z
PC Card
Hoop Size A(F):126x110mm
Mode
2
1
3
4
q
w
w
48
NOTE:
Do not store the machine in a high humidity area, near
a heat radiator or in direct sunlight.
Store the power supply cable in the extension table.
q
w
e
r
t
Replacing the Light Bulb
WARNINGS:
Turn off the power before replacing the light bulb.
The bulb could be
HOT
, wait until it has cooled down
before touching it.
To remove:
Remove the cap and setscrew. Remove the faceplate.
Pull out the bulb from the socket.
To replace:
Insert a new bulb into the opening of the socket.
Attach the faceplate with the setscrew, and attach the
cap.
q
Cap
w
Setscrew
e
Faceplate
r
Lamp Socket
t
Light bulb
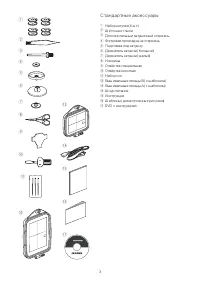
Содержание
- 3 СОДЕРЖАНИЕ
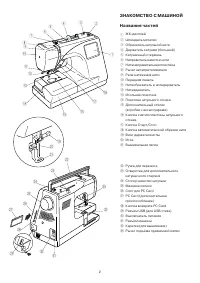
- 5 Стандартныеаксессуары
- 6 Съёмный приставной столик
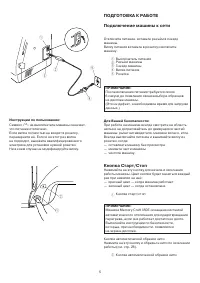
- 7 ПОДГОТОВКА К РАБОТЕ; Для Вашей безопасности:
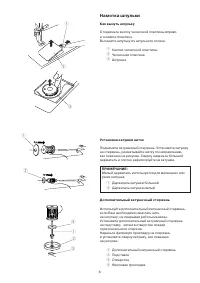
- 8 Намотка шпульки; Как вынуть шпульку
- 10 Установка шпульки
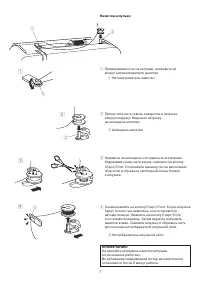
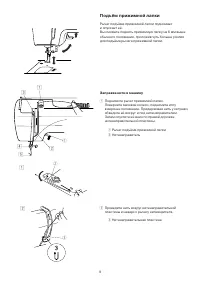
- 11 Подъём прижимной лапки; Заправка нити в машину
- 12 v b
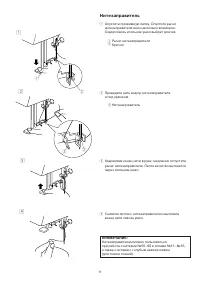
- 13 Нитезаправитель
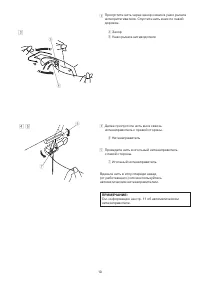
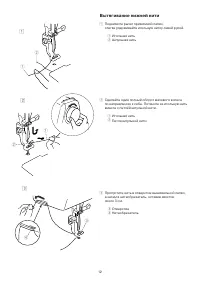
- 14 Вытягивание нижней нити
- 15 Регулировка натяжения нити; Сбалансированное натяжение нити:
- 16 Смена игл
- 18 Стабилизатор; Типы стабилизаторов
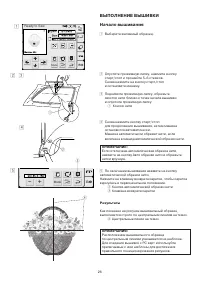
- 20 Установка вышивальных пялец
- 21 A Z; ОПЕРАЦИОННЫЕ КЛАВИШИ; Встроенные рисунки
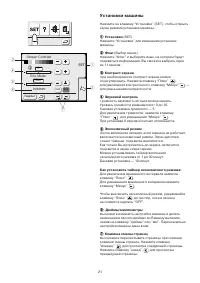
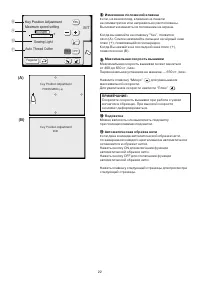
- 22 Режим установок; Клавиша “Установки”
- 23 Установки машины
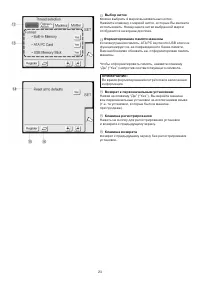
- 24 Yes; SET; Изменение положений клавиш
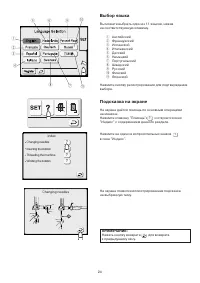
- 26 Index; Changing needles; Выбор языка
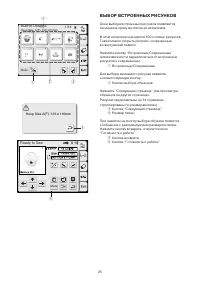
- 27 Ready to Sew; ВЫБОР ВСТРОЕННЫХ РИСУНКОВ
- 28 centerlines on the fabric.
- 29 Trace outline; Cancel; Paused; Клавиша траектории
- 30 x c; ВЫПОЛНЕНИЕ ВЫШИВКИ; Результаты
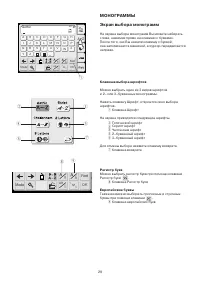
- 31 pper or lower case letters by pressing; AA ZZ; МОНОГРАММЫ; Клавиша выбора шрифтов
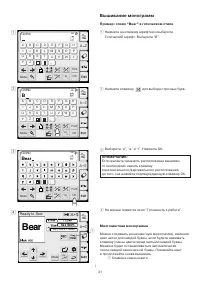
- 33 ear; Bear; Вышивание монограмм; Пример: слово “Bear” в готическом стиле
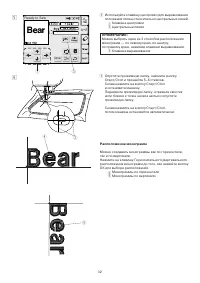
- 34 Расположение монограмм
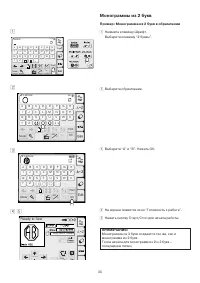
- 35 Монограммы из 2 букв; Пример: Монограмма из 2 букв в обрамлении
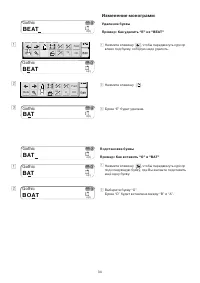
- 36 l t; BEAT; BAT; BAT; BOAT; Изменение монограмм; Удаление буквы
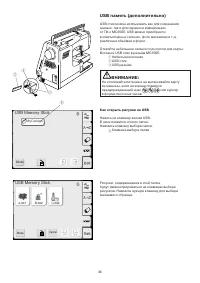
- 37 ДОПОЛНИТЕЛЬНЫЕ; Загрузка и извлечение PC Card
- 38 Как открыть рисунки на USB
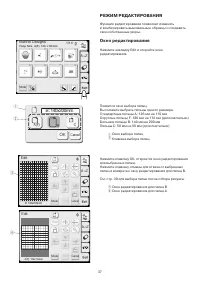
- 39 РЕЖИМ РЕДАКТИРОВАНИЯ
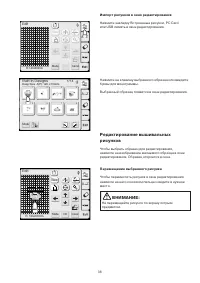
- 40 Редактирование вышивальных; Перемещение выбранного рисунка
- 41 Перемещение выбранного объекта (продолжение)
- 42 Изменение размера выбранного рисунка; MONOGRAMMING; A Z
- 43 Deleting the pattern; Deleting the pattern; Deleting the pattern
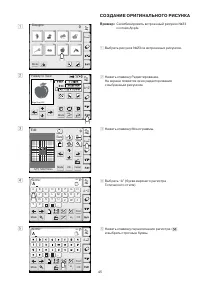
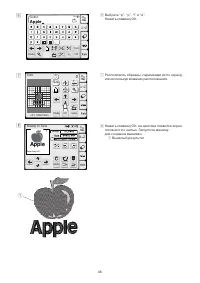
- 47 Apple; CREATING AN ORIGINAL DESIGN; Apple; CREATING AN ORIGINAL DESIGN; Apple
- 50 HOT; Replacing the Light Bulb; HOT
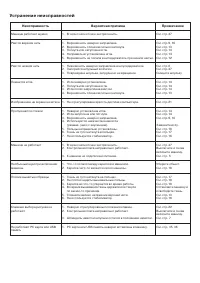
- 51 Устранение неисправностей; Неисправность


