
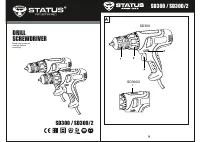
Шуруповерты STATUS SD-300/2 2220601 - инструкция пользователя по применению, эксплуатации и установке на русском языке. Мы надеемся, она поможет вам решить возникшие у вас вопросы при эксплуатации техники.
Если остались вопросы, задайте их в комментариях после инструкции.
"Загружаем инструкцию", означает, что нужно подождать пока файл загрузится и можно будет его читать онлайн. Некоторые инструкции очень большие и время их появления зависит от вашей скорости интернета.

5
•
Use the power tool, accessories and tool bits etc., in accordance with these
instructions and in the manner intended for the particular type of power tool,
taking into account the working conditions and the work to be performed.
Use of the power tool for operations different from intended could result in a
hazardous situation.
5) SERVICE
•
Have your power tool serviced by a qualified repair person using only identical
replacement parts.
This will ensure that the safety of the power tool is
maintained.
Additional safety instructions for your electric drill
•
Do not use the electric power tool with a damaged cable. Do not move the
damaged cable, and pull out the power plug if the cable becomes damaged
during operation.
Damaged cables increase the risk of electric shock.
•
If the replacement of the supply cord is necessary, this has to be done by the
manufacturer or his agent in order to avoid a safety
hazard.
•
Materials containing asbestos may not be worked on.
Fine dust particles can
remain in the air, despite the installation of a dust vacuum, and can greatly
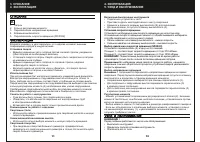
PARTS AND ACCESSORIES
PRIOR TO FIRST USE
1
. Chuck
(with 10 mm tooth ring)
2
. Torque adjustment ring
3
.
Left/right rotation switch
4.
On/off button
5
.
2-
speed function switch (SD300/2)
Danger of injury!
Before all adjustments and settings:
•
Turn the machine off.
•
Wait until the machine has come to a complete standstill.
•
Pull out the power plug.
Remove the packaging and make sure that all parts are there.
Inserting the drill
•
Place the drill socket key in one of the side holes of the drill socket and turn the
drill socket
clockwise.
•
Select a designated drill and push it as far as possible into the drill socket opening.
•
Tighten the drill socket by turning it counter-clockwise. Make sure that the drill is
secure in
the drill socket.
•
Conduct a short test-run and make sure that the drill is tightly secured even
after a complete run.
Using screw tools
When using screw bits, you should always use a universal bit holder.
3
.
PARTS AND ACCESSORIES
4
.
PRIOR TO FIRST USE
6
Only use screw bits which are compatible with the screw head. Make sure that the
screw tools are only used with reduced rotation speed.
OPERATION
6
.
OPERATION
Special work advice
•
Never place the drill socket key in the drill socket.
•
Keep the handle dry and free from oil and grease.
•
Make sure that there are no water pipes or electricity cables in or behind the
place or object to be drilled.
•
Attach nuts and screws to the electric drill only when it is turned off.
NOTE:
When operating a power tool outdoors, connect it to a residual current
circuit-breaker.
Turning on/off
•
Connect the power plug to a power outlet.
•
Attach the drilling machine directly to the drill
spot.
•
Press and hold the on/off button (4) to turn the
machine on.
•
To turn the machine off, let go of the on/off button (4).
Setting the rotation speed
By pressing the on/off button (4), you can set the rotation speed during idle
operation. The optimal rotation speed depends on the material drilled,
the operation mode, and the inserted drill.
Light pressure on the on/off button:
low rotation speed (intended for: small/short screws, soft working materials)
Greater pressure on the on/off button:
higher rotation speed (designated for: large/long screws, hard working materials)
NOTE:
To prevent the cracking of drill holes (e.g. when drilling tiles), drill holes
first with low rotation speed and then increase it. The drill is then easier to control
and will not slip.
Gear selection switch (SD300/2)
Do not set the gear selection switch (5) during drilling.
Gear 1
- low rotatio speed (0 - 370 RPM)
Gear 2
- high rotation speed (0 - 1050 RPM)
Setting the torque
The torque setting enables you to fix a screw perfectly without damaging the base
material or the screw head. The setting depends on the material and the screw
type. On your drill there are
20
selectable settings. A slipping clutch stops
the drill chuck from turning when the set torque is reached.
Set the desired torque with setting ring (2):
•
Level 1: minimum torque (for small screws and sensitive materials)
•
Level
20
: maximum torque (for large screws and robust materials)
•
Drill symbol: Torque setting switched off.


