
Шуруповерты Stanley SCI12S2 - инструкция пользователя по применению, эксплуатации и установке на русском языке. Мы надеемся, она поможет вам решить возникшие у вас вопросы при эксплуатации техники.
Если остались вопросы, задайте их в комментариях после инструкции.
"Загружаем инструкцию", означает, что нужно подождать пока файл загрузится и можно будет его читать онлайн. Некоторые инструкции очень большие и время их появления зависит от вашей скорости интернета.


9
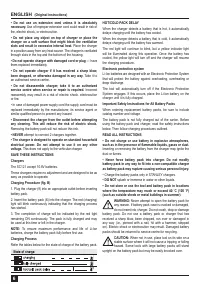
ENGLISH
(Original instructions)
ENGLISH
(Original instructions)
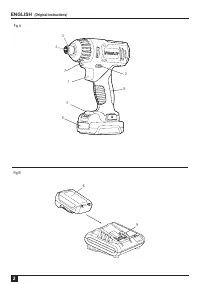
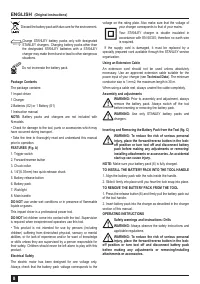
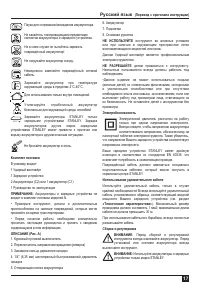
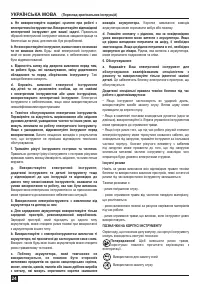
Proper Hand Position (Fig. A, E)
WARNING:
To reduce the risk of serious personal injury,
ALWAYS
use proper hand position as shown.
WARNING:
To reduce the risk of serious personal injury,
ALWAYS
hold securely in anticipation of a sudden
reaction.
Proper hand position requires one hand on the main handle (8).
Trigger switch (Fig. A)
To turn the tool on, squeeze the trigger switch (1). To turn the tool
off, release the trigger switch. Your tool is equipped with a brake.
The chuck will stop when the trigger switch is fully released.
The variable speed switch enables you to select the best speed
for a particular application. The further you squeeze the trigger,
the faster the tool will operate. For maximum tool life, use variable
speed only for starting holes or fasteners.
NOTE:
Continuous use in variable speed range is not
recommended. It may damage the switch and should be avoided.
Forward/Reverse Control Button (Fig. A)
A forward/reverse control button
(2)
determines the rotational
direction of the tool and also serves as a lock off
To select forward rotation, release the trigger switch and depress
the forward/reverse control button on the right side of the tool.
To select reverse, depress the forward/reverse control button on
the left side of the tool.
The center position of the control button locks the tool in the off
position. When changing the position of the control button, be
sure the trigger is released.
NOTE:
The first time the tool is run after changing the direction
of rotation, you may hear a click on start up. This is normal and
does not indicate a problem.
LED work light (Fig. A)
There is a LED work light (7) located under the chuck collar. The
work light will be activated when the trigger switch is squeezed.
Note:
The work light is for lighting the immediate work surface
and is not intended to be used as a flashlight.
Quick-Release Chuck (Fig. A, D)
NOTE:
The chuck accepts 1/4" (6.35 mm) hex accessories allows
better access in tight spaces.
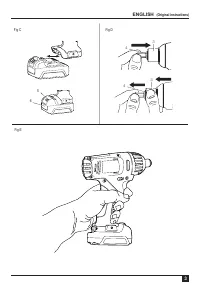
Place the forward/reverse button (2) in the locked off (center)
position or remove battery pack before changing accessories.
To install an accessory,
push accessory to fully insert into chuck
(4). The chuck collar (3) does not need to be pulled up to lock
accessory in place.
To remove an accessory,
pull the chuck collar (3) away from the
front of the tool. Remove the accessory and release the collar.
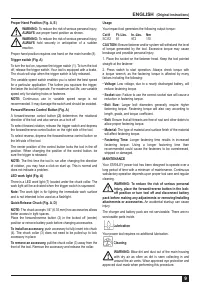
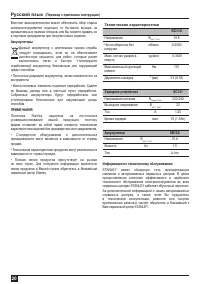
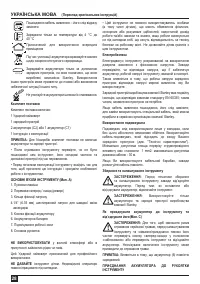
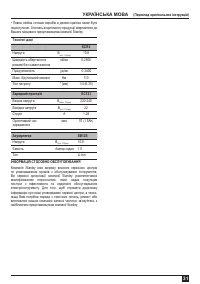
Usage
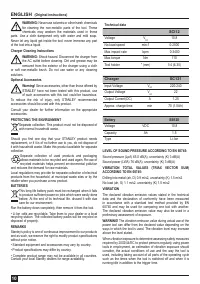
Your impact tool generates the following output torque:
Cat # Ft.-Lbs. In.-Lbs. Nm
SCI12 81
972
110
CAUTION:
Ensure fastener and/or system will withstand the level
of torque generated by the tool. Excessive torque may cause
breakage and possible personal injury.
1. Place the socket on the fastener head. Keep the tool pointed
straight at the fastener.
2. Press switch to start operation. Always check torque with
a torque wrench, as the fastening torque is affected by many
factors including the following:
•
Voltage:
Low voltage, due to a nearly discharged battery, will
reduce fastening torque.
•
Socket
size: Failure to use the correct socket size will cause a
reduction in fastening torque.
•
Bolt Size:
Larger bolt diameters generally require higher
fastening torque. Fastening torque will also vary according to
length, grade, and torque coefficient.
•
Bolt:
Ensure that all threads are free of rust and other debris to
allow proper fastening torque.
•
Material:
The type of material and surface finish of the material
will affect fastening torque.
•
Fastening Time:
Longer fastening time results in increased
fastening torque. Using a longer fastening time than
recommended could cause the fasteners to be overstressed,
stripped or damaged.
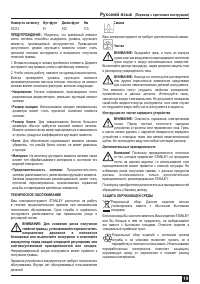
MAINTENANCE
Your STANLEY power tool has been designed to operate over a
long period of time with a minimum of maintenance. Continuous
satisfactory operation depends upon proper tool care and regular
cleaning.
WARNING: To reduce the risk of serious personal
injury, place the forward/reverse button in the lock-
off position or turn tool off and disconnect battery
pack before making any adjustments or removing/installing
attachments or accessories.
An accidental start-up can cause
injury.
The charger and battery pack are not serviceable. There are no
serviceable parts inside.
Lubrication
Your power tool requires no additional lubrication.
Cleaning
WARNING:
Blow dirt and dust out of the main housing
with dry air as often as dirt is seen collecting in and
around the air vents. Wear approved eye protection and
approved dust mask when performing this procedure.


