
Шуруповерты Makita DFS251Z - инструкция пользователя по применению, эксплуатации и установке на русском языке. Мы надеемся, она поможет вам решить возникшие у вас вопросы при эксплуатации техники.
Если остались вопросы, задайте их в комментариях после инструкции.
"Загружаем инструкцию", означает, что нужно подождать пока файл загрузится и можно будет его читать онлайн. Некоторые инструкции очень большие и время их появления зависит от вашей скорости интернета.


7 ENGLISH
NOTE:
Even with the switch on and motor running,
the driver bit does not rotate. Push the tool forward to
engage the clutch.
NOTE:
The tool automatically stops if the motor
keeps rotating for about 6 minutes.
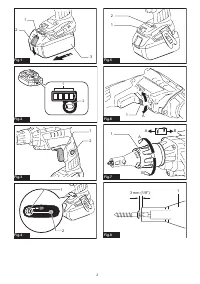
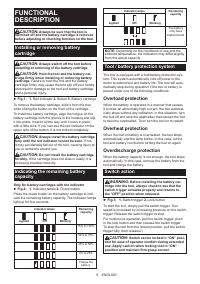
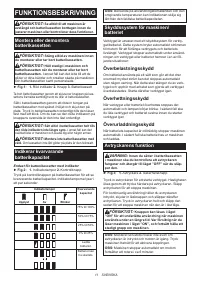
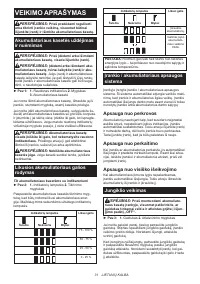
Push drive mode
►
Fig.4:
1.
Button
2.
Mode indicator
This tool has push drive mode. In this mode, the tool
cuts off power to the motor to save the battery power
at idle.
To select push drive mode, pull the trigger slightly, then
release it and quickly press the button. The mode indi
-
cator will then light up.
Once push drive is activated, pull the switch trigger and
then push the lock button. Apply pressure to the driver
bit and the motor will start rotating. Further pressure
engages the clutch and the driver bit will start rotating.
In push drive mode, the motor and the driver bit will only
rotate by applying pressure.
NOTE:
If the tool does not run for about 8 hours in
push drive mode with the trigger locked on, tool is
shutdown. In such a case, release and pull the trigger
again for restarting.
Lighting up the front lamp
CAUTION:
Do not look in the light or see the
source of light directly.
►
Fig.5:
1.
Lamp
2.
Button
To turn on the lamp, slightly pull the switch trigger, and
then release it. The lamp goes out approximately 10
seconds after releasing the switch trigger.
To keep turning off the light, slightly pull the switch trigger,
then release it, and then press the button for a few seconds.
To turn on the light, perform the same operation again.
In push drive mode with the switch trigger locked, the
lamp goes out approximately one minute after the motor
stops.
NOTE:
While pulling the switch trigger, the lamp
status cannot be changed.
NOTE:
For approximately 10 seconds after releasing
the switch trigger, the lamp status can be changed.
NOTE:
Use a dry cloth to wipe the dirt off the lens of
the lamp. Be careful not to scratch the lens of lamp, or
it may lower the illumination.
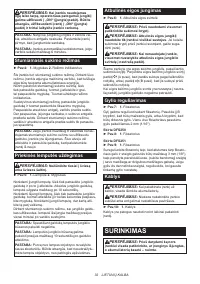
Reversing switch action
►
Fig.6:
1.
Reversing switch lever
CAUTION:
Always check the direction of
rotation before operation.
CAUTION:
Use the reversing switch only after
the tool comes to a complete stop.
Changing the
direction of rotation before the tool stops may dam-
age the tool.
CAUTION:
When not operating the tool,
always set the reversing switch lever to the neu-
tral position.
This tool has a reversing switch to change the direc
-
tion of rotation. Move the reversing switch lever to the
position
(A side) for clockwise rotation or to the posi
-
tion
(B side) for counterclockwise rotation.
When the reversing switch lever is in the neutral posi
-
tion, the switch trigger cannot be pulled.
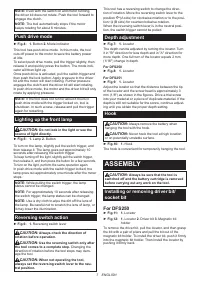
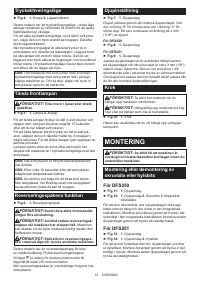
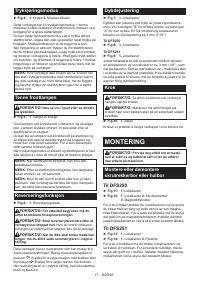
Depth adjustment
►
Fig.7:
1.
Locator
The depth can be adjusted by turning the locator. Turn
it in "B" direction for less depth and in "A" direction for
more depth. One full turn of the locator equals 2 mm
(1/16") change in depth.
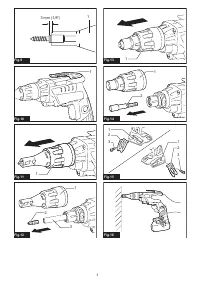
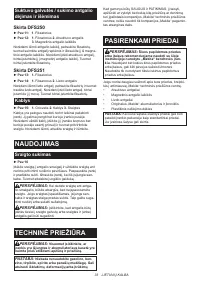
For DFS250
►
Fig.8:
1.
Locator
For DFS251
►
Fig.9:
1.
Locator
Adjust the locator so that the distance between the tip
of the locator and the screw head is approximately 3
mm (1/8") as shown in the figures. Drive a trial screw
into your material or a piece of duplicate material. If the
depth is still not suitable for the screw, continue adjust
-
ing until you obtain the proper depth setting.
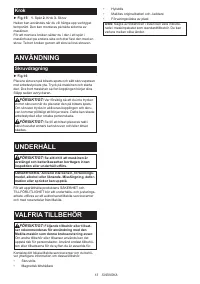
Hook
CAUTION:
Always remove the battery when
hanging the tool with the hook.
CAUTION:
Never hook the tool at high location
or on potentially unstable surface.
►
Fig.10:
1.
Hook
The hook is convenient for temporarily hanging the tool.
ASSEMBLY
CAUTION:
Always be sure that the tool is
switched off and the battery cartridge is removed
before carrying out any work on the tool.
Installing or removing driver bit/
socket bit
For DFS250
►
Fig.11:
1.
Locator
►
Fig.12:
1.
Locator
2.
Driver bit
3.
Magnetic bit
holder
To remove the driver bit, pull the locator, and then grasp
the bit with a pair of pliers and pull the bit out of the
magnetic bit holder. To install the driver bit, push it firmly
into the magnetic bit holder. Then install the locator by
pushing it firmly back.
Содержание
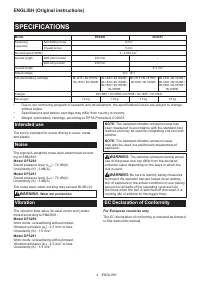
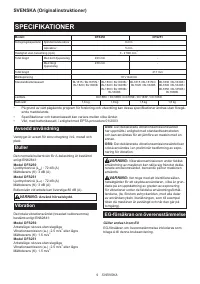
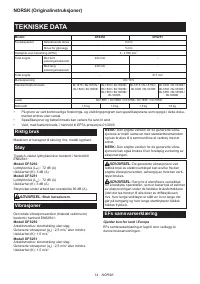
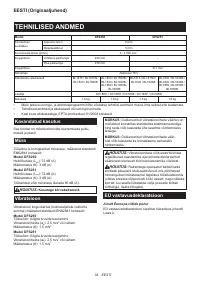
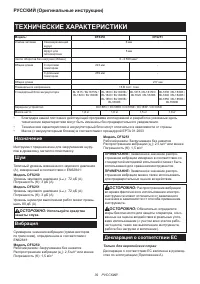
Характеристики

Остались вопросы?Не нашли свой ответ в руководстве или возникли другие проблемы? Задайте свой вопрос в форме ниже с подробным описанием вашей ситуации, чтобы другие люди и специалисты смогли дать на него ответ. Если вы знаете как решить проблему другого человека, пожалуйста, подскажите ему :)


