
Шуруповерты Makita DDF486Z - инструкция пользователя по применению, эксплуатации и установке на русском языке. Мы надеемся, она поможет вам решить возникшие у вас вопросы при эксплуатации техники.
Если остались вопросы, задайте их в комментариях после инструкции.
"Загружаем инструкцию", означает, что нужно подождать пока файл загрузится и можно будет его читать онлайн. Некоторые инструкции очень большие и время их появления зависит от вашей скорости интернета.


8 ENGLISH
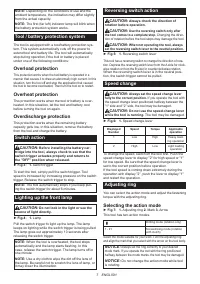
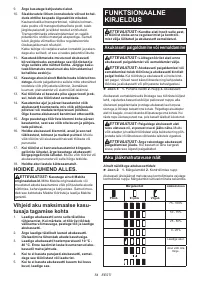
Adjusting the fastening torque
►
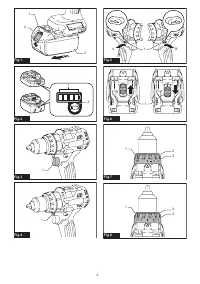
Fig.8:
1.
Adjusting ring
2.
Mark (1 - 21 graduation)
3.
Arrow
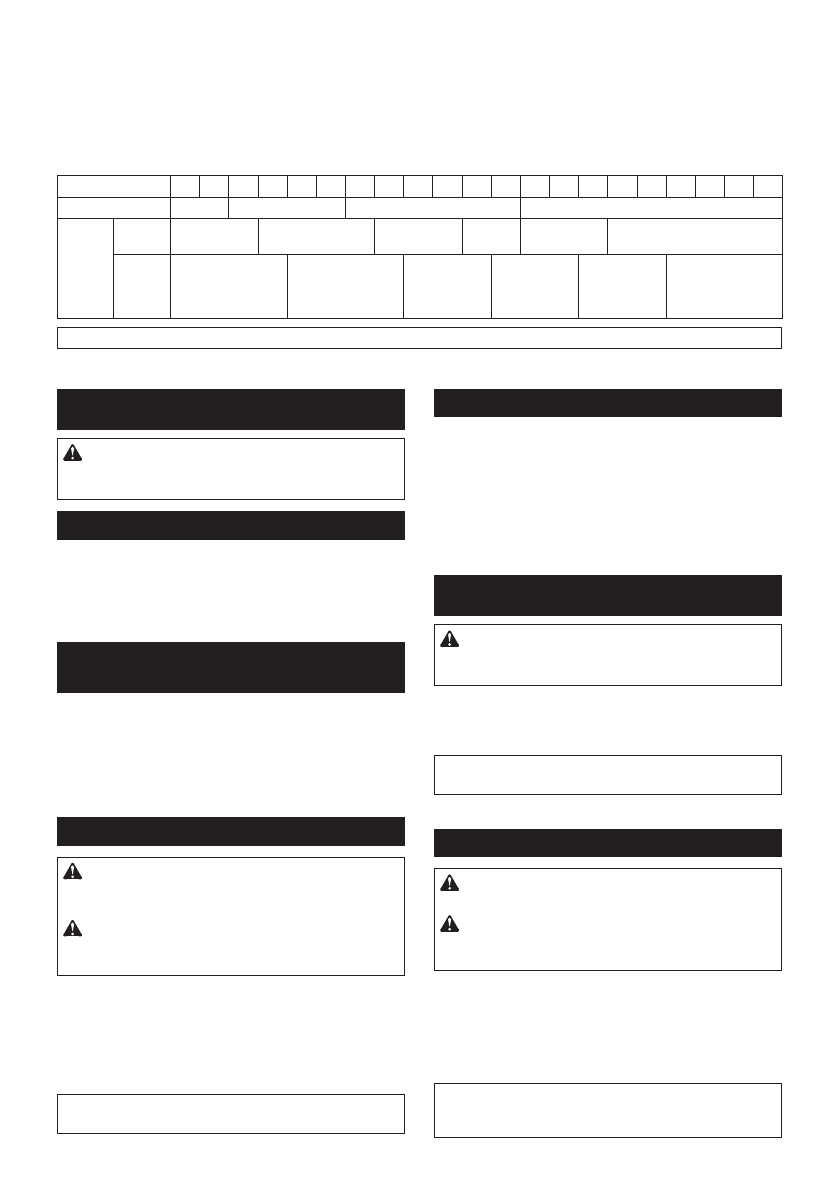
The fastening torque can be adjusted in 21 levels by turning the adjusting ring. Align the graduations with the arrow
on the tool body. You can get the minimum fastening torque at 1 and maximum torque at 21.
Before actual operation, drive a trial screw into your material or a piece of duplicate material to determine which
torque level is required for a particular application.
Graduation
1
2
3
4
5
6
7
8
9
10 11 12 13 14 15 16 17 18
19
20 21
Machine screw
M4
M5
M6
–
Wood
screw
Soft wood
(e.g. pine)
–
ø
3.5 x 22
ø4.1 x 38
–
ø5.1 x 50
–
Hard
wood
(e.g.
lauan)
–
ø
3.5 x 22
ø4.1 x 38
–
ø5.1 x 50
–
NOTE:
The adjusting ring does not lock when the arrow is positioned only halfway between the graduations.
ASSEMBLY
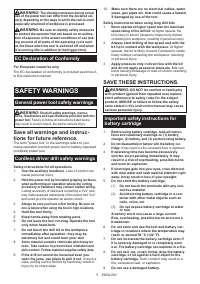
CAUTION:
Always be sure that the tool is
switched off and the battery cartridge is removed
before carrying out any work on the tool.
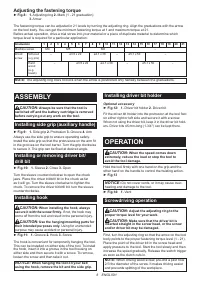
Installing side grip (auxiliary handle)
►
Fig.9:
1.
Side grip
2.
Protrusion
3.
Groove
4.
Arm
Always use the side grip to ensure operating safety.
Install the side grip so that the protrusions on the arm fit
in the grooves on the tool barrel. Turn the grip clockwise
to secure it. The grip can be fixed at desired angle.
Installing or removing driver bit/
drill bit
►
Fig.10:
1.
Sleeve
2.
Close
3.
Open
Turn the sleeve counterclockwise to open the chuck
jaws. Place the driver bit/drill bit in the chuck as far
as it will go. Turn the sleeve clockwise to tighten the
chuck. To remove the driver bit/drill bit, turn the sleeve
counterclockwise.
Installing hook
CAUTION:
When installing the hook, always
secure it with the screw firmly.
If not, the hook may
come off from the tool and result in the personal injury.
CAUTION:
Use the hanging/mounting parts for
their intended purposes only.
Using for unintended
purpose may cause accident or personal injury.
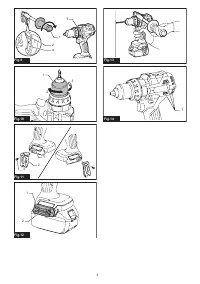
►
Fig.11:
1.
Groove
2.
Hook
3.
Screw
The hook is convenient for temporarily hanging the tool.
This can be installed on either side of the tool. To install
the hook, insert it into a groove in the tool housing on
either side and then secure it with a screw. To remove,
loosen the screw and then take it out.
NOTICE:
When hanging the tool on your belt
using the hook, remove the bit and the side grip.
Installing driver bit holder
Optional accessory
►
Fig.12:
1.
Driver bit holder
2.
Driver bit
Fit the driver bit holder into the protrusion at the tool foot
on either right or left side and secure it with a screw.
When not using the driver bit, keep it in the driver bit hold-
ers. Driver bits 45 mm-long (1-3/4") can be kept there.
OPERATION
CAUTION:
When the speed comes down
extremely, reduce the load or stop the tool to
avoid the tool damage.
Hold the tool firmly with one hand on the grip and the
other hand on the handle to control the twisting action.
►
Fig.13
NOTICE:
Do not cover vents, or it may cause over
-
heating and damage to the tool.
►
Fig.14:
1.
Vent
Screwdriving operation
CAUTION:
Adjust the adjusting ring to the
proper torque level for your work.
CAUTION:
Make sure that the driver bit is
inserted straight in the screw head, or the screw
and/or driver bit may be damaged.
First, turn the adjusting ring so that the arrow on the tool
body points to the proper fastening torque level (1 - 21).
Place the point of the driver bit in the screw head and
apply pressure to the tool. Start the tool slowly and then
increase the speed gradually. Release the switch trigger
as soon as the clutch cuts in.
NOTE:
When driving wood screw, pre-drill a pilot hole
2/3 the diameter of the screw. It makes driving easier
and prevents splitting of the workpiece.
Содержание
- 58 ТЕХНИЧЕСКИЕ ХАРАКТЕРИСТИКИ; Подходящий блок аккумулятора и зарядное устройство
- 59 МЕРЫ БЕЗОПАСНОСТИ; Сохраните брошюру с инструк
- 60 Важные правила техники; СОХРАНИТЕ ДАННЫЕ
- 61 Советы по обеспечению максималь; ОПИСАНИЕ РАБОТЫ; Защита от перегрузки
- 62 Выбор режима действия
- 63 Регулировка крутящего момента затяжки; СБОРКА
- 64 ЭКСПЛУАТАЦИЯ; Работа в режиме шуруповерта; ОБСЛУЖИВАНИЕ


