
Шуруповерты Makita DDA460Z - инструкция пользователя по применению, эксплуатации и установке на русском языке. Мы надеемся, она поможет вам решить возникшие у вас вопросы при эксплуатации техники.
Если остались вопросы, задайте их в комментариях после инструкции.
"Загружаем инструкцию", означает, что нужно подождать пока файл загрузится и можно будет его читать онлайн. Некоторые инструкции очень большие и время их появления зависит от вашей скорости интернета.


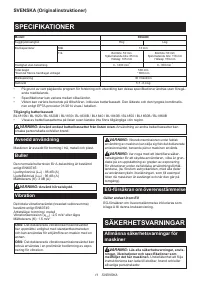


8 ENGLISH
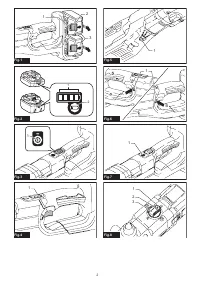
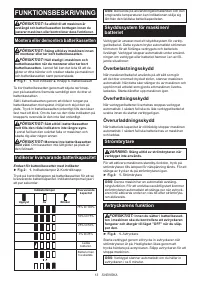
Lighting up the front lamp
CAUTION:
Do not look in the light or see the
source of light directly.
►
Fig.5:
1.
Lamp
Pull the switch trigger to light up the lamp. The lamp
keeps on lighting while the switch trigger is being pulled.
The lamp goes out approximately 10 seconds after
releasing the switch trigger.
NOTE:
When the tool is overheated, the tool stops
automatically and the lamp starts flashing. In this case,
release the switch trigger. The lamp turns off in 5 minute.
NOTE:
Use a dry cloth to wipe the dirt off the lens of
the lamp. Be careful not to scratch the lens of lamp, or
it may lower the illumination.
Reversing switch action
►
Fig.6:
1.
Reversing switch lever
CAUTION:
Always check the direction of
rotation before operation.
CAUTION:
Use the reversing switch only after
the tool comes to a complete stop.
Changing the direc-
tion of rotation before the tool stops may damage the tool.
CAUTION:
When not operating the tool,
always set the reversing switch lever to the neu-
tral position.
This tool has a reversing switch to change the direction of rota
-
tion. Depress the reversing switch lever from the A side for clock-
wise rotation or from the B side for counterclockwise rotation.
When the reversing switch lever is in the neutral posi-
tion, the switch lever cannot be pulled.
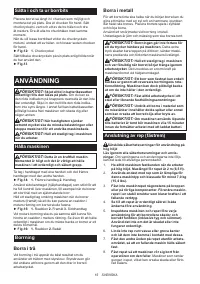
Automatic speed change function
This tool has "high speed mode" and "high torque mode".
The tool automatically changes the operation mode
depending on the work load. When the work load is low,
the tool will run in the "high speed mode" for quicker
operation. When the work load is high, the tool will run
in the "high torque mode" for powerful operation.
►
Fig.7:
1.
Mode indicator
The mode indicator lights up in green when the tool is
running in "high torque mode".
If the tool is operated with excessive load, the mode indicator
will blink in green. The mode indicator stops blinking and
then lights up or turns off if you reduce the load on the tool.
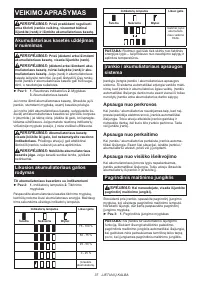
Mode indicator status
Operation
mode
On
Off
Blinking
High speed
mode
High torque
mode
Overload
alert
Speed change
NOTICE:
Use the speed change knob only after
the tool comes to a complete stop.
Changing the
tool speed before the tool stops may damage the tool.
NOTICE:
Always set the speed change knob
carefully into the correct position.
If you operate
the tool with the speed change knob positioned half-
way between the position 1 and the position 2, the
tool may be damaged.
Two speed ranges can be preselected with the speed
change knob.
To change the speed, depress the lock button and turn
the speed change knob so that the pointer points to the
position 1 for low speed or the position 2 for high speed.
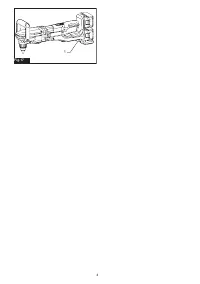
►
Fig.8:
1.
Lock button
2.
Pointer
3.
Speed change
knob
Torque limiter
The torque limiter will actuate when a certain torque
level is reached at the low speed setting (position 1).
The motor will disengage from the output shaft. When
this happens, the drill bit will stop turning.
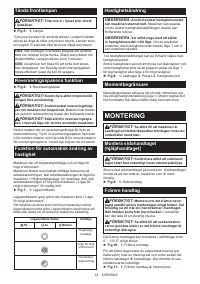
ASSEMBLY
CAUTION:
Always be sure that the tool is
switched off and the battery cartridge is removed
before carrying out any work on the tool.
Installing side grip (auxiliary handle)
CAUTION:
Always be sure that the side grip is
installed securely before operation.
Screw the side grip on the tool securely. The side grip
can be installed on either side of the tool, whichever is
convenient.
►
Fig.9:
1.
Side grip
Front handle
CAUTION:
Do not fix the front handle beyond
the limits of the arrow as illustrated. Be cautious
that your hand is not caught in the grip. Keep the
hand away from the drill chuck.
They can lead to
serious accidents.
CAUTION:
Always be sure that the hex bolts
(both sides) of the front handle are tightened
securely.
The front handle can be installed in any position within
0° - 112.5° as illustrated.
►
Fig.10:
1.
Front handle
To change the position, loosen the hex bolts (both
sides) with a hex wrench and turn the front handle to the
desired position. Then tighten the hex bolts securely.
►
Fig.11:
1.
Front handle
2.
Hex wrench


