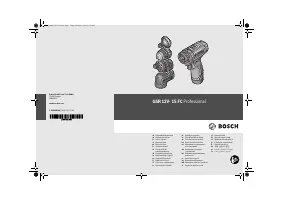
Шуруповерты Bosch GSR 12V-15 FC (06019F6000) - инструкция пользователя по применению, эксплуатации и установке на русском языке. Мы надеемся, она поможет вам решить возникшие у вас вопросы при эксплуатации техники.
Если остались вопросы, задайте их в комментариях после инструкции.
"Загружаем инструкцию", означает, что нужно подождать пока файл загрузится и можно будет его читать онлайн. Некоторые инструкции очень большие и время их появления зависит от вашей скорости интернета.


16
| English
1 609 92A 38S | (4.11.16)
Bosch Power Tools
–
Provide for good ventilation of the working place.
–
It is recommended to wear a P2 filter-class respirator.
Observe the relevant regulations in your country for the
materials to be worked.
Prevent dust accumulation at the workplace.
Dust can
easily ignite.
Operation
Starting Operation
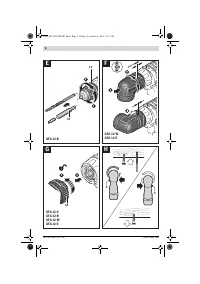
Inserting the battery
Note:
Use of batteries not suitable for the machine can lead to
malfunctions of or cause damage to the power tool.
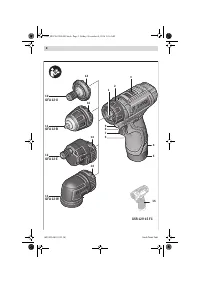
Set the rotational direction switch
6
to the centre position in
order to avoid unintentional starting. Insert the charged bat-
tery
5
into the handle so that it can be felt to engage and faces
flush against the handle.
Reversing the rotational direction (see figure H)
The rotational direction switch
6
is used to reverse the rota-
tional direction of the machine. However, this is not possible
with the On/Off switch
7
actuated.
Right Rotation:
For drilling and driving in screws, push the
rotational direction switch
6
left to the stop.
Left Rotation:
For loosening and unscrewing screws and
nuts, press the rotational direction switch
6
through to the
right stop.
Setting the torque
With the torque presetting ring
2
the required torque setting
can be preselected in 15 steps. With the correct setting, the
insert tool is stopped as soon as the screw is screwed flush in-
to the material or when the adjusted torque is reached. The
safety clutch is deactivated in the “
” position, e. g. for
drilling.
Select a higher setting or switch to the “
” symbol when un-
screwing screws.
Gear selection, mechanical
Actuate the gear selector 3 only when the machine is at
a standstill.
Two speed ranges can be preselected with the gear selector
3
.
Gear 1:
Low speed range; for screwdriving or for working with a large
drilling diameter.
Gear 2:
High speed range; for working with a small drilling diameter.
Always push the gear selector through to the stop.
Oth-
erwise, the machine can become damaged.
Switching On and Off
To
start
the machine, press the On/Off switch
7
and keep it
pressed.
The work light
9
illuminates when the On/Off switch
7
is lightly
or fully pressed and allows the illumination of the work area in
poor lighting conditions.
The worklight
9
will remain lit for approx. 10 seconds when
the On/Off switch
7
has been released.
To save energy, only switch the power tool on when using it.
Adjusting the Speed
The speed of the switched-on power tool can be variably ad-
justed, depending on how far the On/Off switch
7
is pressed.
Light pressure on the On/Off switch
7
results in a low rotation-
al speed. Further pressure on the switch results in an increase
in speed.
Fully automatic spindle locking (Auto-lock)
The drill spindle and therefore the mounting are locked when
the On/Off switch
7
is not pressed.
This enables screws to be screwed in, even when the battery
is empty and allows for the machine to be used as a screwdriv-
er.
Temperature Dependent Overload Protection
In normal conditions of use, the power tool cannot be over-
loaded. If the power tool is overloaded or not kept within the
permitted operating temperature range, the power output is
reduced or the power tool is switched off. The power tool will
not run at full power output again until the permitted operat-
ing temperature has been reached.
Battery Charge-control Indication
The battery charge-control indicator
8
consists of three green
LEDs, and indicates the charge condition of the battery for a
few seconds when the On/Off switch
7
is pressed halfway or
fully.
Working Advice
Apply the power tool to the screw only when it is
switched off.
Rotating tool inserts can slip off.
After longer periods of working at low speed, allow the ma-
chine to cool down by running it for approx. 3 minutes at max-
imum speed with no load.
For drilling in metal, use only perfectly sharpened HSS drill
bits (HSS = high-speed steel). The appropriate quality is guar-
anteed by the Bosch accessories program.
Before screwing larger, longer screws into hard materials, it is
advisable to predrill a pilot hole with the core diameter of the
thread to approx.
2
/
3
of the screw length.
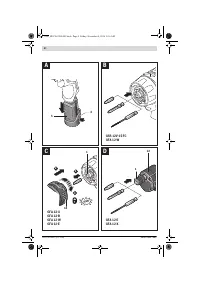
Maintenance and Service
Maintenance and Cleaning
Before any work on the machine itself (e. g. mainte-
nance, tool change, etc.) as well as during transport
and storage, remove the battery from the power tool.
There is danger of injury when unintentionally actuating
the On/Off switch.
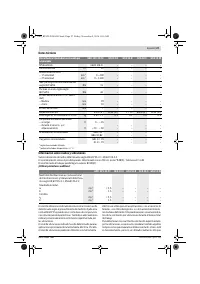
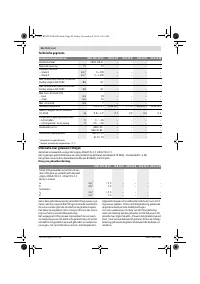
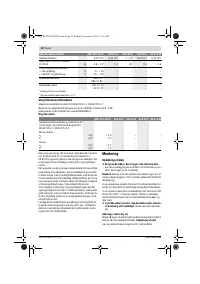
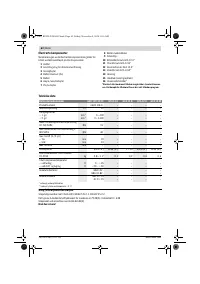
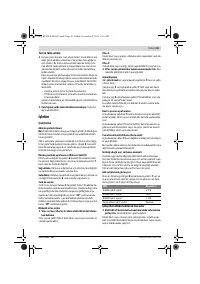
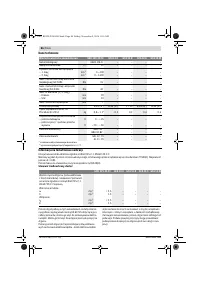
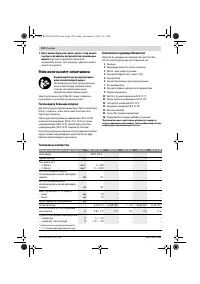
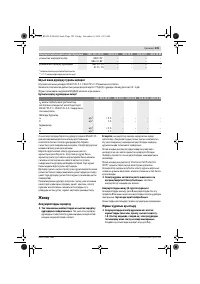
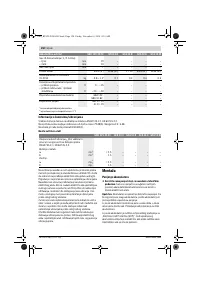
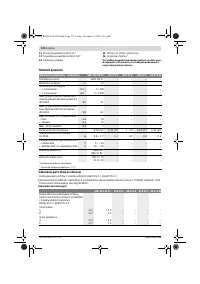
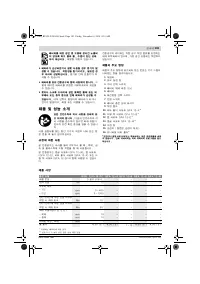
LED
Capacity
Continuous lighting 3 x green
≥ 2/3
Continuous lighting 2 x green
≥1/3
Continuous lighting 1 x green
< 1/3
Flashing light 1 x green
Reserve
OBJ_BUCH-2980-001.book Page 16 Friday, November 4, 2016 8:16 AM
Содержание
- 108 Указания по безопасности
- 110 Описание продукта и услуг; Применение по назначению
- 111 Данные по шуму и вибрации; Сборка; Зарядка аккумулятора
- 112 Замена рабочего инструмента; Работа с инструментом; Включение электроинструмента
- 113 Указания по применению; Техобслуживание и сервис; Техобслуживание и очистка
- 114 Транспортировка
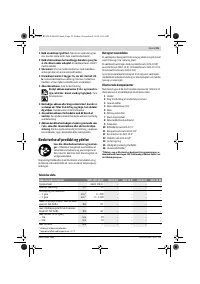
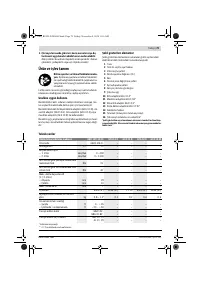
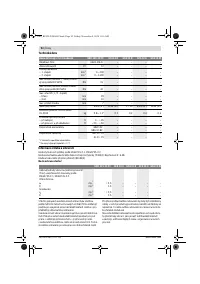
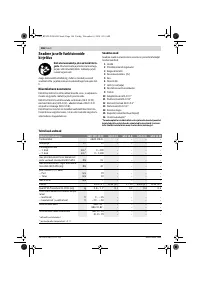
Характеристики

Остались вопросы?Не нашли свой ответ в руководстве или возникли другие проблемы? Задайте свой вопрос в форме ниже с подробным описанием вашей ситуации, чтобы другие люди и специалисты смогли дать на него ответ. Если вы знаете как решить проблему другого человека, пожалуйста, подскажите ему :)


