
Шлифмашины Makita GA038GZ - инструкция пользователя по применению, эксплуатации и установке на русском языке. Мы надеемся, она поможет вам решить возникшие у вас вопросы при эксплуатации техники.
Если остались вопросы, задайте их в комментариях после инструкции.
"Загружаем инструкцию", означает, что нужно подождать пока файл загрузится и можно будет его читать онлайн. Некоторые инструкции очень большие и время их появления зависит от вашей скорости интернета.


21 ENGLISH
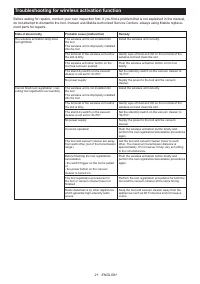
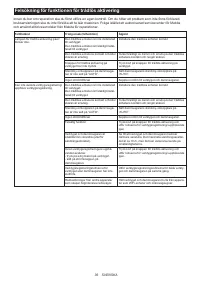
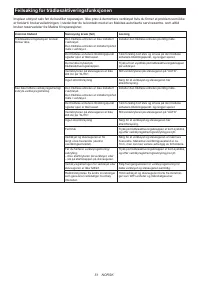
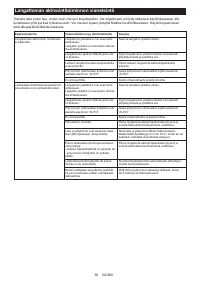
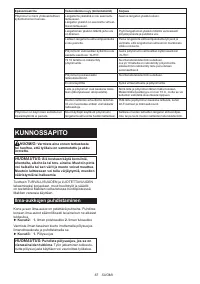
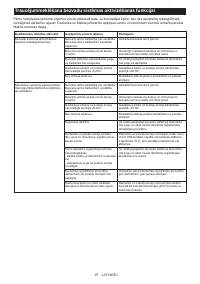
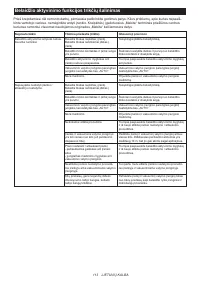
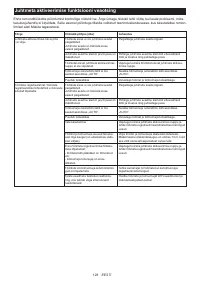
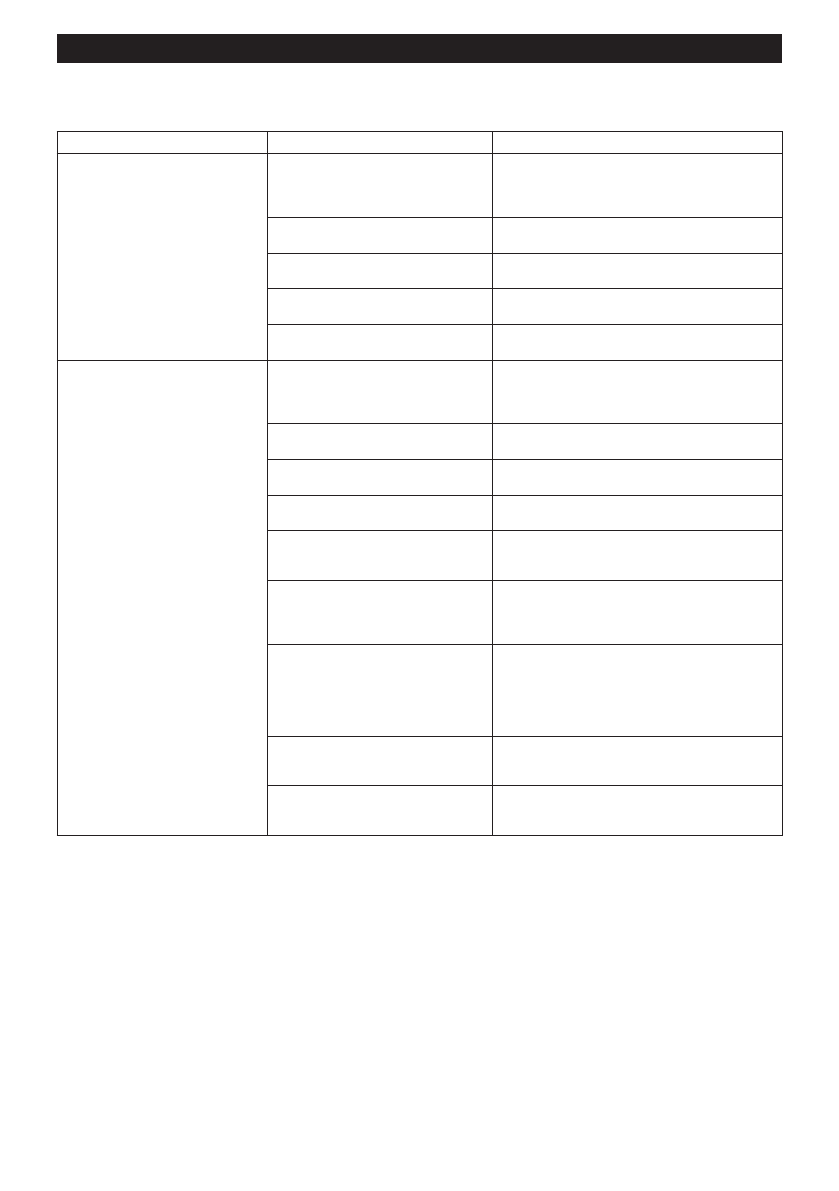
Troubleshooting for wireless activation function
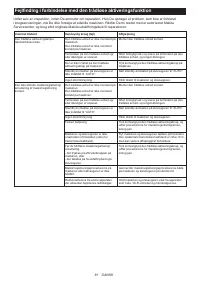
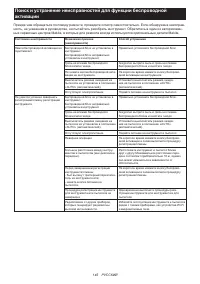
Before asking for repairs, conduct your own inspection first. If you find a problem that is not explained in the manual,
do not attempt to dismantle the tool. Instead, ask Makita Authorized Service Centers, always using Makita replace
-
ment parts for repairs.
State of abnormality
Probable cause (malfunction)
Remedy
The wireless activation lamp does
not light/blink.
The wireless unit is not installed into
the tool.
The wireless unit is improperly installed
into the tool.
Install the wireless unit correctly.
The terminal of the wireless unit and/or
the slot is dirty.
Gently wipe off dust and dirt on the terminal of the
wireless unit and clean the slot.
The wireless activation button on the
tool has not been pushed.
Push the wireless activation button on the tool
briefly.
The stand-by switch on the vacuum
cleaner is not set to "AUTO".
Set the stand-by switch on the vacuum cleaner to
"AUTO".
No power supply
Supply the power to the tool and the vacuum
cleaner.
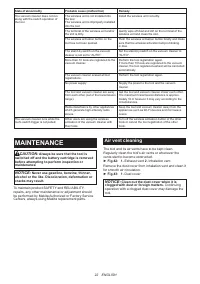
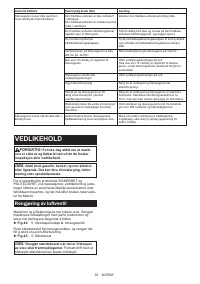
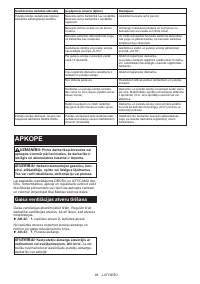
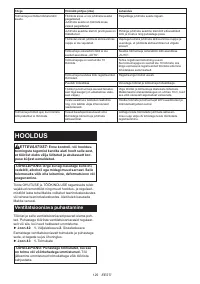
Cannot finish tool registration / can
-
celling tool registration successfully.
The wireless unit is not installed into
the tool.
The wireless unit is improperly installed
into the tool.
Install the wireless unit correctly.
The terminal of the wireless unit and/or
the slot is dirty.
Gently wipe off dust and dirt on the terminal of the
wireless unit and clean the slot.
The stand-by switch on the vacuum
cleaner is not set to "AUTO".
Set the stand-by switch on the vacuum cleaner to
"AUTO".
No power supply
Supply the power to the tool and the vacuum
cleaner.
Incorrect operation
Push the wireless activation button briefly and
perform the tool registration/cancellation procedures
again.
The tool and vacuum cleaner are away
from each other (out of the transmission
range).
Get the tool and vacuum cleaner closer to each
other. The maximum transmission distance is
approximately 10 m however it may vary according
to the circumstances.
Before finishing the tool registration/
cancellation;
- the switch trigger on the tool is pulled
or;
- the power button on the vacuum
cleaner is turned on.
Push the wireless activation button briefly and
perform the tool registration/cancellation procedures
again.
The tool registration procedures for
the tool or vacuum cleaner have not
finished.
Perform the tool registration procedures for both the
tool and the vacuum cleaner at the same timing.
Radio disturbance by other appliances
which generate high-intensity radio
waves.
Keep the tool and vacuum cleaner away from the
appliances such as Wi-Fi devices and microwave
ovens.
Содержание
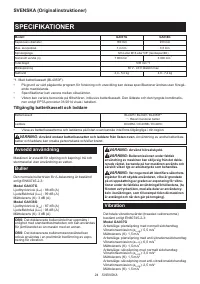
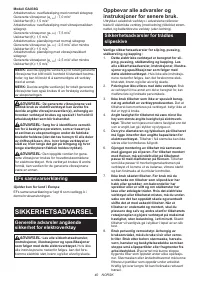
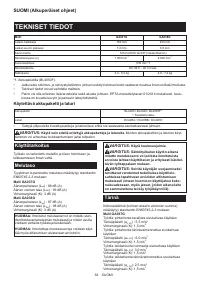
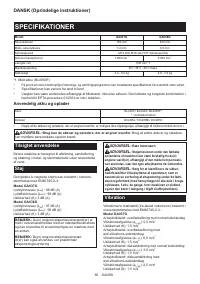
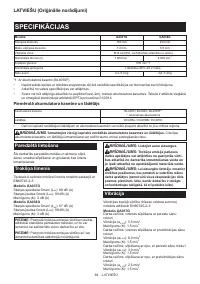
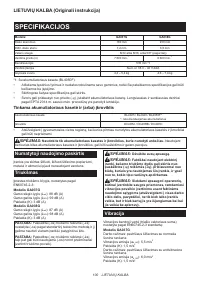
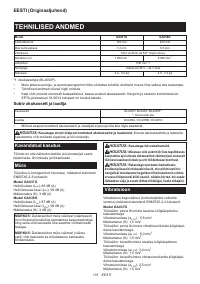
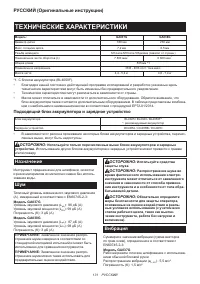
- 131 ТЕХНИЧЕСКИЕ ХАРАКТЕРИСТИКИ; Подходящий блок аккумулятора и зарядное устройство; Назначение; Вибрация
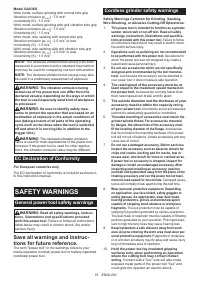
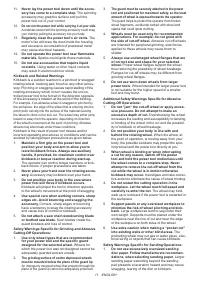
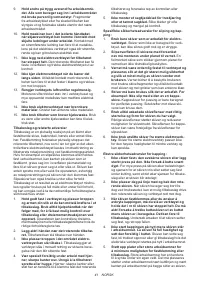
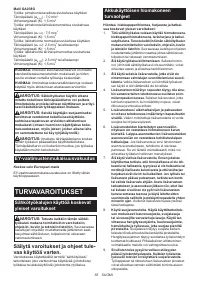
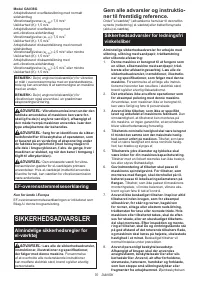
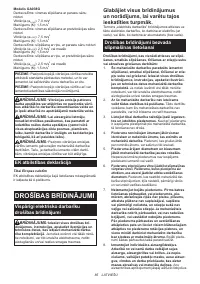
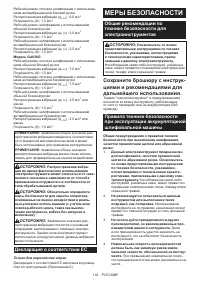
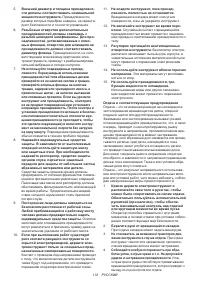
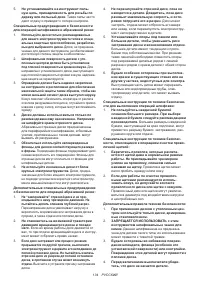
- 132 МЕРЫ БЕЗОПАСНОСТИ; Сохраните брошюру с инструк
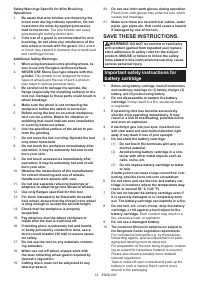
- 135 СОХРАНИТЕ ДАННЫЕ; Важные правила техники
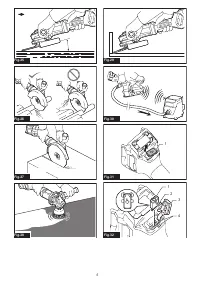
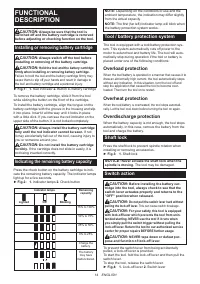
- 137 ОПИСАНИЕ РАБОТЫ; Установка или снятие блока
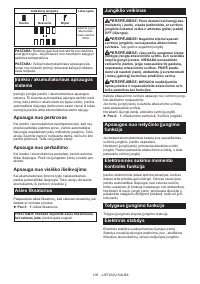
- 138 Защита от перегрузки
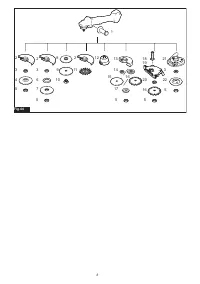
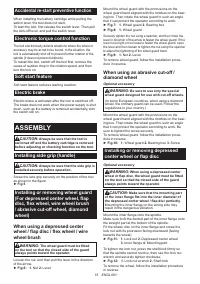
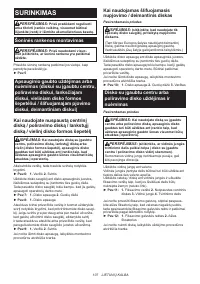
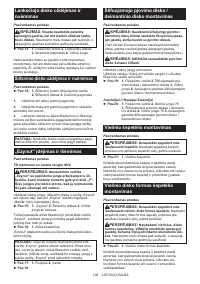
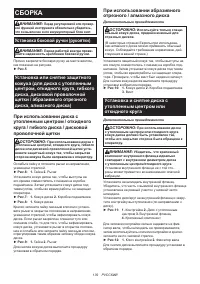
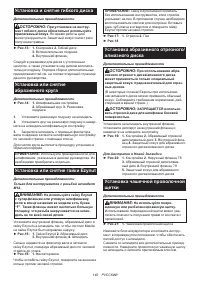
- 139 СБОРКА; При использовании диска с
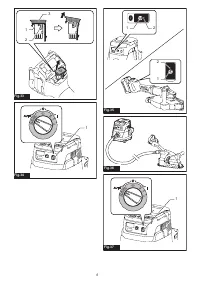
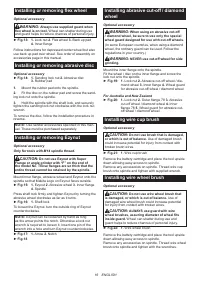
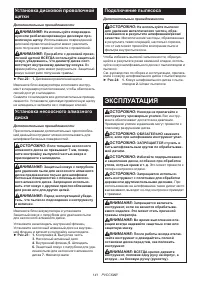
- 141 Установка дисковой проволочной; Установка несоосного алмазного; Подключение пылесоса; ЭКСПЛУАТАЦИЯ
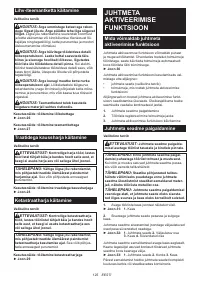
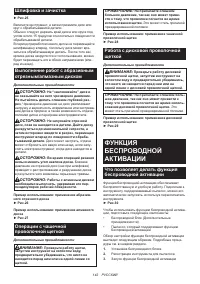
- 142 ФУНКЦИЯ
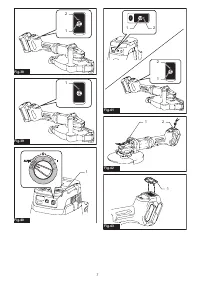
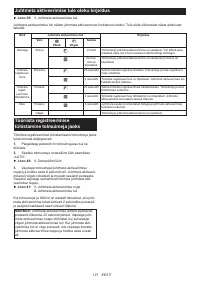
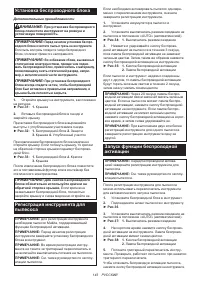
- 143 Установка беспроводного блока; Регистрация инструмента для
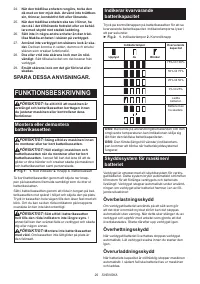
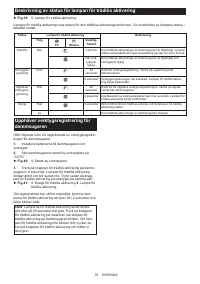
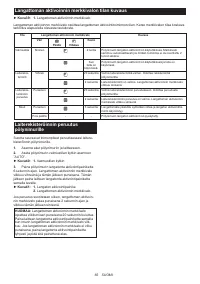
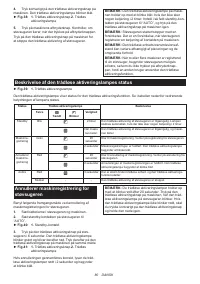
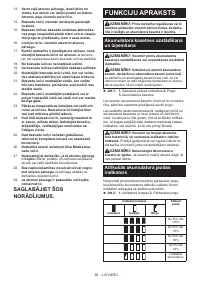
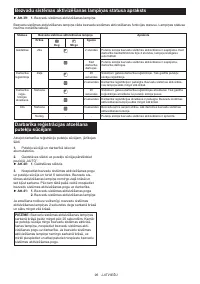
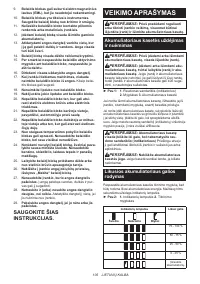
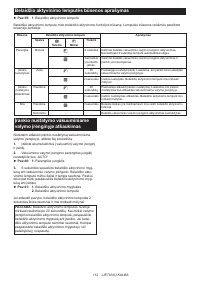
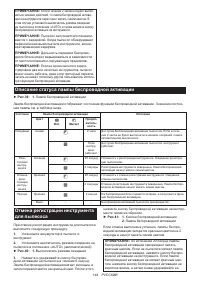
- 144 Описание статуса лампы беспроводной активации
- 145 Поиск и устранение неисправностей для функции беспроводной
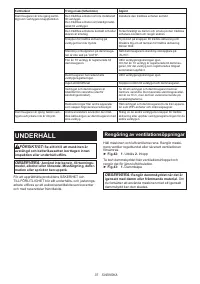
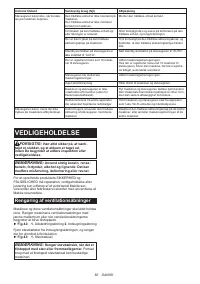
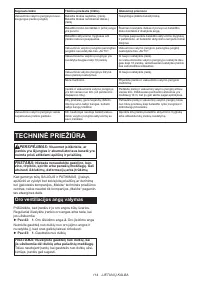
- 146 ОБСЛУЖИВАНИЕ; Очистка вентиляционного отверстия
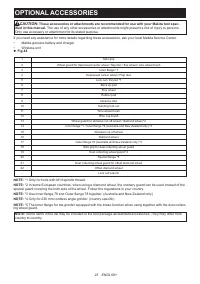
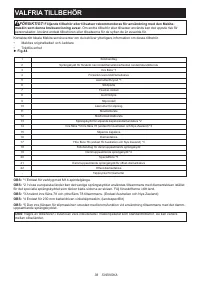
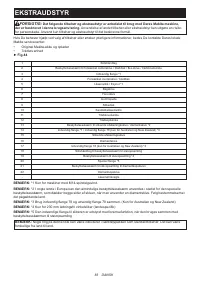
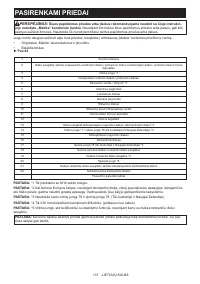
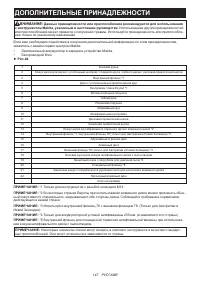
- 147 ДОПОЛНИТЕЛЬНЫЕ ПРИНАДЛЕЖНОСТИ
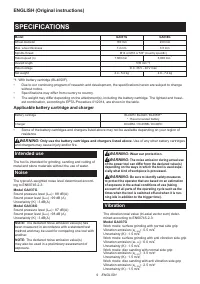
Характеристики

Остались вопросы?Не нашли свой ответ в руководстве или возникли другие проблемы? Задайте свой вопрос в форме ниже с подробным описанием вашей ситуации, чтобы другие люди и специалисты смогли дать на него ответ. Если вы знаете как решить проблему другого человека, пожалуйста, подскажите ему :)


