Шлифмашины Einhell TE-MA 1500 (4350735) - инструкция пользователя по применению, эксплуатации и установке на русском языке. Мы надеемся, она поможет вам решить возникшие у вас вопросы при эксплуатации техники.
Если остались вопросы, задайте их в комментариях после инструкции.
"Загружаем инструкцию", означает, что нужно подождать пока файл загрузится и можно будет его читать онлайн. Некоторые инструкции очень большие и время их появления зависит от вашей скорости интернета.


GB
- 16 -
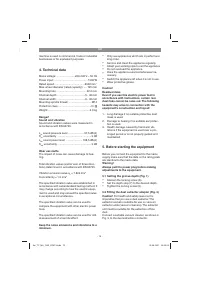
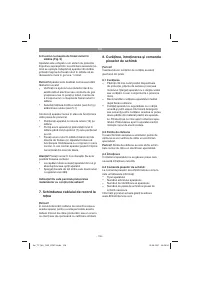
5.3 Trial run for new diamond cutting wheels
Have the equipment run in idle mode for at least
1 minute with the cutting wheels
fi
tted. Replace
vibrating wheels immediately.
6. Operation
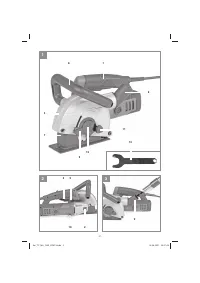
6.1 Switch (Fig. 4)
The equipment comes with a safety switch which
is designed to prevent accidents.
To start the equipment, push the locking lever (5)
forwards and then press the On/O
ff
switch (4).
Warning! Wait until the machine has reached
its top speed.
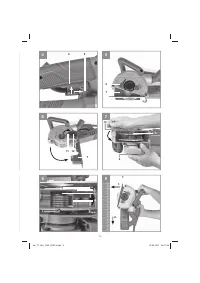
6.2 Changing and setting the diamond
cutting wheels (Fig. 5-8)
Danger!
Pull the mains power plug out of the
socket-outlet
Removing:
•
Undo the locking screw for the depth stop (6)
and remove (Fig. 5)
•
Swing the depth stop (7) downwards (Fig. 6)
•
Slacken the screw for the flange cover (11)
and open the flange cover (12) (Fig. 6)
•
Press and hold the spindle lock (2) and re-
lease the outer flange (a) with the supplied
flange nut wrench (13) (Fig. 7)
•
Remove the following as shown in Fig. 8:
- the top cutting wheel (b)
- the top inner flange (c)
- 6x spacers (d)
- the bottom cutting wheel (e)
- the bottom inner flange (f)
Important!
Thoroughly clean all the spacers and
fl
anges.
Fitting:
Important!
Diamond cutting wheels must always
be replaced as pairs!
•
Fit the bottom inner flange (f) and the bottom
cutting wheel (e)
Important!
Check the direction of rotation of
the cutting wheel!
•
Fit the number of spacers (d) required for the
groove width
•
Place the top inner flange (c) – with its raised
side up – onto the last fitted spacer.
Important!
Each spacer is approx. 3.5 mm
wide. The groove width results from the
number of spacers (d), the top inner flange
(c) between the cutting wheels, and the thick-
ness of the two cutting wheels
•
Put on the top cutting wheel (b)
Important!
Check the direction of rotation of
the cutting wheel!
•
Fit all the remaining spacers (d) and screw
the outer flange (a) back in place
Warning!
All 6 spacers (d) must be
fi
tted
irrespective of the desired groove width!
Close and fasten the
fl
ange cover (12) and swivel
the depth stop (7) back in place.
Fasten the depth stop (7) using the locking screw
for depth screw (6).
Important!
Check that all the parts are seated
fi
rmly and correctly.
Caution:
Only ever press the spindle lock when
the motor and grinding spindle are at a
standstill! The spindle lock must be kept
pressed while the wheel is being changed!
6.3 Motor
It is vital for the motor to be well ventilated during
operation. Be sure, therefore, to keep the ventilati-
on holes clean at all times.
6.4 Working with the masonry channel cutter
(Fig. 9)
The device is
fi
tted with an overload cut-out. The
motor will cut out if overloaded. Relieve the load
on the motor immediately and allow the masonry
channel cutter to cool down for approx. 1 minute
without load.
Danger!
The device is suitable for dry cutting
only!
•
Use a cable/pipe detector to check for conce-
aled electric cables and gas and water pipes
in the wall before you start using the masonry
channel cutter.
•
Select the desired groove width (see 6.2) and
groove depth (see 5.1).
Only ever guide the device along the workpiece
while switched on.
•
Place the device against the wall with the rol-
ler (10) against the wall.
•
Switch on the device and then cut slowly into
the wall until the stop (7) rests against the
wall.
Anl_TC_MA_1500_SPK13.indb 16
Anl_TC_MA_1500_SPK13.indb 16
02.08.2021 09:08:09
02.08.2021 09:08:09
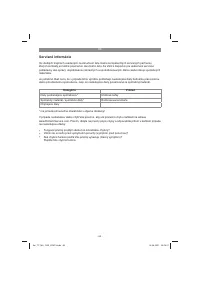
Характеристики

Остались вопросы?Не нашли свой ответ в руководстве или возникли другие проблемы? Задайте свой вопрос в форме ниже с подробным описанием вашей ситуации, чтобы другие люди и специалисты смогли дать на него ответ. Если вы знаете как решить проблему другого человека, пожалуйста, подскажите ему :)


