
Сабельные пилы Bosch GSA 120 Professional - инструкция пользователя по применению, эксплуатации и установке на русском языке. Мы надеемся, она поможет вам решить возникшие у вас вопросы при эксплуатации техники.
Если остались вопросы, задайте их в комментариях после инструкции.
"Загружаем инструкцию", означает, что нужно подождать пока файл загрузится и можно будет его читать онлайн. Некоторые инструкции очень большие и время их появления зависит от вашей скорости интернета.


12
| English
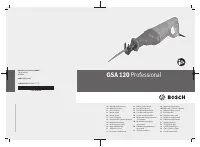
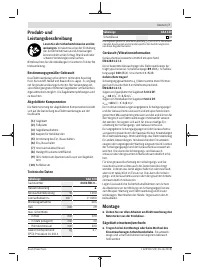
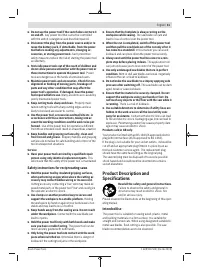
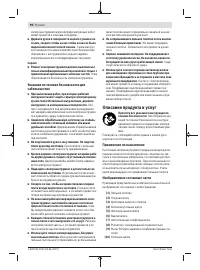
Product features
The numbering of the product features refers to the diagram
of the power tool on the graphics page.
(1)
Saw blade
(2)
Base plate
(3)
Saw blade receptacle
(4)
Caps for carbon brushes
(5)
On/off switch locking mechanism
(6)
On/off switch
(7)
Hex key
(8)
Handle (insulated gripping surface)
(9)
SDS lever for saw blade clamping and release
(10)
Carbon brush
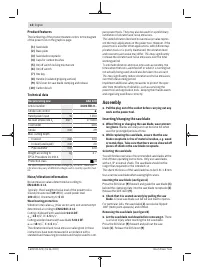
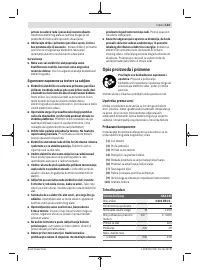
Technical data
Reciprocating saw
GSA 120
Article number
3 601 FB1 0..
Stroke rate control
●
Rated power input
W
1200
No-load stroke rate n
0
min
−1
0−3000
Tool holder
SDS
Stroke
mm
29
Max. cutting depth
– In wood
mm
220
– In steel (unalloyed)
mm
20
– Pipe diameter
mm
220
Weight according to
EPTA-Procedure 01:2014
kg
3.7
Protection class
/
Ⅱ
The specifications apply to a rated voltage [U] of 230 V. These spe-
cifications may vary at different voltages and in country-specific mod-
els.
Noise/vibration information
Noise emission values determined according to
EN 62841-2-11
.
Typically, the A-weighted noise level of the power tool is:
Sound pressure level
89
dB(A); sound power level
100
dB(A). Uncertainty K=
5
dB.
Wear hearing protection
Vibration total values a
h
(triax vector sum) and uncertainty K
determined according to
EN 62841-2-11
:
Cutting chipboard with saw blade
S 611 DF
:
a
h,B
=
18
m/s
2
, K=
1.5
m/s
2
,
Cutting wooden beams with saw blade
S 611 DF
:
a
h,WB
=
18
m/s
2
, K=
1.5
m/s
2
.
The vibration level and noise emission value given in these
instructions have been measured in accordance with a
standardised measuring procedure and may be used to com-
pare power tools. They may also be used for a preliminary
estimation of vibration and noise emissions.
The stated vibration level and noise emission value repres-
ent the main applications of the power tool. However, if the
power tool is used for other applications, with different ap-
plication tools or is poorly maintained, the vibration level
and noise emission value may differ. This may significantly
increase the vibration and noise emissions over the total
working period.
To estimate vibration and noise emissions accurately, the
times when the tool is switched off or when it is running but
not actually being used should also be taken into account.
This may significantly reduce vibration and noise emissions
over the total working period.
Implement additional safety measures to protect the oper-
ator from the effects of vibration, such as servicing the
power tool and application tools, keeping their hands warm,
and organising workflows correctly.
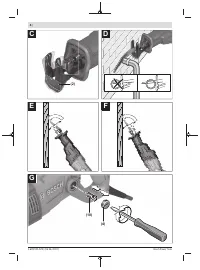
Assembly
u
Pull the plug out of the socket before carrying out any
work on the power tool.
Inserting/changing the saw blade
u
When fitting or changing the saw blade, wear protect-
ive gloves.
Blades are sharp and can become hot when
used for prolonged periods of time.
u
While replacing the saw blade, ensure that the saw
blade receptacle is free of material residue, e.g. wood
or metal chips. Take care that there are no sheared-off
pieces of shank in the saw blade receptacle.
Selecting the saw blade
You will find an overview of recommended saw blades at the
end of these operating instructions. Only use saw blades
with a 1/2" universal shank. The saw blade should not be
longer than required for the intended cut.
The shank thickness of the saw blade has to be 0.8–1.8 mm.
Use a narrow saw blade when sawing tight curves.
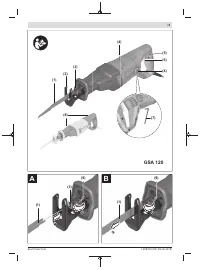
Inserting the saw blade (see figure A)
Press the SDS lever
(9)
forward and guide the saw blade
(1)
behind the clamping plate into the saw blade receptacle
(3)
.
Release the SDS lever
(9)
.
u
Check that it is seated securely by pulling the saw
blade.
A loose saw blade can fall out and lead to injuries.
For particular jobs, the saw blade
(1)
can also be flipped
180° (teeth point upwards) and refitted.
Removing the saw blade (see figure B)
u
Let the saw blade cool down before removing it.
There
is a risk of injury when touching the hot saw blade.
Press the SDS lever
(9)
forward and pull out the saw
blade
(1)
. Release the SDS lever
(9)
.
1 609 92A 52K | (03.06.2019)
Bosch Power Tools
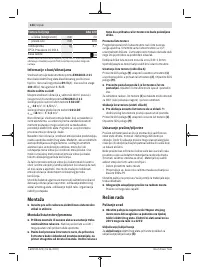
Содержание
- 88 Указания по технике безопасности; ЖДЕНИЕ
- 90 Описание продукта и услуг; Применение по назначению
- 91 Технические данные; Данные по шуму и вибрации; Сборка; Установка/смена пильного полотна
- 92 Удаление пыли и стружки; Работа с инструментом; Включение электроинструмента
- 93 Техобслуживание и сервис; Техобслуживание и очистка
- 94 Утилизация; Українська; Вказівки з техніки безпеки; ДЖЕННЯ
Характеристики

Остались вопросы?Не нашли свой ответ в руководстве или возникли другие проблемы? Задайте свой вопрос в форме ниже с подробным описанием вашей ситуации, чтобы другие люди и специалисты смогли дать на него ответ. Если вы знаете как решить проблему другого человека, пожалуйста, подскажите ему :)


