
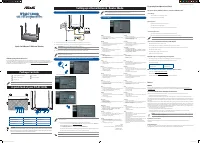
Роутеры ASUS RT-AC1200L (90IG0550-BR3400) - инструкция пользователя по применению, эксплуатации и установке на русском языке. Мы надеемся, она поможет вам решить возникшие у вас вопросы при эксплуатации техники.
Если остались вопросы, задайте их в комментариях после инструкции.
"Загружаем инструкцию", означает, что нужно подождать пока файл загрузится и можно будет его читать онлайн. Некоторые инструкции очень большие и время их появления зависит от вашей скорости интернета.
Quick Start Manual / Kullanım Klavuzu
¤
RT-AC1200L
802.11AC Dual Band Router
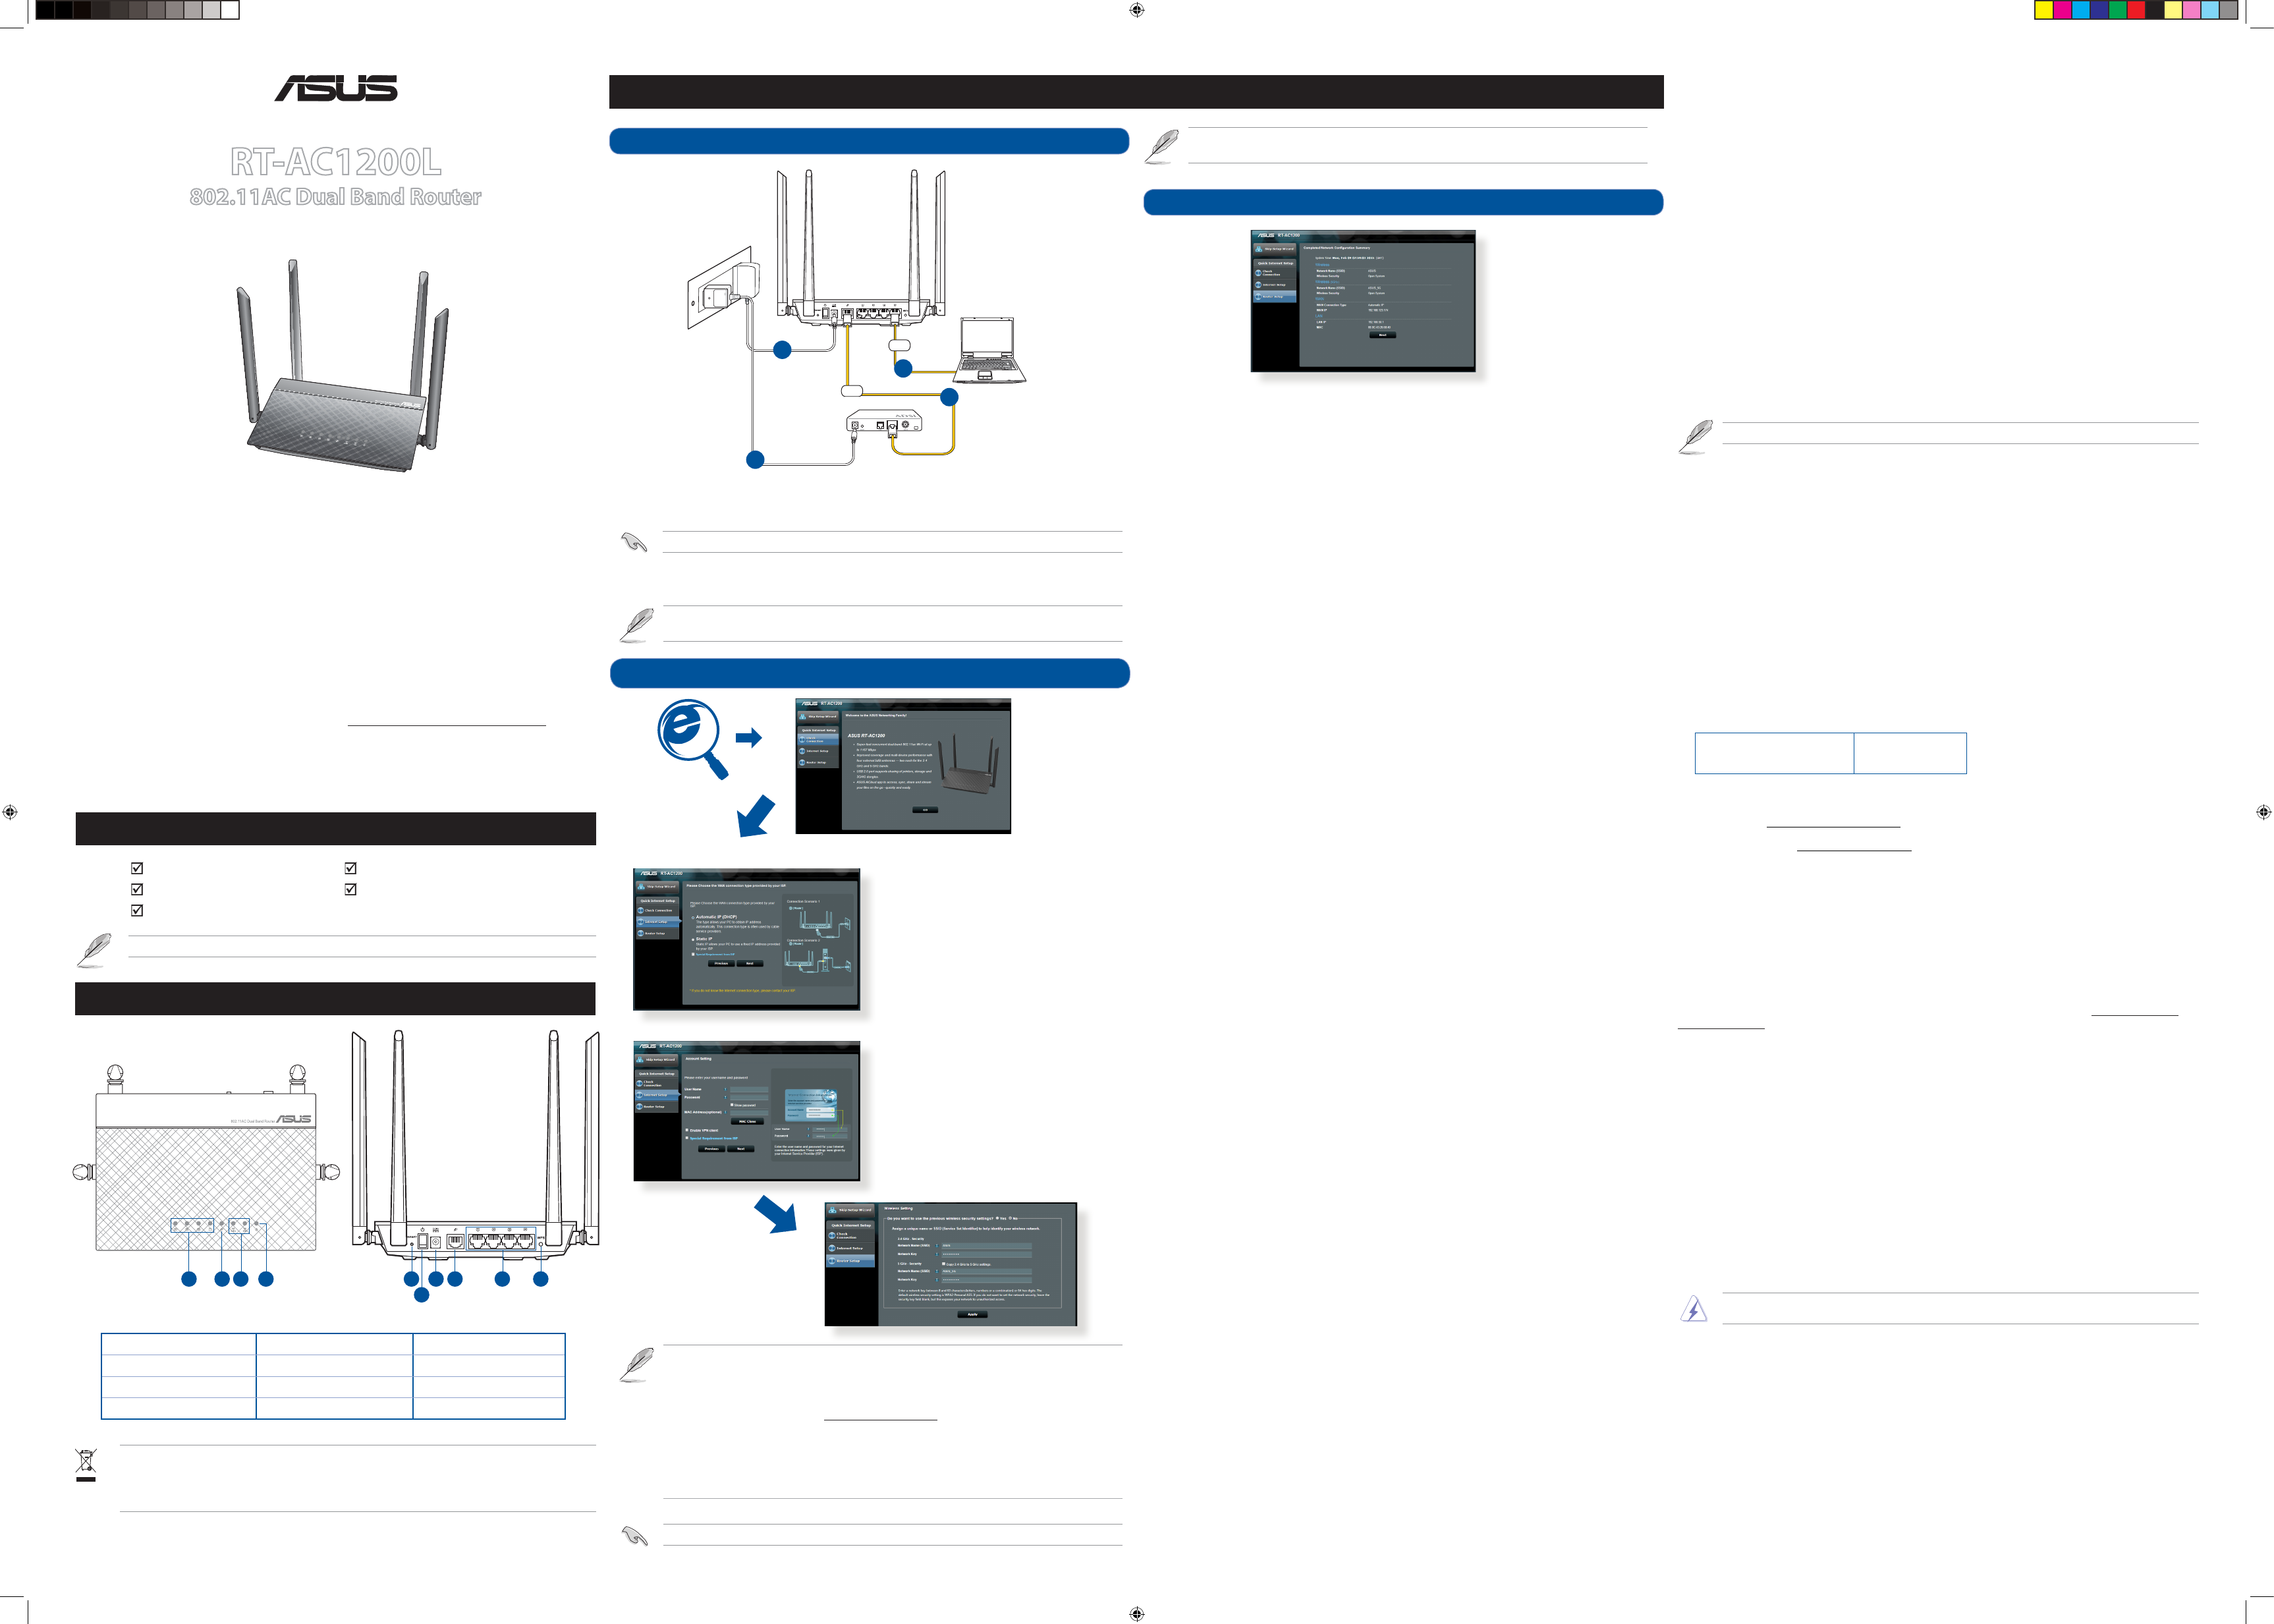
Package Contents
A quick look at your RT-AC1200L
NOTE
: If any of the items is damaged or missing, please contact your retailer.
1. Connect your devices.
Setting up a Home Network - Router Mode
2. Launch the web browser and follow the Quick Internet Setup (QIS) steps.
1
.
If the QIS web page does not appear after launching the web browser, disable the proxy settings on
the web browser.
2. If QIS does not launch automatically, follow these steps to manually launch QIS:
• On your web browser, key in
http://router.asus.com
. Use the default username
admin
and
password
admin
to log into the user interface.
• Click
Quick Internet Setup
on the left panel on the
Network Map
page.
• The auto-detection of your ISP connection type takes place when you configure the wireless router
for the first time or when your wireless router is reset to its default settings.
3. Setup complete.
Italiano
1. Collegare le periferiche.
2. Avviare il browser web e seguire la procedura QIS (Quick
Internet Setup).
3. La configurazione è stata completata.
Deutsch
1. Schließen Sie Ihre Geräte an.
2. Starten sie einen Web-Browser und folgen sie den Internet-
Schnelleinstellungsschritten (QIS).
3. Die Einrichtung ist fertig.
Hrvatski
1. Spojite uređaje.
2.
Pokrenite web preglednik i slijedite korake za Quick Internet
Setup (QIS) (Brzo podešavanje za internet).
3. Podešavanje je dovršeno.
Pусский
1. Подключите ваши устройства.
2. Запустите браузер и следуйте инструкциям быстрого
подключения к Интернету (QIS).
3. Установка завершена.
Česky
1. Připojte zařízení.
2. Spusťte webový prohlížeč a postupujte podle kroků
Rychlého nastavení Internetu (QIS).
3. Instalace je dokončena.
Български
1. Свържете устройствата.
2. Стартирайте уеб браузъра и следвайте стъпките в
Quick Internet Setup (QIS) (Бързи интернет настройки).
3. Конфигурирането приключи.
Nederlands
1. Sluit uw apparaten aan.
2. Start de webbrowser en volg de QIS-stappen (Quick Internet
Setup (snelle internetinstelling)).
3. De instelling is voltooid.
Dansk
1. Tilslut enhederne.
2. Start webbrowseren og følg quick-internetopsætning (QIS)
trinene.
3. Opsætning fuldført.
Suomi
1. Kytke laitteet.
2. Käynnistä verkkoselain ja noudata QIS-asennuksen vaiheita.
3. Asennus on valmis.
Eesti
1. Ühendage seadmed.
2. Käivitage veebibrauser ja järgige viisardi Quick Internet Setup
(Interneti-ühenduse kiirhäälestus (QIS)) samme.
3. Häälestus on lõpule viidud.
Magyar
1. Csatlakoztassa az eszközöket.
2. Indítsa el a webböngészőt, és kövesse a gyors internetes
beállítás (QIS) lépéseit.
3. A beállítás befejeződött.
Ελληνικά
1. Συνδέστε τις συσκευές σας.
2. Εκκινήστε το πρόγραμμα πλοήγησης στο διαδίκτυο και
ακολουθήστε τα βήματα της Γρήγορης Εγκατάστασης
Internet (QIS).
3. Η εγκατάσταση έχει ολοκληρωθεί.
Latviski
1. Savienojiet savas ierīces.
2. Palaidiet tīmekļa pārlūku un izpildiet Quick Internet Setup
(Ātrās interneta palaišanas) (QIS) soļus.
3. Iestatīšana ir pabeigta.
Bosanski
1. Spojite uređaje.
2. Pokrenite web pretraživač i pratite korake za Quick Internet
Setup (QIS) (Brzo podešavanje za internet).
3. Podešavanje je dovršeno.
Srpski
1. Povežite svoje uređaje.
2. Pokrenite internet pregledač i pratite korake Uputstva za
brzo podešavanje (QIS).
3. Podešavanje je obavljeno.
Lietuvių
1. Prijunkite prietaisus.
2. Paleisk ite interneto naršyk lę ir vadovauk itės greitos
internetinės sąrankos (QIS) nuorodomis.
3. Sąranka baigta.
Polski
1. Podłącz swoje urządzenia.
2. Uruchom przeglądarkę internetową i postępuj zgodnie z
poleceniami Szybkiej konfiguracji Internetu (QIS).
3. Konfiguracja została zakończona.
Norsk
1. Koble til enhetene dine.
2.
Start nettleseren og følg trinnene til Quick Internet Setup (QIS) (Rask
oppsett av Internett).
3. Oppsettet er ferdig.
Română
1. Conectaţi dispozitivele dvs.
2. Lansaţi browser-ul web şi urmaţi paşii de Conectare Rapidă
la Internet (QIS).
3. Conectarea este finalizată.
Português
1. Ligue os dispositivos.
2. Abra o browser da web e siga as instruções para configuração
rápida da Internet.
3. A configuração fica assim concluída.
Slovenščina
1. Priključite naprave.
2. Zaženite internetni brskalnik in sledite navodilom QIS (hitra
nastavitev interneta).
3. Namestitev je dokončana.
Slovensky
1. Pripojte svoje zariadenia.
2. Spustite internetový prehliadač a postupujte podľa krokov
Stručného návodu pre nastavenie internetu (QIS).
3. Nastavenie je dokončené.
Українська
1. Підключіть пристрої.
2.
Запустіть браузер і дотримуйтесь інструкцій для
Швидкого з’єднання з мережею Інтернет (QIS).
3.
Налаштування завершено.
Svenska
1. Anslut dina enheter.
2. Öppna webbläsaren och följ stegen i QIS (snabb Internet-
inställning).
3. Inställningen slutförd.
Español
1. Conecte sus dispositivos.
2. Abra su explorador web y siga los pasos indicados por la
función Quick Internet Setup rápida de Internet.
3. Ha finalizado la configuración.
Türkçe
1. Aygıtlarınızı bağlayın.
2. Web tarayıcınızı açın ve Quick Internet Setup (Hızlı İnternet
Kurulumu) (QIS) adımlarını izleyin.
3. Kurulum tamamlanır.
•
Bu Cihaz Türkiye analog şebekelerde çalışabilecek şekilde
tasarlanmıştır.
•
Cihazın ayrıntılı kurulum rehberi kutu içeriğinden çıkan CD
içerisindedir. Cihazın kullanıcı arayüzü Türkçe’dir.
•
Cihazın kullanılması planlanan ülkelerde herhangi bir
kısıtlaması yoktur. Ülkeler simgeler halinde kutu üzerinde
belirtilmiştir.
Français
1. Connectez les périphériques.
2. Lancez votre navigateur Web puis suivez les étapes du
gestionnaire de configuration rapide d’Internet en ligne
(QIS).
3. La configuration est terminée..
תירבע
.םירישכמה תא רבח .
1
ךרד הריהמ הנקתהל תוארוהה יפל לעפו ןפדפד חתפ .
2
.)QIS
) טנרטניאה
.המייתסה הנקתהה .
3
U15675 / First Edition V1 / July 2019
ASUS Recycling/Takeback Services
ASUS recycling and takeback programs come from our commitment to the highest standards for protecting our
environment. We believe in providing solutions for you to be able to responsibly recycle our products, batteries, other
components, as well as the packaging materials. Please go to
http://csr.asus.com/english/Takeback.htm
for the
detailed recycling information in different regions.
1) LAN 1~4 LED
5) Reset button
9) LAN 1~4 ports
2) WAN (Internet) LED
6) Power switch
10) WPS button
3) 2.4GHz / 5GHz LED
7) Power (DC-IN) port
4) Power LED
8) WAN (Internet) port
1.
Insert your wireless router’s AC adapter to the DC-IN port and plug it to a power outlet.
2.
Using the bundled network cable, connect your computer to your wireless router’s LAN port.
IMPORTANT
! Ensure that the WAN and LAN LEDs are blinking.
3.
Using another network cable, connect your modem to your wireless router’s WAN port.
4.
Insert your modem’s AC adapter to the the DC-IN port and plug it to a power outlet.
NOTE
: Before you proceed, disconnect the wires/cables from your existing modem setup. After two
minutes, reconnect the wires/cables.
for Automatic IP (DHCP)
for PPPoE, PPTP, and L2TP
IMPORTANT
! Obtain the necessary information from your ISP about the Internet connection type.
1
2
3
4
7
8
10
6
9
5
CAUTION!
DO NOT throw this product in municipal waste. This product has been designed to
enable proper reuse of parts and recycling. This symbol of the crossed out wheeled bin indicates
that the product (electrical and electronic equipment) should not be placed in municipal waste.
Check local regulations for disposal of electronic products.
RT-AC1200L Wireless Router
AC adapter
Network cable (RJ-45)
Quick Start Guide
Warranty card
Modem
3
1
4
WAN
2
LAN
RT-AC1200L
NOTE
: To set up up your router via wireless connection, please refer to the SSID and Password below.
You can also find SSID and Password at the bottom of your router.
Notices
REACH
Complying with the REACH (Registration, Evaluation, Authorisation, and Restriction of Chemicals) regulatory
framework, we published the chemical substances in our products at ASUS REACH website at http://csr.asus.com/
english/REACH.htm.
Federal Communications Commission Statement
This device complies with Part 15 of the FCC Rules. Operation is subject to the following two conditions:
• This device may not cause harmful interference.
• This device must accept any interference received, including interference that may cause undesired operation.
This equipment has been tested and found to comply with the limits for a class B digital device, pursuant to part 15 of
the FCC Rules. These limits are designed to provide reasonable protection against harmful interference in a residential
installation.
This equipment generates, uses and can radiate radio frequency energy and, if not installed and used in accordance
with the instructions, may cause harmful interference to radio communications. However, there is no guarantee that
interference will not occur in a particular installation. If this equipment does cause harmful interference to radio or
television reception, which can be determined by turning the equipment off and on, the user is encouraged to try to
correct the interference by one or more of the following measures:
• Reorient or relocate the receiving antenna.
• Increase the separation between the equipment and receiver.
• Connect the equipment into an outlet on a circuit different from that to which the receiver is connected.
• Consult the dealer or an experienced radio/TV technician for help.
WARNING!
Any changes or modifications not expressly approved by the party responsible for compliance could void the
user’s authority to operate the equipment.
Prohibition of Co-location
This device and its antenna(s) must not be co-located or operating in conjunction with any other antenna or
transmitter.
Safety Information
To maintain compliance with FCC’s RF exposure guidelines, this equipment should be installed and operated with
minimum distance 20cm between the radiator and your body. Use on the supplied antenna.
Frequently Asked Questions (FAQs)
The client cannot establish a wireless connection with the router.
Out of Range:
•
Put the router closer to the wireless client.
•
Try to change the channel settings.
Authentication:
•
Use wired connection to connect to the router.
•
Check the wireless security settings.
•
Press the Reset button at the rear panel for more than five seconds.
Cannot find the router:
•
Press the Reset button at the rear panel for more than five seconds.
•
Check the setting in the wireless adapter such as SSID and encryption settings.
You can find SSID and Password in the first page of this QSG or in the label at the bottom of the router.
Cannot access the Internet via wireless LAN adapter.
• Move the router closer to the wireless client.
• Check whether the wireless adapter is connected to the correct wireless router.
• Check whether the wireless channel in use conforms to the channels available in your country/area.
• Check the encryption settings.
• Check if the ADSL or Cable connection is correct.
• Retry using another Ethernet cable.
Network name or encryption keys are forgotten.
• Try setting up the wired connection and configuring the wireless encryption again.
• Press the Reset button of the wireless router for more than five seconds.
• Factory default settings:
User name / Password:
admin / admin
IP address:
router.asus.com
Where can I find more information about the wireless router?
• Online FAQ site:
http://support.asus.com/faq
• Technical Support s
ite:
http://support.asus.com
• Customer Hotline: Refer to the Support Hotline in this Quick Start Guide
U115675_RT-AC1200L_QSG.indd 1
2019/7/1 15:38:05


