
Пылесос BLACK-DECKER PV1200AV - инструкция пользователя по применению, эксплуатации и установке на русском языке. Мы надеемся, она поможет вам решить возникшие у вас вопросы при эксплуатации техники.
Если остались вопросы, задайте их в комментариях после инструкции.
"Загружаем инструкцию", означает, что нужно подождать пока файл загрузится и можно будет его читать онлайн. Некоторые инструкции очень большие и время их появления зависит от вашей скорости интернета.


9
ENGLISH
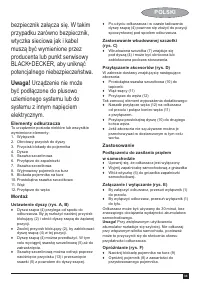
5. Crevice tool
6. Cigarette lighter connector
7. Brush
tool
8. Removable dust bowl
9. Dust bowl door release
10. Right angle brush tool
11. Hose
12. Hose connector
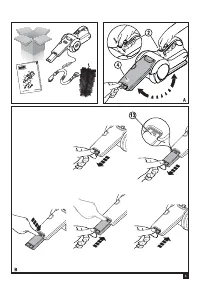
Assembly
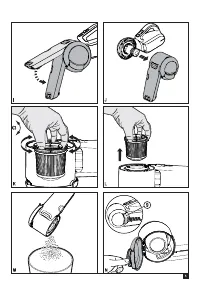
Adjusting the Nozzle ($ g. A, B)
The nozzle (4) is stored under the appliance.
To adjust for use, press the nozzle rotate
button (2) and rotate the nozzle to the required
position.
Release the nozzle rotate button (2) to lock the
nozzle (4) in position.
The dust nozzle (4) can be extended by pulling
the crevice tool (5) until it locks into position.
The crevice tool can be retracted by pressing
the button (13) and pushing the crevice tool (5)
back into the nozzle.
The nozzle (4) should be returned to the
storage position under the appliance after use.
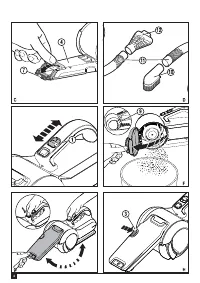
Using the built in brush ($ g. C)
The built in brush (7) is located beneath the
nozzle (4) and can be rotated and locked into
position for use.
Fitting the accessories ($ g D)
The appliance is supplied with the following
accessories:
A right angle brush tool (10 ) for upholster y
An extension hose (11)
A hose connector (12)
To t an accessor y, proceed as follows:
Fit the hose connector (11) onto the nose of
the appliance and attach one end of the hose
(12) to the connector.
Attach the right-angled brush tool (10) to the
other end of the hose.
When not in use, the accessories can be
stored in the storage bag (Provided).
Use
Connecting to the vehicle’s power supply
Make sure that the appliance is switched off.
Remove the cigarette lighter from it’s socket.
Plug the connector (6) into the cigarette lighter
socket.
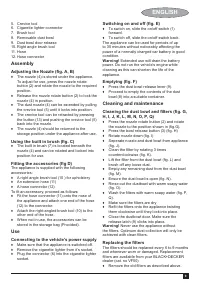
Switching on and off ($ g. E)
To switch on, slide the on/off switch (1)
for ward.
To switch off, slide the on/off switch back.
The appliance can be used for periods of up
to 30 minutes without noticeably affecting the
power of a normally charged car batter y in good
condition.
Warning!
Extended use will drain the batter y
power. Do not run the vehicle’s engine while
cleaning as this can shor ten the life of the
appliance.
Emptying ($ g. F)
Press the dust bowl release lever (9).
Proceed to empty the contents of the dust
bowl (8) into a suitable container.
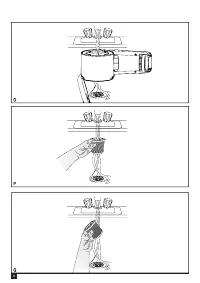
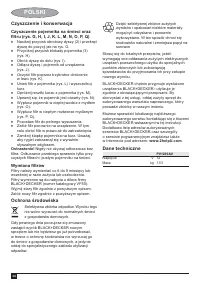
Cleaning and maintenance
Cleaning the dust bowl and $ lters ($ g. G,
H, I, J, K, L, M, N, O, P, Q)
Press the nozzle rotate button (2) and rotate
the nozzle to the position shown in ( g.G).
Press the bowl release button (3) ( g. H)
Rotate nozzle down ( g. I)
Seperate nozzle and dust bowl from appliance
( g. J).
Clean the lter by rotating 3 times
counterclockwise ( g. K).
Lift the lter from the dust bowl ( g. L) and
brush off any loose dust.
Empty any remaining dust from the dust bowl
( g. M).
Ensure the dust bowl is open ( g. N).
Rinse out the dustbowl with warm soapy water
( g. O).
Wash the lters with warm soapy water ( g. P,
Q).
Make sure the lters are dr y
Re t the lters onto the appliance twisting
them clockwise until they lock into place.
Close the dustbowl door. Make sure the
release latch (9) clicks into place.
Warning!
Never use the appliance without
the lters. Optimum dust collection will only be
achieved with clean lters.
Replacing the $ lters
The lters should be replaced ever y 6 to 9 months
and whenever worn or damaged. Replacement
lters are available from your BLACK+DECKER
dealer (cat. no VF50)
Remove the old lters as described above.


