Пылесос Saturn ST-VC7294 - инструкция пользователя по применению, эксплуатации и установке на русском языке. Мы надеемся, она поможет вам решить возникшие у вас вопросы при эксплуатации техники.
Если остались вопросы, задайте их в комментариях после инструкции.
"Загружаем инструкцию", означает, что нужно подождать пока файл загрузится и можно будет его читать онлайн. Некоторые инструкции очень большие и время их появления зависит от вашей скорости интернета.
6
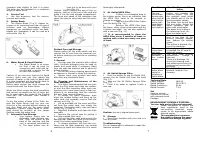
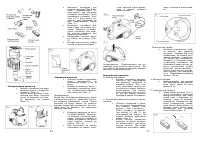
extended tube slightly to lock it in place.
The tube can be extended to a maximum
length of about 90cm.
4.
Crevice Tool
·
Use this accessory tool for corners,
crevices and cracks.
5.
Duster Brush
·
The Duster Brush (2 in 1) cleaner ac-
cessory is for removing dust from all type of
surfaces such as lampshades, electric
equipment, air conditioner grills, car dash-
boards etc. Separately it can be used as a
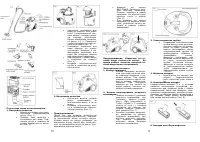
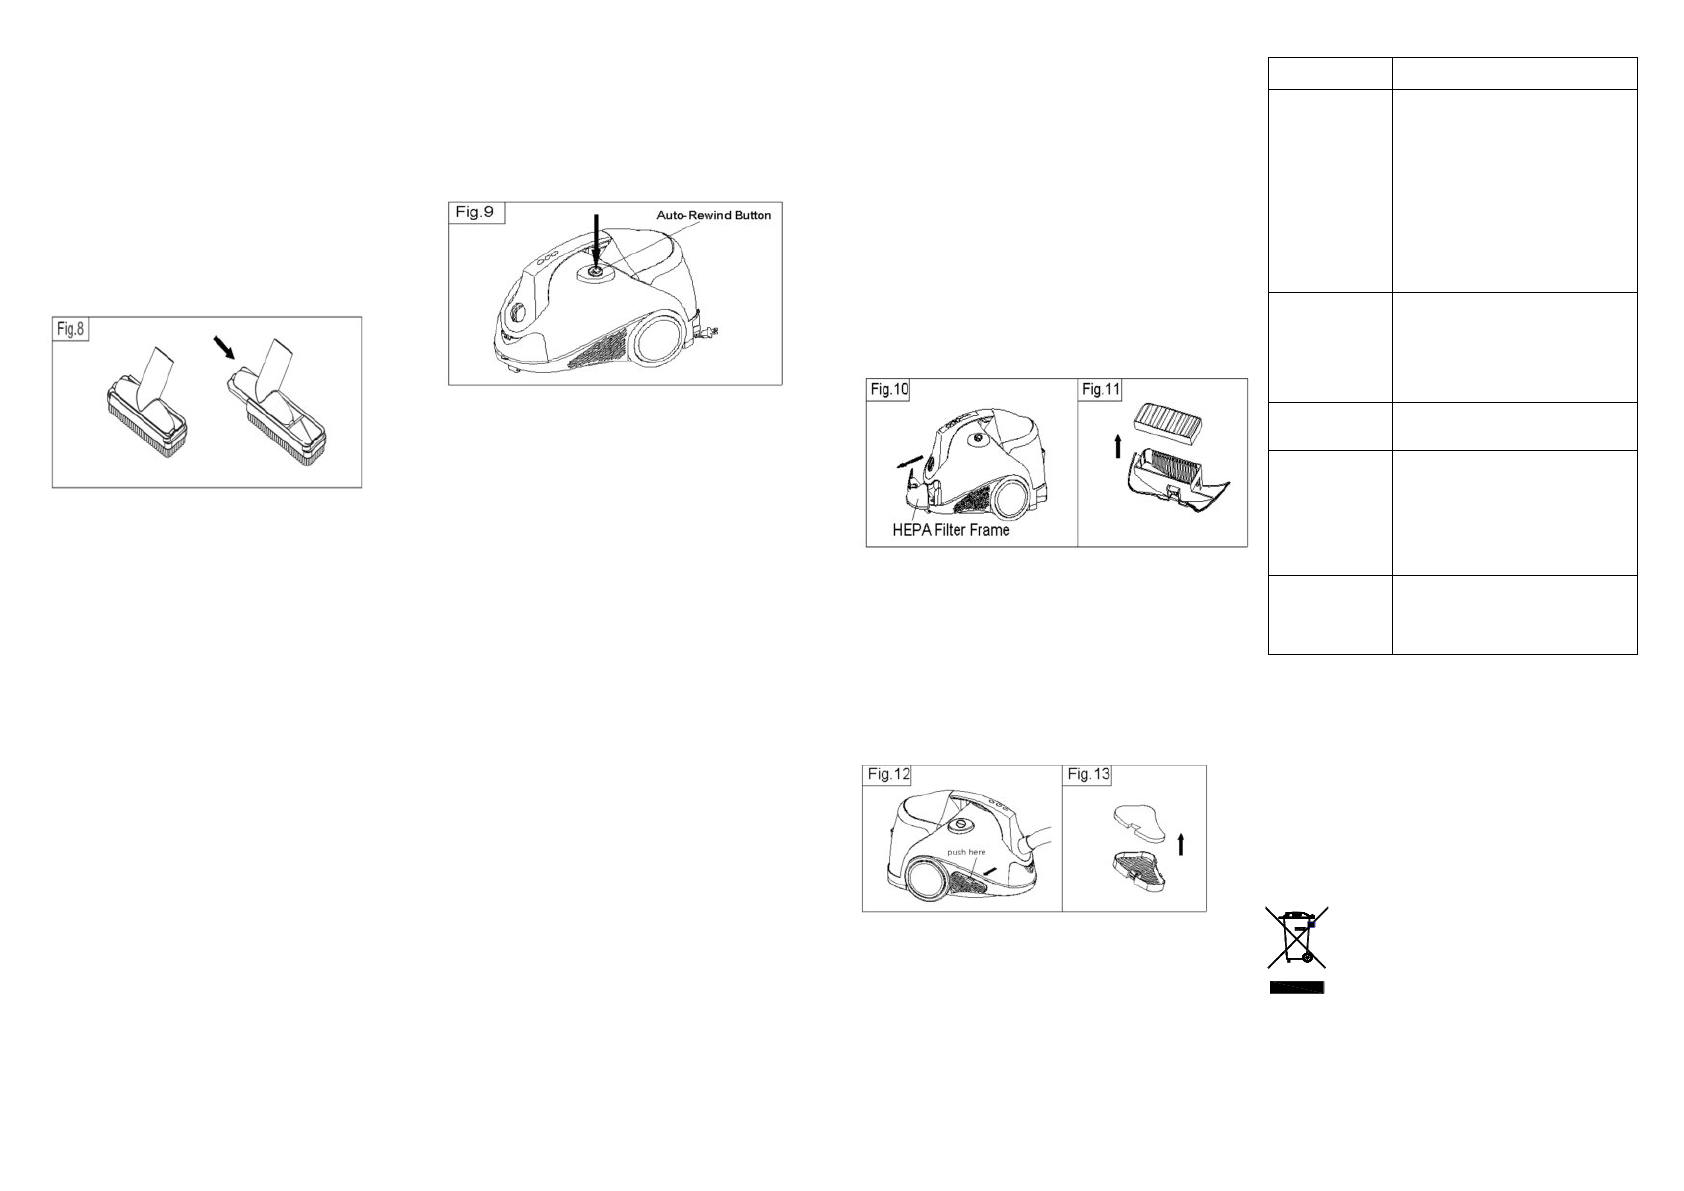
sofa nozzle (Fig. 8).
6.
Water Brush & Liquid Suction
·
The Water Brush is so versa-
tile that it can be used for
vacuuming both solid and liq-
uid dirt and is mainly for use
on hard floor surface.
Caution: If you use your machine for liquid
suction. Make sure you first reduce the
amount of water in the tank by about half.
It is also important not to allow the tank to
become too full of vacuumed liquid.
Before liquid suction you must change the
carpet brush with the Water Brush
When you finish, empty the tank completely
and vacuum up about one liter of clean wa-
ter to rinse clean the inside of the Flexible
Hose AND THE Telescopic Tube. Repeat if
necessary.
To dry the inside of Hose & the Tube, de-
tach the Water Brush, and run your ma-
chine for a few minutes without sucking up
any dirt. Wash and dry the water brush
separately. Vacuum soapy liquid or deter-
gent should be avoided, as this causes
frothing inside the water tank.
7.
Automatic Cord Storage
·
Your system comes with an
Automatic Code Storage sys-
tem. Push the button at the
back of the machine and the
cord is retracted automatical-
ly. The large button also al-
lows this to be done with your
foot (Fig. 9).
Caution: While nearing the end of the re-
traction, hold on to the end of the cord and
guide it into the cord storage compartment.
The force and speed of the retraction may
cause the plug to snap back and hit some-
thing.
Product Care and Storage
Always switch off the main switch and dis-
connect the AC cord from the electrical out-
let before cleaning you machine or replacing
any part.
1. General
·
You may wipe the machine with a damp
cloth. Synthetic detergent may be used on
plastic and metal parts if necessary. Make
sure you wipe the machine and its parts dry
before storage.
·
Do not use strong cleaning agents such
as benzene or thinner to clean the machine.
·
Always store your product and parts
after they are completely dried.
2.
Cleaning and Maintenance of the
filter assembly.
·
It is highly recommended that you pour
away the dirty water and clean the contain-
er and the filter assembly after each use.
Keeping your home clean using a clean ap-
pliance is an advantage that the machine
has over ‘bag’-vacuum cleaner.
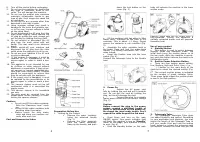
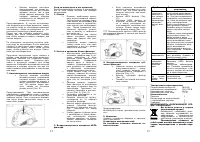
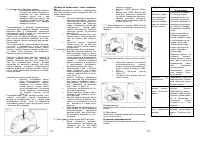
·
To empty the water container, push
down the release button and hang up the
water tank unit upwards, remove from the
vacuum unit (Fig. 1).
·
Lift up and take out the cover and filter
set from the water tank, and empty the
container. Thoroughly clean, rinse and leave
to dry (Fig. 2) (Fig. 3).
·
Regularly dismantle and clean the filter
assembly.
·
Remove the curved tube by pulling it
from the meshed filter cage.
·
Pull out the filter cage and remove the
sponge filter. Wash and rinse all the compo-
nents. Dry before assembling them.
·
To remove stubborn dirt from the con-
tainer and the filter assembly, use normal
washing-up liquid but make sure it is rinsed
7
thoroughly afterwards.
3.
Air Outlet HEPA Filter
·
If there is a noticeable drop in
the suction power, this is an indication that
the HEPA filter need to be cleaned or
change a new one.
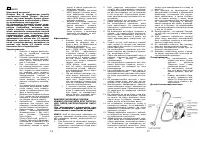
·
Take out the HEPA Filter Frame
from the body (Fig. 10).
·
Remove the HEPA Filter from
the frame, clean, rinse by tap water and dry
it before use again. You can also replace it
with a new one (Fig. 11).
***
It is recommended to clean the
HEPA filter every 3 months at least, or
replace with a new one every one year
at least.
4.
Air Outlet Sponge Filter
·
Push the button on the Air Outlet Grill,
remove the Air Outlet Grill from the body
(Fig. 12).
·
Take out the Air Outlet Sponge Filter
(Fig. 13).
·
Clean it by water or replace it with a
new one.
Caution:
Use only original spare part.
5.
Storage
·
Store your machine with care and in a
cool dry place.
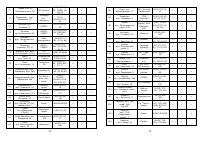
Troubleshooting
Do not disassemble or attempt to repair the
machine yourself.
Conditions
Possible Cause and So-
lution
The ma-
chine stops
during oper-
ation and all
four suction
power indi-
cator lights
start blink-
ing together.
Wait for about 30 seconds
before you operate the
machine again. This lets
the machine reset whilst
you identify one of the fol-
lowing possible causes.
The water has turned very
dirt and milky. Empty the
water container and re-
place with clean water.
The water level is above
the maximum level. Re-
duce the water level.
The selected suction power
level is too high for the
current cleaning applica-
tion. Reduce the suction
power.
The airflow is blocked. Re-
move the blockage.
The ma-
chine does
not start.
AC supply is not properly
connected the AC cord to
electrical supply.
Noticeable
decrease in
the suction
power.
The HEPA filter requires
replacement. Change a
new one.
There is a blockage. Re-
move the cleaning tools
and attachments from the
machine and remove the
blockage.
Leakage of
water when
using for
cleaning of
liquid waste.
The Switch Float is
blocked. Unblock it by
cleaning.
Technical Data
Power Supply:
1600 W
Rated Voltage:
220-230 V
Rated Frequency:
50 Hz
Rated Current:
7.2 A
Set
Vacuum cleaner
1
Instruction manual
with warranty book
1
Package
1
ENVIRONMENT FRIENDLY DISPOSAL
You can help protect the environment!
Please remember to respect the
local regulations: hand in the
non-working
electrical
equip-
ments to an appropriate waste
disposal center.
The manufacturer reserves
the right to change the speci-
fication and design of goods

