Пылесос Karcher К 65 - инструкция пользователя по применению, эксплуатации и установке на русском языке. Мы надеемся, она поможет вам решить возникшие у вас вопросы при эксплуатации техники.
Если остались вопросы, задайте их в комментариях после инструкции.
"Загружаем инструкцию", означает, что нужно подождать пока файл загрузится и можно будет его читать онлайн. Некоторые инструкции очень большие и время их появления зависит от вашей скорости интернета.

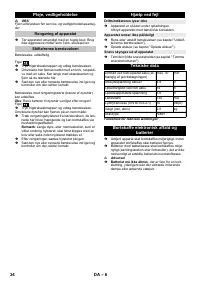


– 5
When unpacking the product, make sure that no acces-
sories are missing and that none of the package con-
tents have been damaged. If you detect any transport
damages please contact your dealer.
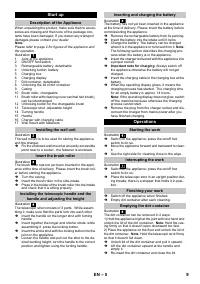
Note:
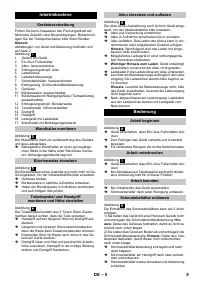
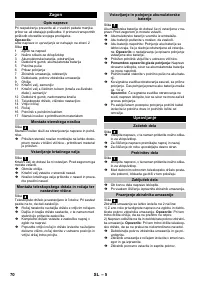
Please refer to page 2 for figures of the appliance and
the operation.
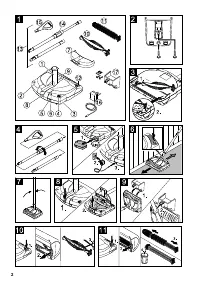
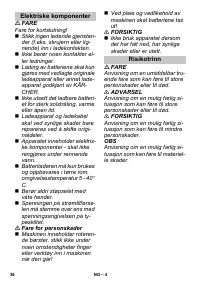
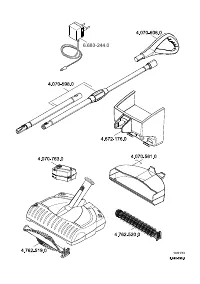
Illustration
1
Joint at the appliance
2
ON/OFF foot switch
3
Rechargeable battery, detachable
4
Unlocking button, battery
5
Charging box
6
Charging display
7
Dirt container, detachable
8
Unlocking the lid of dirt container
9
Casing
10 Brush roller, changeable
11 Brush roller with cleaning cover (animal hair brush),
can be interchanged
12 Unlocking button for the changeable brush
13 Telescopic strut, adjustable height
14 Turning handle
15 Handle
16 Charger with charging cable
17 Wall mount with fasteners
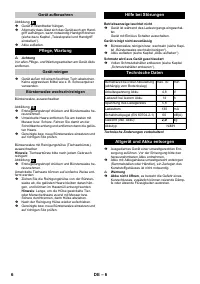
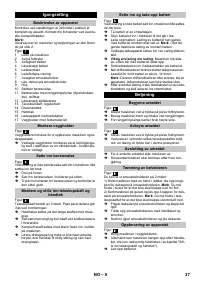
Illustration
The wall mount is to be used for storing the appliance
and the charger.
Fix the enclosed wall mount at an easily accessible
point near to a socket - the fastener is enclosed.
Illustration
The brush roller has not yet been inserted in the appli-
ance at the time of delivery. Please insert the brush roll-
er before starting the appliance.
Turn the casing.
Insert the brush roller in the side-intake.
Press in the holder of the brush roller into the intake
and check that it is sitting properly.
Illustration
The telescopic strut consists of 3 parts. While assem-
bling it, make sure that the parts lock into each other.
Insert the handle on the longer strut with turning
handle.
Insert together the longer and shorter struts; while
assembling it, press the locking button.
Insert the entire strut with the locking button into the
joint on the appliance.
Loosen the handle and pull out the strut to the de-
sired working height; turn the handle to the correct
position and tighten using the turning handle.
Illustration
The battery has not yet been inserted in the appliance
at the time of delivery. Please insert the battery before
commissioning the appliance.
Remove the rechargeable battery from its packing.
Insert the battery into the intake until it locks.
Charge the battery: The battery can be charged
when it is in the appliance or removed from it.
Note
:
The following section describes the charging pro-
cess when the battery is in the appliance.
Insert the charger delivered with the appliance into
a proper socket.
Important note for charging
: Always switch off
the appliance otherwise the battery will not get
charged.
Insert the charging cable in the charging box at the
battery.
When the operating display glows, it means the
charging process has started. The charging time
for an empty battery is approx. 14 hours.
Note:
If the operating display does not glow, switch
off the machine because otherwise the charging
process cannot start.
Remove the plug from the charger socket and dis-
connect the charger from mains power after you
have finished charging.
Illustration
Switch on the appliance; press the on/off foot
switch to do so.
Move the appliance forward and backward to clean
it.
Use the right side for cleaning close to the edge.
Illustration
Switch off the appliance; press the on/off foot
switch to do so.
Place the telescopic strut in an upright position dur-
ing breaks; there is a stopper that holds it in posi-
tion.
Switch off the appliance when finished.
Empty dirt container after each cleaning.
Illustration
The dirt container can be removed in 2 ways:
1) Hold the appliance high at the joint with one hand and
unlock the lid of the dirt container.
Note
: Hold the cas-
ing firmly so that it doesn't open downward too fast.
2) Place the appliance on the floor and unlock the lid of
the dirt container.
Note
: Hold the telescopic strut firmly
so that it doesn't fall down.
Unlock lid of the dirt container and pull it upward.
Lift the dirt container upward at the handle and
empty it.
Re-insert the dirt container and close the lid.
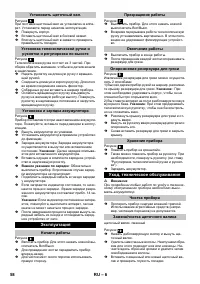
Start up
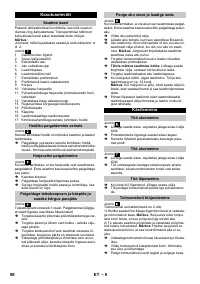
Description of the Appliance
Installing the wall unit
Insert the brush roller
Installing the telescopic handle and the
handle and adjusting the height
Inserting and charging the battery
Operations
Starting the work
Interrupting the work
Finishing your work
Emptying the dirt container
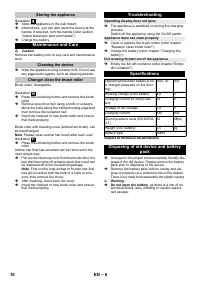
9
EN
Характеристики

Остались вопросы?Не нашли свой ответ в руководстве или возникли другие проблемы? Задайте свой вопрос в форме ниже с подробным описанием вашей ситуации, чтобы другие люди и специалисты смогли дать на него ответ. Если вы знаете как решить проблему другого человека, пожалуйста, подскажите ему :)


