Пылесос Clatronic AKS 825 - инструкция пользователя по применению, эксплуатации и установке на русском языке. Мы надеемся, она поможет вам решить возникшие у вас вопросы при эксплуатации техники.
Если остались вопросы, задайте их в комментариях после инструкции.
"Загружаем инструкцию", означает, что нужно подождать пока файл загрузится и можно будет его читать онлайн. Некоторые инструкции очень большие и время их появления зависит от вашей скорости интернета.
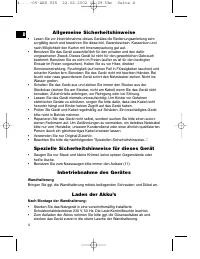
Charging the Batteries
After mounting the wall holder:
•
Insert the AC adapter in a duly installed 230V/50Hz protective contact socket.
The charging LED lights up.
•
If you want to charge the batteries, first remove the nozzle attachments and
then insert the device first into the upper bracket of the wall mounting.
•
Then press the handle lightly until the device locks in place.
•
The charging time is approximately 16 hours the first time, and then approxima-
tely 8 hours. Once the charging is over, unplug the AC adapter.
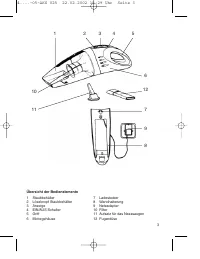
Using the Device
Unplug the device and fit on the desired nozzle. In order to start vacuuming you
have to press the ON/OFF switch (4) and keep it pressed. Once you have finished
or when the batteries are down, connect the vacuum to the charger as described in
„Charging the Batteries“. Make sure that the plug is inserted.
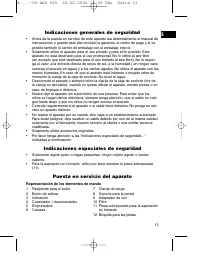
Nozzles
Crevice nozzle:
ideal for vacuuming corners and crevices, etc.
Use for wet vacuuming:
Please ensure that you always use the attachment
when vacuuming up liquids (insert the extension of
the attachment into the device until the nozzle is
flush).
Cleaning
•
Always unplug the device before cleaning!
•
Clean the casing with a dry cloth.
•
The dust container can be released with the release knob (2) and then pulled
off from the top downwards.
•
Remove the dust filter (10) by turning the insert anticlockwise (OPEN) and
tapping it out. After emptying the
container several times, it can also be cleaned in water. Dry well once you have
finished.
•
Please reassemble the device in the reverse order.
This device has been tested according to all relevant current CE guidelines,
such as electromagnetic compatibility and low voltage directives, and has been
constructed in accordance with the latest safety regulations.
Subject to technical changes without prior notice!
23
GB
4....-05-AKS 825 22.02.2002 15:29 Uhr Seite 23


