
Пылесос Ariete 2765/1 Red - инструкция пользователя по применению, эксплуатации и установке на русском языке. Мы надеемся, она поможет вам решить возникшие у вас вопросы при эксплуатации техники.
Если остались вопросы, задайте их в комментариях после инструкции.
"Загружаем инструкцию", означает, что нужно подождать пока файл загрузится и можно будет его читать онлайн. Некоторые инструкции очень большие и время их появления зависит от вашей скорости интернета.


E N
- 12 -
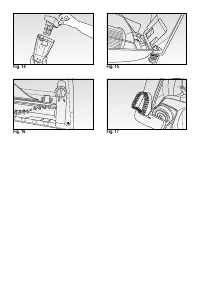
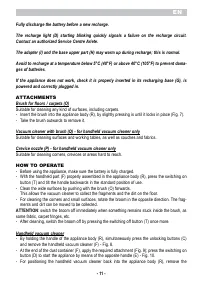
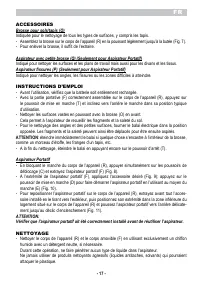
installed attachment first, by removing it outward, position the end in the lower side of the apposite
housing in the appliance body (R) and slightly push backward the handheld vacuum cleaner until
it clicks into place (Fig. 11).
WARNING:
Make sure the handheld vacuum cleaner is properly installed before proceeding with a new
use.
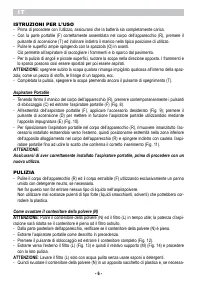
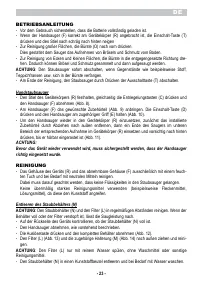
CLEANING
- Clean the appliance body (R) and the removable body (F) by using only a damp cloth with mild
detergent, if necessary.
Proceed with care to prevent any kind of liquid from getting into the appliance.
Never use strong cleaning agents (stain removers, solvents) that may corrode the plastic.
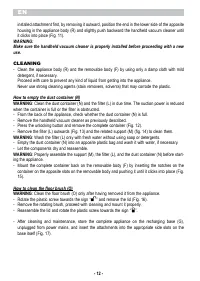
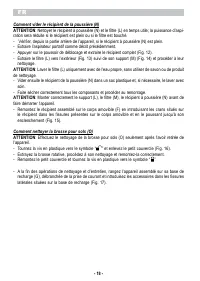
How to empty the dust container (N)
WARNING: Clean the dust container (N) and the filter (L) in due time. The suction power is reduced
when the container is full or the filter is obstructed.
- From the back of the appliance, check whether the dust container (N) is full.
- Remove the handheld vacuum cleaner as previously described.
- Press the unlocking button and remove the complete container (Fig. 12).
- Remove the filter (L) outwards (Fig. 13) and the related support (M) (fig. 14) to clean them.
WARNING: Wash the filter (L) only with fresh water without using soap or detergents.
- Empty the dust container (N) into an apposite plastic bag and wash it with water, if necessary.
- Let the components dry and reassemble.
WARNING: Properly assemble the support (M), the filter (L), and the dust container (N) before start-
ing the appliance.
- Mount the complete container back on the removable body (F) by inserting the notches on the
container on the apposite slots on the removable body and pushing it until it clicks into place (Fig.
15).
How to clean the floor brush (O)
WARNING: Clean the floor brush (O) only after having removed it from the appliance.
- Rotate the plastic screw towards the sign “ ” and remove the lid (Fig. 16).
- Remove the rotating brush, proceed with cleaning and mount it properly.
- Reassemble the lid and rotate the plastic screw towards the sign “ ”.
- After cleaning and maintenance, store the complete appliance on the recharging base (G),
unplugged from power mains, and insert the attachments into the appropriate side slots on the
base itself (Fig. 17).
Содержание
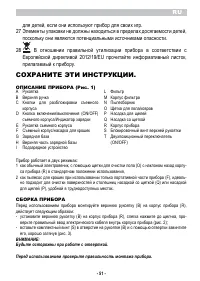
- 53 для детей, если они используют прибор для своих игр.; СОХРАНИТЕ ЭТИ ИНСТРУКЦИИ.; СБОРКА ПРИБОРА; Будьте осторожны при работе с отверткой.
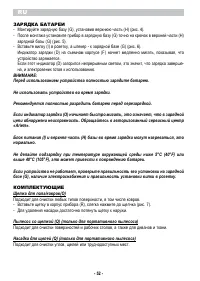
- 54 ЗАРЯДКА БАТАРЕИ; устройство заряжается.; КОМПЛЕКТУЮЩИЕ; Подходит для очистки любых типов поверхности, в том числе ковров.
- 55 ИНСТРУКЦИЯ ПО ПРИМЕНЕНИЮ; - Перед использованием убедитесь, что батарея полностью заряжена.; Портативный пылесос; УХОД; снижается, если контейнер заполнен или фильтр засорен.; ВНИМаНИЕ
- 57 Гарантийный срок 2 года. Срок службы изделия 2 года.


