
Подогреватели Bertazzoni WD60N - инструкция пользователя по применению, эксплуатации и установке на русском языке. Мы надеемся, она поможет вам решить возникшие у вас вопросы при эксплуатации техники.
Если остались вопросы, задайте их в комментариях после инструкции.
"Загружаем инструкцию", означает, что нужно подождать пока файл загрузится и можно будет его читать онлайн. Некоторые инструкции очень большие и время их появления зависит от вашей скорости интернета.


EN
Installation instructions
Before installation
Check that the input voltage
indicated on the
characteristics plate is the same as the voltage of
the power outlet you are going to use.
Open the drawer and
take out all the
accessories
and remove the packing material.
Attention!
The front surface of the crockery
heater may be wrapped in a
protective film
.
Before using the warming drawer for the first
time, remove this film carefully.
Make sure that the warming drawer is not
damaged in any way.
Check that the drawer
opens and closes correctly. If you find any
damage, contact the Technical Assistance
Service.
Attention: the power socket should be easily
accessible after the warming drawer has been
installed.
The warming drawer should only be built-in in
combination with those appliances indicated by
the manufacturer.
If it is fitted in combination
with other appliances, the guarantee is no
longer valid since it is impossible to
guarantee that the warming drawer will work
correctly.
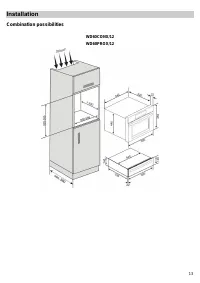
Installation
To build-in the warming drawer in combination
with another appliance there must be a fixed,
interim shelf in the housing unit to support the
weight of both appliances.
The appliance to be combined with the warming
drawer will be placed directly on the latter without
any need to have a separating shelf.
To build-in the appliance which is combined with
the warming drawer, follow the instructions set
out in the respective instructions and fitting
booklet.
The relevant installation dimensions are indicated
in mm
in the diagrams shown at the end of
this booklet
. Proceed as follows:
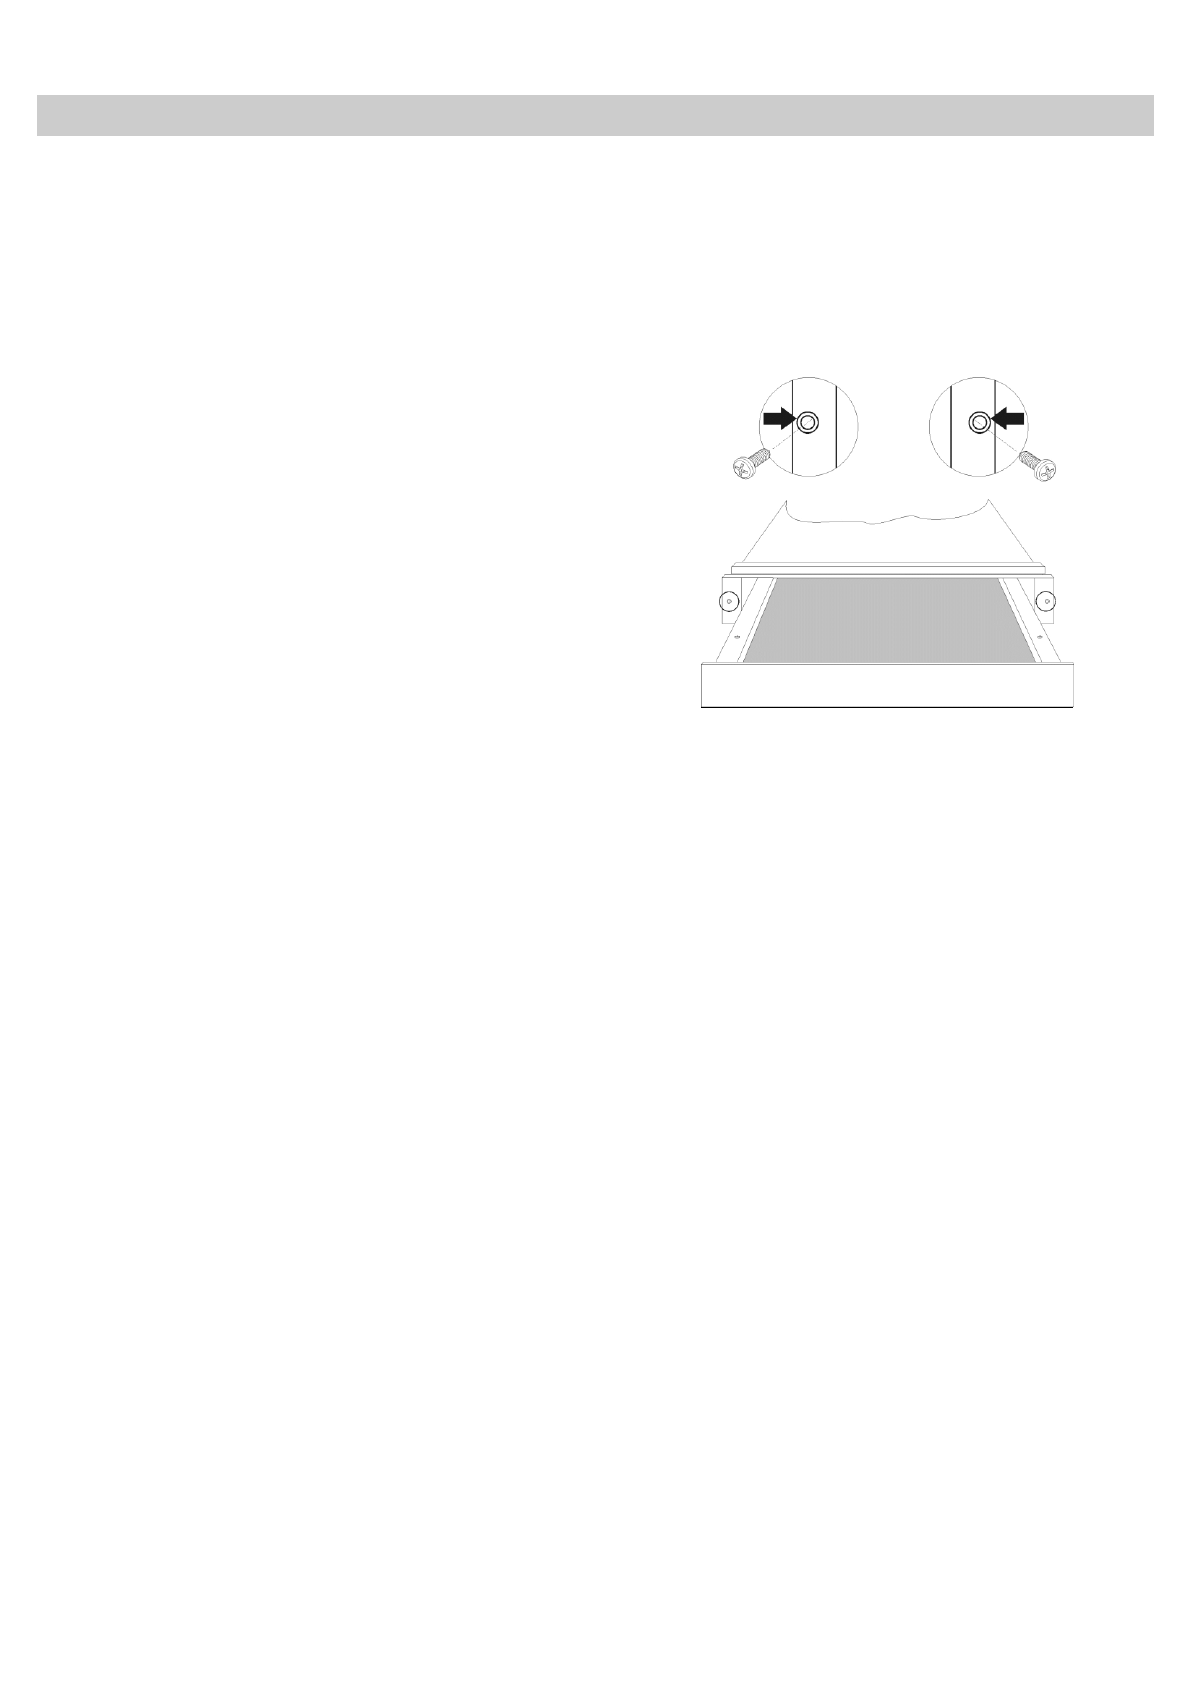
1. Place the warming drawer on the shelf and
slide it towards the interior of the niche in
such a way that it is centred and completely
lined up with the front of the unit.
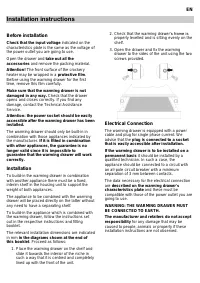
2. Check that the warming drawer
’s frame is
properly levelled and is sitting evenly on the
shelf.
3. Open the drawer and fix the warming
drawer to the sides of the unit using the two
screws provided.
Electrical Connection
The warming drawer is equipped with a power
cable and plug for single phase current. We
advise that the
plug is connected to a socket
that is easily accessible after installation.
If the warming drawer is to be installed on a
permanent basis
it should be installed by a
qualified technician. In such a case, the
appliance should be connected to a circuit with
an all-pole circuit breaker with a minimum
separation of 3 mm between contacts.
The data necessary for the electrical connection
are
described on the warming drawer
’s
characteristics plate
and these must be
compatible with those of the power outlet you are
going to use.
WARNING: THE WARMING DRAWER MUST
BE CONNECTED TO EARTH.
The manufacturer and retailers do not accept
responsibility
for any damage that may be
caused to people, animals or property if these
installation instructions are not observed.
Характеристики

Остались вопросы?Не нашли свой ответ в руководстве или возникли другие проблемы? Задайте свой вопрос в форме ниже с подробным описанием вашей ситуации, чтобы другие люди и специалисты смогли дать на него ответ. Если вы знаете как решить проблему другого человека, пожалуйста, подскажите ему :)


